Enter the code USA15 at checkout to apply your discount. Discount will be applied at checkout when the code is entered & applies to all parts. Cannot be combined with any other coupon or special offer & cannot be applied to a previously placed order. Not valid toward tax or shipping & handling. Discount has no cash value. Discount expires on July 4 at 11:59pm EST.
GE Washer Parts
- Search your model number to find:
- Genuine OEM parts guaranteed to fit
- Free manuals and guides
- Repair instructions and videos

Popular GE Washer Parts
- Spinning Issues
- Spins slowly
- Will not agitate
- See more...
- Shaking and Moving
- Spinning Issues
- See more...
- Shaking and Moving
- Spinning Issues
- See more...
- Noisy and Marks Left on Clothes
- Spinning Issues
- Will not agitate
- See more...
Remove belt gaurd.
Remove belt.
Remove pulley.
Remove clutch and shifter.
Install in reverse order Read more...
- Noisy and Marks Left on Clothes
- Spinning Issues
- Will not agitate
- See more...
Remove belt gaurd.
Remove belt.
Remove pulley.
Remove clutch and shifter.
Install in reverse order Read more...
- Draining Issues
- Leaking
- Will not drain
- See more...
Remove rear drain hose and drained rest of water into a bucket
Remove small rear panel (bottom left hand corner) where the drain hose connects
Tipped washer up about 45 degrees to get underneath it - Supported it with a few paint cans
Remove internal drain hose/clamps from pump - w/ pliers
Remove belt cover (gray plastic) with socket - 3 bolts
Remove wire assembly plug from socket
Remove old drain pump with socket - 3 bolts
Install new drain pump - 3 bolts - plug wire assembly into socket
Reinstall belt cover - 3 bolts
Reinstall hose to drain pump (note panel will be inside washer)
Feed drain hose panel through hole and reinstall - 1 nut
Re attached drain hose to exterior drain plug
You are done ! Read more...
- Burning smell
- Leaking
- Shaking and Moving
- See more...
- Lid or door won’t close
- Locking Issues
- Will not agitate
- See more...
- Noisy and Marks Left on Clothes
- Spinning Issues
- Will not agitate
- See more...
- Spinning Issues
- Will not agitate
- See more...
Unplugged and unsnapped speed sensor and replaced with new one . Washer spinning like it should. Problem solved Read more...
General Electric Washer Appliance Types
Related General Electric Washer Parts
- General Electric Washer Drums and Tubs
- General Electric Washer Knobs
- General Electric Washer Hardware
- General Electric Washer Switches
- General Electric Washer Seals and Gaskets
- General Electric Washer Latchs
- General Electric Washer Pumps
- General Electric Washer Springs and Shock Absorbers
- General Electric Washer Belts
- General Electric Washer Hoses and Tubes
- General Electric Washer Agitators
- General Electric Washer Circuit Boards and Touch Pads
- General Electric Washer Valves
- General Electric Washer Motors
- General Electric Washer Caps and Lids
- General Electric Washer Timers
- General Electric Washer Dispensers
- General Electric Washer Hinges
- General Electric Washer Panels
- General Electric Washer Power Cords
Popular General Electric Washer Models
Below are the most popular General Electric Washer models we have. Enter your model number in the search box to find your model.
- GTWN4250D1WS
- WCVH6800J1WW
- GTWN4250D0WS
- WBVH6240F0WW
- WCVH6260F0WW
- GTWN2800D1WW
- WHRE5550K2WW
- GTWN3000M1WS
- WPRE6150K2WT
- GTWN3000M0WS
- WSXH208A1WW
- WBVH5300K0WW
- WHDVH626F0WW
- GTWN2800D0WW
- WJRR4170G1WW
- GLWN2800D1WS
- GTWP1800D0WW
- GFWH2400L0WW
- WBVH5200J3WW
- WJRR4170G2WW

Genuine OEM GE Washer Parts
GE dryers are known for their high power and cleaning efficiency. If you own a GE washer, you are likely familiar with features such as the UltraFresh Vent System, Odor Block, and SmartDispense. To keep enjoying these features, you will likely need to perform regular maintenance on your washer. We are here to help!
PartSelect has been a leading online retailer for over 25 years, and we are proud to carry genuine OEM parts for various GE models such as the GE Adora, GE Allura, and GE Profile. Each OEM part is designed to the same high quality as the original. And for your peace of mind, we offer a?365-day?return period and a 1-year warranty on all our electronic parts. Browse our wide selection of GE control boards, drain pumps, door switches, filters, and more.

Common GE Washing Machine Problems and How to Fix Them
Troubleshooting your GE washing machine may look tough, but don’t worry. We provide expert repair guides to help you find and address any issues you may have. You can trust our ability to make troubleshooting your washing machine easy and successful.
Noisy GE Washing Machine – Your GE washing machine has a variety of parts that experience motion during use. It is not uncommon for these parts like pumps and drive belts to become worn over time and start to create unpleasant noises like knocking or grinding. Determining the cause of the noise in your washing machine is as easy as isolating the area where the noise is coming from.
Leaking GE Washing Machine – It may be alarming to see water leaks coming from your GE washing machine. With the motion created by use, it is not uncommon to see a part like a pump or hose develop a bad seal or become damaged leading to a water leak. You can address the problem by finding the source of water to ensure all connections are in place and no damage is present, making sure your machine can run without any water leaks.
GE Washing Machine Will Not Start – Dealing with a GE washing machine that won’t start can be annoying. This is frequently related to damaged drive motors or start switches, but it could also be due to a broken door or lid strike. After making sure the problem is not simply caused by a loose power cord, which can happen as the machine moves during use, you should first inspect the lid or door strike for any damages which would not allow this to latch, then move on to the electrical parts such as drive motor or start switch. By addressing these areas you can fix the problems, allowing your appliance to start once again.
GE Washing Machine Will Not Spin – It can be unsettling when your GE washing machine’s spinning function is not working as expected. With the number of moving parts in your machine, it’s not surprising to face issues like a damaged door lock or a worn-out direct drive motor coupling. By inspecting these areas, you can pinpoint and repair the issue, ensuring your washing machine spins properly.
GE Washing Machine Does Not Drain – If your GE washing machine is failing to drain, it could be as simple as checking the parts essential for proper drainage. This issue is often caused by obstructions within a connection hose or a blockage within the pump itself. By looking at these key areas, you can identify and resolve the problem, allowing your washing machine to drain after each cycle.
Related General Electric Washer Articles

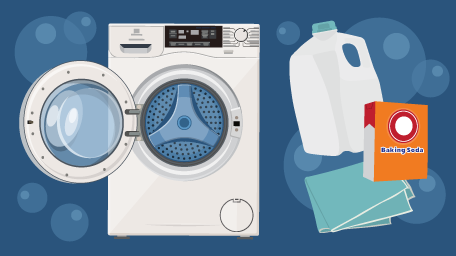
How to properly clean your top load washer to eliminate odor and keep it fr...

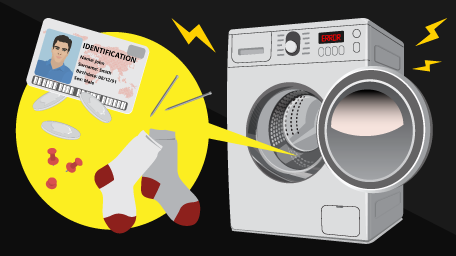
Find your mysteriously missing coins, socks and bank cards by taking a quic...

Spring is here, and we are cleaning up all our appliances! A washer is supp...


