Microwave Oven Combo Parts

Popular Microwave Oven Combo Parts
Your Price
$8.87
   In Stock
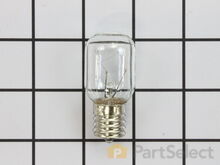
Microwave Oven Combo Light Bulb - 40W
★★★★★
★★★★★
157 Reviews
PartSelect Number PS2376034
Manufacturer Part Number 8206232A
This 40w light bulb is a replacement bulb constructed of glass and metal. It is an easy-to-install electrical part which produces 40w of light. If the bulb won't light up then it may be broken and should be replaced. The bulb attaches directly to an appropriate light socket and has a small screw-in base. To access the exterior light bulb, you will need to remove the panel on the bottom of the microwave using a Phillips screwdriver. If your exterior light bulb has not been changed before, it is probably held in place with some silicone. You will need to cut away this silicone to remove the old bulb. If you cannot access the silicone with a utility knife, it can be removed using dental floss. Once the silicone is removed, simply unscrew the old bulb, and replace it with the new one. Be sure to disconnect the power to the microwave before you begin this repair. This light bulb measures about 1 1/8 inches. We do not recommend using a higher-wattage bulb for this appliance, and can only recommend this specific bulb. If fixing the bulb does not solve your microwave light issue, it's possibly a problem with the socket, which means the socket and/or board will need to be replaced. This can be a more dangerous repair, so consult your user manual or a technician before attempting.
Installation Instructions
Chris from Cedar Hill, TX
Burned out light under microwave and Filters needed changing
I just removed the multiple screws which held the hood cover on. I then attempted to remove the light bulbs from the socket. This proved impossible because the bulbs were so fragile from the heat and grease build up. To make this task much easier and probably safer, just replace the bulb housing and light bulb. The bulb housing unplugs very easily. Just replace it then screw your new bulb in. P.S. Be sure to unplug appliance before you start.

The filters are very easy to replace. No tools needed.

Hope this helps.
Read more...
Your Price
$12.24
   In Stock
Microwave Oven Combo FILTER,GREASE
★★★★★
★★★★★
31 Reviews
PartSelect Number PS12713651
Manufacturer Part Number 5230W1A012E
This is a single grease filter manufactured for a microwave. The microwave grease filter filters the exhaust air and traps any grease flowing out of the appliance. It is important to keep the filter clean and intact by cleaning it regularly and replacing it when needed. A clogged air filter can cause your appliance to run inefficiently and possibly alter the taste and smell of your food. This filter is approximately 7.5 inches wide and 5 inches deep. This part is sold separately. No tools are required for this repair, the filter simply slides in and out using the easy-pull tab on the filter.
Installation Instructions
David from Smithfield, VA
Grill Vent Broken Tabs
Piece of cake. Grill arrived quickly, was easily installed with a Phillips head screwdriver, needed for the two upper screws which most folks don't think about - Hence the need for this part, since the charcoal filter is behind the grill and most people don't think about replacing this. Easy installation of all filters. Thanks! Read more...
Your Price
$64.52
   In Stock
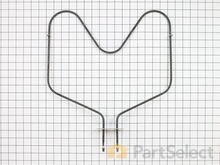
Microwave Oven Combo Bake Element - 2600W 240V
★★★★★
★★★★★
88 Reviews
PartSelect Number PS11740695
Manufacturer Part Number WP308180
The bake element in your oven is the part that provides heat when cooking. If your oven is too hot, or not hot enough, or does not heat evenly, you may need to replace the bake element. This part is 2600 Watts and 240 Volts. It is a closed hinged style bake element which is 15-3/4 inches long and 16-5/8 inches wide. The terminal depth is three inches and they are 1-3/4 inches apart. This part is made of metal and is black in color. Be sure to disconnect power to the oven before completing this repair.
Fixes these symptoms
  • Element will not heat
  • Little to no heat when baking
  • Oven is too hot
  • See more...
Installation Instructions
Joe from Greeley, CO
oven wouldn't heat
First I removed the two screws that hold the element in place. I then pulled the element out about 3 inches and disconnected the two wires, then removed element and replaced with new
.
Read more...
Your Price
$22.13
   In Stock
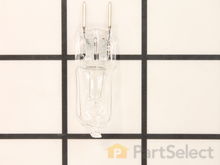
Microwave Oven Combo Halogen Light Bulb - 120V 20W
★★★★★
★★★★★
41 Reviews
PartSelect Number PS2351821
Manufacturer Part Number WB25X10019
This light bulb is located on the inside of your microwave. The bulb is behind the top grill. It will need to be replaced when it has burnt out and no longer works. Unplug the unit before beginning this repair. Remove the top grill of your microwave, use your screwdriver to open the light socket, scrape off any silicone holding the bulb in place, clean the area of any oil and dirt, insert the new bulb into the socket without touching the bulb, slide the holder back into place, line up the tabs on top of the metal plate, and secure the holder back into place.
Installation Instructions
Mark from GRAND BLANC, MI
Lens cracked and bulbs burned out
First I removed the single screw holding the lens assembly in place. Then I lowered the assembly and tilted it until it came out. To remove the existing cracked glass lens there were four tabs bent down on it. By hand I lifted each tab just enough to remove the broken lens. I then replaced the broken lens with the new one and re-bent the tabs down by hand to secure them to the new lens.

The lens assembly, now removed, revealed the cavity that contained the two halogen bulbs. Since they were both burned out for days, they weren't hot so I could pull each one out by hand. The bulbs are secured by two straight heavy gauge wire leads and provided a little resistance but come out fairly easily. Make a mental note of the angle they came out so it will be easier to replace them with new ones.

You're not supposed to touch halogen bulbs with your bare hands, so I used the bubble wrap they came in as a means to hold the bulb while installing it.

Be sure to insert the bulbs at the same angle they came out so the pins do not get bent.

Once both bulbs are in place, replace the lens cover assembly by putting the end opposite where the screw hole goes in first on the right, then swing it up until flush and screw it down.
Read more...
Your Price
$18.86
   In Stock
Microwave Oven Combo Grease Filter
★★★★★
★★★★★
25 Reviews
PartSelect Number PS3506741
Manufacturer Part Number WB02X11534
This is a replacement grease filter for your microwave. Sometimes known as the air filter, this part fits underneath your microwave and catches grease. As a result, your grease filter can become clogged, and this is the part you will need to replace it. It measures approximately 7 inches by 7 inches. Most microwaves have two grease filters, but this part is sold individually.
Installation Instructions
Anita D from LACEY, WA
original grease filter fell apart while washing it and couldn't be put back together
Can't believe GE Profile allows such a flimsy filter to be used at all. These filters should not just fall apart while running water through them.

I ordered replacement 4 replacements because I'm sure this will happen again. Part Select fortunately had replacements! You just slide the new filter in place, no tools required. Thanks Part Select.
Read more...
Your Price
$54.60
   In Stock
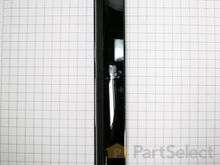
Microwave Oven Combo Vent Grille - Black
★★★★★
★★★★★
50 Reviews
PartSelect Number PS3535252
Manufacturer Part Number MDX61912701
This is replacement vent grille or vent grill for your microwave. You will find the grill vent either above or below the microwave door, depending on your model. If your vent grill is discolored or cracked, or if the mounting brackets for the grill are broken, you may need to replace the grill. This part is made of black plastic and is approximately 24 inches long and 3.5 inches wide. This product is sold individually.
Fixes these symptoms
Installation Instructions
Andy from PERRYSBURG, OH
Vent Grille tabs snapped off
Repair was easy but you have to remove the screw at the top of the microwave (top left) in order to secure the far left tab with the hole in the tab. Place the grille in place, push to the left and then secure the screw you removed. Just remember that the mounted screw will need to be removed the next time you need access in order to replace the charcoal filter. Read more...
Your Price
$70.31
   In Stock
Microwave Oven Combo Bake Element
★★★★★
★★★★★
52 Reviews
PartSelect Number PS11750369
Manufacturer Part Number WPW10207397
The bake element is located at the bottom of the oven and gives off heat in order to bake evenly. If you notice that the element is not heating up or is not cooking evenly, it could be because it is broken or burnt out. All you need for this simple repair is a small screwdriver. To complete this repair, you will need to first turn the oven off (or shut off the house circuit breaker), remove the two screws that are holding the old element in place, remove the two wires from the old part, and then connect them to the new part and screw back into place.
Fixes these symptoms
  • Element will not heat
  • Little to no heat when baking
  • Oven not heating evenly
  • See more...
Installation Instructions
Donald from INDEPENDENCE, MO
The over the range halogen light bulb is difficult to remove.
The halogen light bulb is very tight in the socket and difficult to remove by hand. Read reviews by other customers who had the same issue and complained that they ended up breaking the bulb trying to remove it. If broken may require an on-site service technician to remove the whole assembly with additional much higher cost and time. I found wrapping some duct tape around the burned-out bulb made it easier to grip and remove the old bulb without breaking it.
Based on some You-Tube videos I watched newer models now use LED light panels which appear to solve this problem.
Read more...
Your Price
$21.50
   In Stock
Microwave Oven Combo Microwave Surface Light Bulb
★★★★★
★★★★★
20 Reviews
PartSelect Number PS11722423
Manufacturer Part Number W10709921
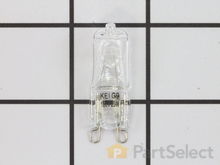
This microwave surface light bulb (120v 25w) is an OEM replacement part used in microwaves and microwave/hood combos. It is one of the two halogen lightbulbs that are positioned on either end of the base of the appliance to illuminate the cooking surface. The light allows you to easily monitor the cooking/heating process. Over time the light bulb may burn out or break resulting in difficulty viewing the cooking surface, and increased chances of injury while cooking. To replace the bulb, unplug the appliance and remove the light cover/lens, to access the bulb housing. Carefully unscrew the old bulb from its socket to avoid breaking it and damaging the assembly. Inspect the socket to check that it is in good working condition. If both of your light bulbs fail at the same time, the socket may be experiencing an electrical fault and will need to be replaced. Install the new bulb by screwing it into the socket. Reattach the light cover and plug in the appliance to check that the light bulb is functional. Each light bulb is sold individually.
Installation Instructions
Daniel from Cheraw, SC
I broke the Bake Element while cleaning the oven.
I removed the two screws that held the bake element in place. Next I removed the Bake Element. I had to unscrew the oven to go behind it because when one piece off of the element broke, it slide back behind the oven. I pushed the wire back thru the piece holes, connected the Element, and pushed the element with the wires back through the holes. I rescrewed the element in place and the oven. PartSelect helped me to save this year's Christmas. Read more...
Your Price
$10.57
   In Stock
Microwave Oven Combo FUSE
★★★★★
★★★★★
19 Reviews
PartSelect Number PS1481237
Manufacturer Part Number WB27X10928
This ceramic microwave fuse is just over an inch in length. It is white in the center, and metal on both ends. This is a 20-amp fuse, and is used to power your microwave. If the touch pad on the microwave becomes unresponsive, the microwave produces little to no heat, or the appliance simply does not turn on, it could mean that your fuse is at fault and needs to be replaced. Because this part contains an electrical charge, remember to disconnect power to the microwave unit before you begin this repair. NOTE: Before you start this repair, ensure that the microwave is unplugged, and the capacitor is discharged. A capacitor stores large amounts of electricity even after your microwave is unplugged.
Fixes these symptoms
  • No heat
  • Touchpad does not respond
  • Won’t turn on
  • See more...
Installation Instructions
Kim from Cliffside Park, NJ
Microwave completely stopped working
Turned out the issue was easily solved by replacing a single, inexpensive fuse.

First off, UNPLUG THE MICROWAVE.

The fuse is located under the plastic grill at the top of the microwave. It's held on by two screws. Once you've removed the screws and taken off the plastic grill, you go to the right side of the microwave and remove another screw that holds a small metal grill in place. Removing the small metal grill is probably the toughest part of this repair. You kind of have to rock it back and forth a bit to get it to release. Once that's off, you can get to the fuse. I removed the burnt out one with a pair of needle nose pliers. I also put a small piece of cardboard under the fuse when I did this so I didn't accidentally drop it into the innards of the microwave. I did the same thing when I replaced the new fuse. I then plugged the appliance back in and made sure it worked. Once that was confirmed, I replaced both grills.
Read more...
Your Price
$13.10
   In Stock
Microwave Oven Combo FUSE
★★★★★
★★★★★
8 Reviews
PartSelect Number PS12071294
Manufacturer Part Number 5304509451
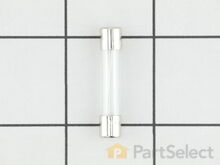
This fuse, also known as a cartridge fuse, is a genuine OEM replacement part for microwaves. It has a glass cylindrical body with a metal cap on each end. The cap connects the fuse to the circuit. If the current goes above the fuse rating, the element inside the glass will melt and cut off the electrical current to the appliance. This protects the circuit and surrounding components from overheating and becoming damaged. Once the fuse is blown, the appliance will likely not operate at all, however, the fuse is designed to be easily replaceable. It is recommended to use insulated gloves and to avoid touching any exposed wiring connections. To replace the fuse, use a fuse puller to grip the metal caps and lift it out of the holder. Place the new fuse in the holder and ensure it is properly seated. Turn the appliance back on and check that the circuit is functioning.
Fixes these symptoms

Microwave Oven Combo Brands

Related Microwave Oven Combo Parts

Popular Microwave Oven Combo Models

Below are the most popular Microwave Oven Combo models we have. Enter your model number in the search box to find your model.