Popular Tappan Parts

Your Price
$35.34
   In Stock
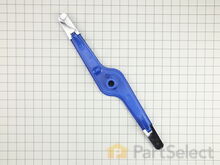
Tappan Lower Spray Arm
★★★★★
★★★★★
123 Reviews
PartSelect Number PS12585623
Manufacturer Part Number 5304517203
The Lower Spray Arm is used in your dishwasher to spray water and clean your dishes. If broken there will be visible damage or your dishes may no longer be cleaned properly. If your spray arm is broken (due to general wear or high heat), it should be replaced. Your lower spray arm will be located at the bottom of your dishwasher tub. Check your user manual and model number to ensure this model is right for you. This version is plastic and metal and comes in gray/blue. We recommend you wear work gloves to keep your hands safe when installing and disconnect power to the appliance. You will also want to make sure that you turn off the water supply to your dishwasher. From here, you will want to open the dishwasher, pull out the lower rack and set it aside. Remove the lower wash arm. On each side of the bottom of the spray arm, there are small locking tabs that can be pushed aside using a flathead screwdriver. Once released, the spray arm can easily be pulled off the dishwasher. Put the new lower wash arm in place and push it down to lock it in. Ensure it is spinning freely and does not hit the heating element. Return the lower dish rack into place and then close the dishwasher door.
Fixes these symptoms
Installation Instructions
Donna from Madison, OH
spray arm keeps melting
I have had to keep replacing the spray arm on the bottom of my dishwasher which takes like 2 seconds to do.. First you open the dishwasher and than pull the bottom basked forward and reach down and pull the spray arm up and pop the bottom of the spray arm off and put it on the new spray arm and slip it back into the dishwasher over the thing that makes it spin around.. but the tricky part is and I didn't know this and this is why my dishwasher spray arm kept falling over and melting on the heating element.. you have to turn it till it clicks in.. and your done.. Read more...
Your Price
$47.55
   In Stock
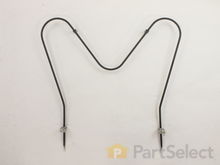
Tappan Oven Bake Element
★★★★★
★★★★★
424 Reviews
PartSelect Number PS438018
Manufacturer Part Number 316075103
The Oven Bake Element is a black, metal part which supplies heat to the oven. This element is 19-1/2" wide x 18-1/2" long and has 3-1/2" inserts. It is rated as "Easy" to install by users, and attaches to the bottom of the oven. If you notice visible damage, or that your oven is not receiving heat properly then it may be a problem with this part. Check your model number and user manual to see if this is the right part for you. It is important for you to disconnect your appliance from the power source before performing this repair. After disconnecting your appliance, remove the two screws/nuts connecting the old element, pull it out, and discard if faulty. Simply connect the new element prongs where the old element fit, and screw it back in. You may need a flashlight when making this repair.
Fixes these symptoms
  • Element will not heat
  • Little to no heat when baking
  • Little to no heat when broiling
  • See more...
Installation Instructions
David from Shawnee, KS
Oven woudn't heat
1. Removed two screws, pulled out the element, voltage tested the element and determined it was an open circuit (bad element).
2. Ordered the part from partselect.com
3. Disconnected element, connected the new one, and screwed it back in.
Read more...
Your Price
$21.06
   In Stock
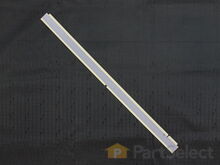
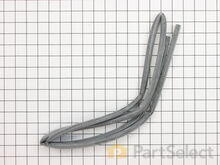
Tappan Dishwasher Bottom Door Gasket
★★★★★
★★★★★
182 Reviews
PartSelect Number PS9495545
Manufacturer Part Number 809006501
This dishwasher door gasket (Bottom Gasket, Gasket, Door Seal, Dishwasher Door Lower Seal) helps prevent water from leaking out of the bottom edge of your dishwasher door by creating a watertight seal. This part is attached to the bottom of your dishwasher inner door panel. It is frequently exposed to water and detergent during its lifetime. The water and chemicals can eventually wear down the gasket and compromise the integrity of the seal. If the gasket is malfunctioning, the integrity of the door seal will be effected. You will notice leaking through the bottom of your dishwasher door. If your dishwasher is leaking water from the bottom of the door, first inspect the seal for food particles near the bottom and sides, and remove the buildup, as it can stop the door from closing properly and keeping a tight seal; if not, you may need to replace the bottom door gasket. Check the door gasket for tears, cuts, or wear. This part is sold individually and measures 22.5 inches by 1.25 inches. It is constructed of plastic, and comes in yellow/grey. Includes one lower door gasket.
Fixes these symptoms
  • Door latch failure
  • Door won’t close
  • Leaking
  • See more...
Installation Instructions
Scott from Flowood, MS
Bottom Door Seal fell apart and started leaking.
First I opened the door all the way. Second I reached down to the bottom gasket then grabed it on the right end of the seal that is on the right side of the door. Then I pulled the end outward from the bottom of the door toward the heater coil in the bottom of the washer. It came out real easy. You see it just snaps into a little plastic groove under the door. I then cleaned up the area for food and soap particules. I then placed the new gasket in place by lining up the notch toward the right end with the piece of plastic that encloses the right end of the plastic notch on the bottom right end of the door. Then push it in untill it stops going into the notch. It snaps in but does not make a snaping sound. It just won't go in no more. Read more...
Your Price
$12.57
   In Stock
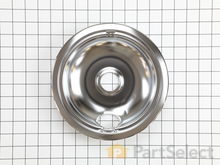
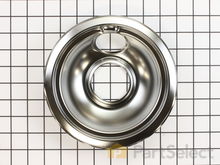
Tappan Drip Bowl - 8"
★★★★★
★★★★★
100 Reviews
PartSelect Number PS437595
Manufacturer Part Number 316048413
This chrome drip bowl is designed for use with electric cooktops and ranges. This drip bowl is sold individually. At the widest point this part has a diameter of approximately 10 inches. It sits beneath the surface burner element. It catches any drips or spills coming from the cookware on your burner. Because the cooktop is a high-traffic area of the kitchen, these bowls often get damaged, or get so dirty they can no longer be adequately cleaned. When replacing this part you need to remove the burner element. While you have it out we recommend inspecting the terminals and the element for any corrosion, arcing, or discoloration. Any of those things could be a sign of a bigger problem, and it indicates that the element and terminal block should be replaced.
Fixes these symptoms
Installation Instructions
John from Nisswa, MN
Old pans/bowls were corroded
Very easy---simply unplug the burners, remove the old pans and replace with the new ones

I was extremely pleased with the easy ordering and prompt delivery of parts that actually fit as they should!
Read more...
Your Price
$7.45
   In Stock
Tappan Chrome Drip Bowl - 6"
★★★★★
★★★★★
79 Reviews
PartSelect Number PS437596
Manufacturer Part Number 316048414
The drip bowl catches grease and spills that come from cooking on your stove top. They are located under the heating elements. Drip bowls are often neglected and can become rusted and cracked. If your drip bowl is damaged, it could allow grease, food, or other spills to drip inside your range. This could become a fire hazard. This 6 inch chrome drip bowl fits most electric ranges. Before you replace your damaged drip bowl, make sure the element is turned off and cool to the touch. To replace the drip bowl, remove the element, replace the current drip bowl, and reattach the element. This part is sold individually.
Fixes these symptoms
Installation Instructions
John from Nisswa, MN
Old pans/bowls were corroded
Very easy---simply unplug the burners, remove the old pans and replace with the new ones

I was extremely pleased with the easy ordering and prompt delivery of parts that actually fit as they should!
Read more...
Your Price
$32.35
   In Stock
Tappan Dishwasher Tub Gasket - Gray
★★★★★
★★★★★
42 Reviews
PartSelect Number PS8260227
Manufacturer Part Number 154827601
This grey OEM dishwasher tub gasket is a 73" grey rubber part that creates a seal around the dishwasher to prevent any water leakage during a cycle. If it's damaged or broken, you'll start seeing water leaking out. If broken, it should be replaced. Refer to your model number and user manual to ensure this part is right for you. When making this repair, open the dishwasher door and take out the lower dish tray for better access. Pull out the old gasket, and clean the channel with a rag. Push the new gasket into place into the notch on the door, which you should see upon close inspection, using a flat-head screwdriver for assistance if necessary. We do not recommend cutting any additional length off on the tub gasket if any is present during your repair.
Fixes these symptoms
  • Door latch failure
  • Door won’t close
  • Leaking
  • See more...
Installation Instructions
Charles from Milton, FL
dishwasher was leaking water
I removed old tub gasket, which the door presses against to make a seal, and put the new one in. Flat tip screwdriver was used to gently press gasket in. Read more...
Your Price
$43.82
   In Stock
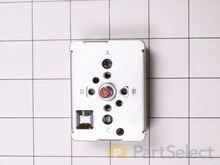
Tappan Infinite Burner Switch
★★★★★
★★★★★
71 Reviews
PartSelect Number PS1145040
Manufacturer Part Number 316436001
The infinite burner switch controls the stove top eight-inch surface burner, which is the large surface element. If your surface element is not warming up, the element can be tested to determine whether or not it is defective. If your element is not defective, then it is more than likely that the infinite burner switch is the issue. Before you install the infinite burner switch you will need to unplug your range from the power supply, or shut off the home circuit breaker. The tools you will need to do this repair include a number one square head screwdriver and a pair of needle nose pliers.
Fixes these symptoms
  • Element will not heat
  • Little to no heat when broiling
  • Oven is too hot
  • See more...
Installation Instructions
William from Burke, VA
Back Burner didn't function
We moved into our townhouse about 6 yrs ago. During the home inspection we checked the range and saw the Red light come on when we turned on each burner. After moving in we realized the large back burner did not work. The light came on but the element never got hot. I of course replaced the element but that did not work. Several years passed and we just ignored the issue. We just got by with 3 burners. Lately we realized how much easier it would be to have all four burners working. Knowing that we will be selling our townhome soon we figured we should either fix the problem or replace the range.

I didn't want to call a repair man because I didn't want to be charged a $150 to have him come out and they to pay extra for parts (and of course a 2nd visit). So I went to www.Partselect.com and typed in the model of my range. Found the diagrams for my range and saw that from the switch ran a pair of wires to a Universal Receptacle (aka Terminal Block Kit). I figured since the Red light turns on when I turn the switch on it has to be the Terminal Block.

I ordered the part from www.Partselect.com ($14.00 including shipping) and replaced the part. The burner still would not get hot. I decided to test the switch. I removed the Control Panel cover (which is secure by 2 screws just below the digital clock). Once the cover was off, I saw the Blue wires going from the switch to the Terminal Block. To test the switch, I disconnected the two Blue Wires from connectors H1 and H2 and temporarily connected them to H1 and H2 of another switch. Sure enough, when I turned the other switch the element got hot.

So I placed another order from www.Partselect.com for a replacement switch ($50 including shipping). When that part came, I flipped the electrical circuit going to the range. I then removed the Control Panel cover again. With the new switch in hand (holding it near the old switch still attached to the Control Panel, I used the pliers to pull out each wire from it's connector and place it to it's corresponding connector on the new switch. Once all the wires were connected to the new switch, I pulled the knob of the switch off then used a phillips screwdriver to remove the two screws holding the switch to the control panel. I replaced the old switch with the new one put the screws back in, replaced the knob. Turned the circuit back on and tested to make sure that the element got hot. When it did, then I replaced the Control Panel cover and enjoyed a nice dinner that was cooked in less time than we're accustomed to because of the new burner. So I spent a total of $64.00 to fix our range. Less than half the amount I would've spent if I called for a technican. And far less then buying a new range.

Partselect is a great resource for information. They have diagrams and schematics available to view and/or download. And when ordering it's a snap because there's an "Add to Cart" button next to each part it lists. So there's no confusion. I've already recommended Partselect.com to about 5 people. And will continue to do so!!
Read more...
Your Price
$39.17
   In Stock
Tappan Door Rack
★★★★★
★★★★★
75 Reviews
PartSelect Number PS735091
Manufacturer Part Number 240535101
The Door Rack (also known as a retainer bar) is a 23" white plastic part used to hold small items inside the fridge door. If broken, it should be replaced. Refer to your user manual and model number to determine if this part is correct for you. This is a simple part to repair and should not require any tools. Most customers found it to be very easy to simply snap the old rack out of place and snap the new one back in, making sure the locking tabs are secure. This part is sold individually and not as a part of a kit. It is certified by the original manufacturer.
Fixes these symptoms
Installation Instructions
Jane from Owosso, MI
broken refrigerator door shelves
snapped right on and removed screws, insert and replace screws. Read more...
Your Price
$16.19
   In Stock
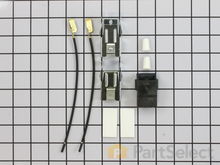
Tappan Terminal Block Kit
★★★★★
★★★★★
38 Reviews
PartSelect Number PS470125
Manufacturer Part Number 5303935058
This part connects the wire harness to the surface element and is used for ranges. The kit includes interchangeable mounting brackets, ceramic wire nuts, heat shrink protective tubing, and wires. If your range/oven is having symptoms such as burner not heating, heating elements not working, burning smell, or if the oven is making a buzzing noise then this could be the solution. The tools needed to replace the kit are wire strippers, a heat gun or hair dryer, and #1 square heard screw driver. Refer to the installation/instructional video for further guidance to accurately replace the element.
Fixes these symptoms
  • Element will not heat
  • Oven not heating evenly
  • Will Not Start
  • See more...
Installation Instructions
Steven from Taylors, SC
rental property stove only had 2 working burners and bottom drawer off track
first i took out burners then i took out the screws of the termnal block bracket. i then raised the lid on the stoveand clipped the wires on all 4 of the terminal block kits.i then slipped the shrink wrap on wires and used the wire nuts to connect wires together then heated the shrink wrap. I then put screws back in terminal block brackets. I then put the burners on while looking under lid so i would know they were making good connections as this is a bad design from factory. if you pull out burners to clean them and they are not put back in right you dont have a good connection and that causes the terminal blocks to get hot and melt. thats what happened in my case.
As far as the drawer glides they just snap into place
Read more...
Your Price
$6.88
   In Stock
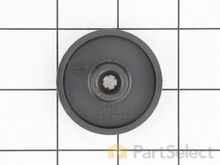
Tappan WHEEL & BUSHING ASS
★★★★★
★★★★★
6 Reviews
PartSelect Number PS16745479
Manufacturer Part Number 5304532229
The single rack roller kit comes with one axle/clip and one wheel/roller. The rack wheel is designed to allow the rack of your dishwasher to roll in and out. If the rack will not complete this task, or you notice that your dishwasher is not cleaning dishes properly, you may need to replace the rack wheel. The single rack roller kit is made of white plastic, and clips to the dishwasher rack with the included axle/clip. Many of our customers have described this repair as easy, and you will not require any tools to complete it. Lower rack roller and bracket assembly, grey. Wheel has been updated. If wheel pictured is not like old one, you may need to replace all wheels.
Fixes these symptoms
Installation Instructions
CHRIS from ROANOKE, VA
Water leaking from Inlet Valve
Remove the bottom cover plate. Disconnect the water inlet and black rubber hose. Remove 2 mounting screws. Pull out electrical connector. Reverse order. Be sure to get the brass inlet connector really tight so it won't leak. I did the final tightning after the part is mounted. Not a bad repair at all. The only problem was that it leaked in the first place and messed up my subfloor and laminate flooring. Read more...

Tappan Appliance Types

Popular Tappan Models

Below are the most popular Tappan models we have. Enter your model number in the search box to find your model.