Popular Range Parts
Your Price
$47.55
   In Stock
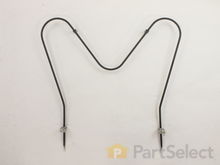
Range Oven Bake Element
β˜…β˜…β˜…β˜…β˜…
β˜…β˜…β˜…β˜…β˜…
424 Reviews
PartSelect Number PS438018
Manufacturer Part Number 316075103
The Oven Bake Element is a black, metal part which supplies heat to the oven. This element is 19-1/2" wide x 18-1/2" long and has 3-1/2" inserts. It is rated as "Easy" to install by users, and attaches to the bottom of the oven. If you notice visible damage, or that your oven is not receiving heat properly then it may be a problem with this part. Check your model number and user manual to see if this is the right part for you. It is important for you to disconnect your appliance from the power source before performing this repair. After disconnecting your appliance, remove the two screws/nuts connecting the old element, pull it out, and discard if faulty. Simply connect the new element prongs where the old element fit, and screw it back in. You may need a flashlight when making this repair.
Fixes these symptoms
  • Element will not heat
  • Little to no heat when baking
  • Little to no heat when broiling
  • See more...
Installation Instructions
David from Shawnee, KS
Oven woudn't heat
1. Removed two screws, pulled out the element, voltage tested the element and determined it was an open circuit (bad element).
2. Ordered the part from partselect.com
3. Disconnected element, connected the new one, and screwed it back in.
Read more...
Your Price
$62.40
   In Stock
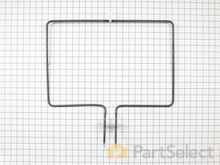
Range Bake Element
β˜…β˜…β˜…β˜…β˜…
β˜…β˜…β˜…β˜…β˜…
118 Reviews
PartSelect Number PS11703285
Manufacturer Part Number W10779716
This is a heating element compatible with various makes of ranges and ovens and is sold as an individual part. Measuring 20.5-inches wide and 20.25-inches (with terminals) long, this heating element is a genuine OEM part. If your range is not heating during the bake setting, not heating evenly, or if the element is burnt out or damaged, the element will need to be replaced. This repair is simple and only requires that you disconnect your oven from the wall outlet and use an appropriate screwdriver to disassemble and replace the element with the additional support brackets to secure it.
Fixes these symptoms
  • Element will not heat
  • Little to no heat when baking
  • Oven is too hot
  • See more...
Installation Instructions
Helen from PURVIS, MS
The oven would take an hour to preheat.
First, we turned on broil and the upper element turned orange and obviously worked. We figured the bottom element went out. The diagram on this site showed a bottom heating element that looked nothing like ours, but after reading other reviews, and reading that part that goes through the back of the oven was in the middle, and not off to the side, we ordered this element. It was perfect. All you have to do is unplug the oven, take out the bottom pan covering the element by removing 2 screws in the back, remove the lower small cover on the back of the oven and then unplug the old element, unscrew the old element on the inside of the stove, then install the new element and put everything back like it was. Nothing to it. It worked like a charm and my oven now heats up fast again. Easiest appliance repair job ever! Read more...
Your Price
$12.57
   In Stock
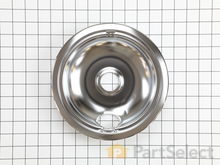
Range Drip Bowl - 8"
β˜…β˜…β˜…β˜…β˜…
β˜…β˜…β˜…β˜…β˜…
100 Reviews
PartSelect Number PS437595
Manufacturer Part Number 316048413
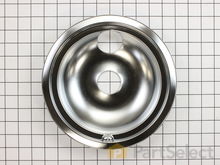
This chrome drip bowl is designed for use with electric cooktops and ranges. This drip bowl is sold individually. At the widest point this part has a diameter of approximately 10 inches. It sits beneath the surface burner element. It catches any drips or spills coming from the cookware on your burner. Because the cooktop is a high-traffic area of the kitchen, these bowls often get damaged, or get so dirty they can no longer be adequately cleaned. When replacing this part you need to remove the burner element. While you have it out we recommend inspecting the terminals and the element for any corrosion, arcing, or discoloration. Any of those things could be a sign of a bigger problem, and it indicates that the element and terminal block should be replaced.
Fixes these symptoms
Installation Instructions
John from Nisswa, MN
Old pans/bowls were corroded
Very easy---simply unplug the burners, remove the old pans and replace with the new ones

I was extremely pleased with the easy ordering and prompt delivery of parts that actually fit as they should!
Read more...
Your Price
$7.45
   In Stock
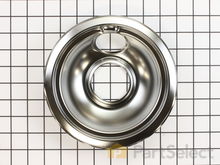
Range Chrome Drip Bowl - 6"
β˜…β˜…β˜…β˜…β˜…
β˜…β˜…β˜…β˜…β˜…
79 Reviews
PartSelect Number PS437596
Manufacturer Part Number 316048414
The drip bowl catches grease and spills that come from cooking on your stove top. They are located under the heating elements. Drip bowls are often neglected and can become rusted and cracked. If your drip bowl is damaged, it could allow grease, food, or other spills to drip inside your range. This could become a fire hazard. This 6 inch chrome drip bowl fits most electric ranges. Before you replace your damaged drip bowl, make sure the element is turned off and cool to the touch. To replace the drip bowl, remove the element, replace the current drip bowl, and reattach the element. This part is sold individually.
Fixes these symptoms
Installation Instructions
John from Nisswa, MN
Old pans/bowls were corroded
Very easy---simply unplug the burners, remove the old pans and replace with the new ones

I was extremely pleased with the easy ordering and prompt delivery of parts that actually fit as they should!
Read more...
Your Price
$7.66
   In Stock
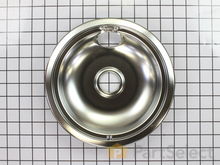
Range Chrome Drip Bowl - 8 inch
β˜…β˜…β˜…β˜…β˜…
β˜…β˜…β˜…β˜…β˜…
42 Reviews
PartSelect Number PS11750107
Manufacturer Part Number WPW10196405
This manufacturer-certified drip bowl is also known as a drip pan, and it is designed for use with cooktops and ranges. It sits below 8-inch burner elements and catches drips and spills from the cookware on the burner. The diameter of the drip bowl is approximately 10 inches. This replacement might appear slightly different, but it will fit your appliance. You will need no tools to complete this repair. Simply remove the burner element, remove the old bowl, line up the hole on the new bowl with the terminal block and drop it into place. Make sure the bowl is flat before reinstalling the element. While you have the element out you should inspect the terminals for corrosion, damage, or discolouration. If you notice any of those things you should also replace the element and terminal block. You will need to replace your drip bowl if it is lost, damaged, or can no longer be cleaned. This replacement part is sold individually. To extend the life of your new drip bowl we recommend you clean it regularly with soap and water. We recommend only using the recommended drip bowl for your appliance; generic versions will not fit properly which could affect the performance of your elements and cause long-term damage.
Fixes these symptoms
Installation Instructions
Joe from Greeley, CO
oven wouldn't heat
First I removed the two screws that hold the element in place. I then pulled the element out about 3 inches and disconnected the two wires, then removed element and replaced with new
.
Read more...
Your Price
$37.81
   In Stock
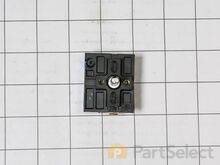
Range Surface Element Control Switch
β˜…β˜…β˜…β˜…β˜…
β˜…β˜…β˜…β˜…β˜…
45 Reviews
PartSelect Number PS11729102
Manufacturer Part Number WB24X25013
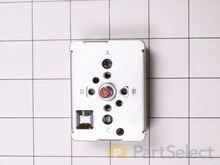
The control switch turns the surface element on and off and controls how much heat the element produces.
Fixes these symptoms
Installation Instructions
Mary from KISSIMMEE, FL
Right front heating element was either off or on high, no in between
Unplug range and pull it out to access the back. Pull knob off bad control at front making sure to check the orientation of the rod the knob goes onβ€”it mattersβ€”and remove two brass screws. Then remove the four hex screws holding the top metal panel on at the back of the range (two have washers) and lift the panel off to expose the controls. (I then took a photo of the switch in situ to remember its orientation and how the wires were connected.) Use pliers to remove wires, then connect up and install the new switch, and put the brass screws back in at front to hold it in place. I used the pliers to turn the rod to the correct orientation before putting the knob back on. Reinstall the back panel with four hex screws. Plug the range in and test.

FYI the directions for accessing the infinite switch that came with the range also had me remove two screws under each side of the front of the control panel, but as far as I could tell that wasn’t necessary.
Read more...
Your Price
$6.95
   In Stock
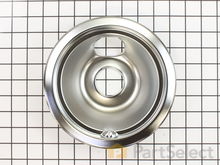
Range Drip Bowl - 6 Inch
β˜…β˜…β˜…β˜…β˜…
β˜…β˜…β˜…β˜…β˜…
88 Reviews
PartSelect Number PS11750108
Manufacturer Part Number WPW10196406
This drip bowl is used for electric cooktops and ranges, it is designed to sit under a 6-inch surface burner. It catches the drips and spills coming from the cookware on the surface burner. This drip bowl is chrome, and it has a diameter of 8 inches. You need to remove the burner element to replace this part. Line the hole up with the element terminal blocks, and ensure the new bowl is flush with the surface of the cooktop before replacing the burner element. Drip bowls need to be replaced when they are lost, damaged, or you are no longer able to clean them adequately. This replacement part is sold individually.
Fixes these symptoms
Installation Instructions
Joe from Greeley, CO
oven wouldn't heat
First I removed the two screws that hold the element in place. I then pulled the element out about 3 inches and disconnected the two wires, then removed element and replaced with new
.
Read more...
Your Price
$18.20
   In Stock
Range Drip Bowl - 6 Inch
β˜…β˜…β˜…β˜…β˜…
β˜…β˜…β˜…β˜…β˜…
61 Reviews
PartSelect Number PS244394
Manufacturer Part Number WB31T10010
This drip bowl, also known as the drip pan or burner bowl, is 6 inches in internal diameter to match the burner, but actually measures closer to 8 inches in total diameter to its outer edges. This authentic manufacturer-approved part is used to catch spills from cooking on the top burner. If your bowls are getting stained, dirty, or rusted, this replacement can solve it. First, remove the element from the stove top, and pull out the old drip pan. Insert the new bowl and make sure it is aligned to where the element is plugged in. Lastly, you can put the element back in. For safety precautions, make sure to unplug the range from the power source and wait until the surface is cool before replacing this part. This part is sold individually, if you are replacing more than one drip bowl on your stove at once, you will need to account for this. To replace, simply pull the old surface elements and burner bowls off, give everything a thorough clean, and install the new parts with no tools necessary.
Installation Instructions
John from San Ramon, CA
I needed new surface elements & burner bowls
This was about the simplest fix I've ever done. Just pulled off the old surface elements & burner bowls, wiped down the range top, and put in the new parts. Perfect fit. No problems at all. $$ well spent. ParsSelect shipped quickly, and they arrived well packaged. A+ experience all around. Thanks PartSelect. JA, San Ramon, CA Read more...
Your Price
$18.63
   In Stock
Range Drip Bowl - 8 Inch
β˜…β˜…β˜…β˜…β˜…
β˜…β˜…β˜…β˜…β˜…
64 Reviews
PartSelect Number PS244395
Manufacturer Part Number WB31T10011
This Drip Bowl, also known as a burner bowl or drip pan, is made to fit an element 8 inches in diameter and comes in chrome. The actual total diameter of this drip bowl is closer to 10 inches, but don't worry, it will fit your 8-inch burner. This bowl is used to catch drippings and food that falls when cooking on the oven element. The drip bowl might burn, become rusty, and wear down over time, and will need to be replaced. Replacing the drip pan is very easy. The elements on the oven must be removed to access the pan underneath. When replacing the bowl, make sure to line up the hole with the terminal block where the element plugs into, and always remove power to your appliance and ensure it is completely cool before commencing your repair. These drip bowls are sold individually, not as a set for your appliance, so you will need to purchase each separately if upgrading all the drip bowls for your range.
Fixes these symptoms
Installation Instructions
Tom from North Prairie, WI
Burner bowls needed replacement
Very easy repair, Pulled burner coil out, removed old burner bowl. Put in new burner bowl, plugged burner coil back in... easy as 1,2,3 Read more...
Your Price
$11.72
   In Stock
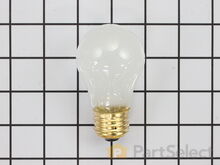
Range Light Bulb - 40W
β˜…β˜…β˜…β˜…β˜…
β˜…β˜…β˜…β˜…β˜…
66 Reviews
PartSelect Number PS884734
Manufacturer Part Number 8009
This an authentic OEM 40-Watt replacement light bulb, used in a number of household appliances. It is specially designed to withstand extreme temperatures, which is why these replacement bulbs are most often used to light the inside of refrigerators and ranges. It features a standard socket base, which means you simply unscrew the burnt-out bulb and screw in the replacement. Depending on the appliance you may require a screwdriver or nut driver to access the light bulb. We recommend you wear work gloves while handling this replacement part. It is constructed of glass and metal and is sold individually. Depending on the appliance and location of the bulb within it, you may want to consider disconnecting power and using a flashlight for easier access to unscrewing and re-screwing in your bulb during this repair.
Installation Instructions
judie from mays landing, NJ
interior drawers were off their rollers
pulled the washer out and replaces the top roller system on both sides and the replaced the weels and brackets on the bottom drwaer. however i had trouble putting the dish washer back correctly and had to call a repairman to adjust the dishwasher and alighn it to open and close properly. but i did do good inside. i feel it was easy and a success. thank you for having the supplies for us to attempt to repair it on our own. Read more...

Range Brands

Related Range Parts

Popular Range Models

Below are the most popular Range models we have. Enter your model number in the search box to find your model.