


0181 - Overview
Models starting with 0181
Click on the best match to narrow your results.
- 0181 (SER 393-12200) Milwaukee Electric Drill (Electric Drill / Driver)
- 0181 (SER 393-1938) Milwaukee Electric Drill (Electric Drill / Driver)
- 0181 (SER 393-2118) Milwaukee Electric Drill (Electric Drill / Driver)
- 0181 (SER 393-1086) Milwaukee Electric Drill (1/4" Pistol Drill)
- 0181 (SER 393-1001) Milwaukee Electric Drill (1/4" Pistol Drill)
- 0181 (SER 393-1331) Milwaukee Electric Drill (Electric Drill / Driver)
- 0181 (SER 393-7700) Milwaukee Electric Drill (Electric Drill / Driver)
- 01810-0 Briggs and Stratton Generator (Briggs & Stratton Generator Model 01810-0 (018100, 01810 0) Parts)
- 01811-0 Briggs and Stratton Pressure Washer (Briggs & Stratton Pressure Washer Model 01811-0 (018110, 01811 0) Parts)
- 01812-0 Briggs and Stratton Generator (Briggs & Stratton Generator Model 01812-0 (018120, 01812 0) Parts)
- 01812-1 Briggs and Stratton Generator (Briggs & Stratton Generator Model 01812-1 (018121, 01812 1) Parts)
- 01812-2 Briggs and Stratton Generator (Briggs & Stratton Generator Model 01812-2 (018122, 01812 2) Parts)
- 01813-0 Briggs and Stratton Generator (Home Generator)
- 01814-0 Briggs and Stratton Generator (Home Generator)
- 01815 Briggs and Stratton Generator (Home Generator)
- 01815-0 Briggs and Stratton Generator (Briggs & Stratton Generator Model 01815-0 (018150, 01815 0) Parts)
- 01819-0 Briggs and Stratton Generator (Briggs & Stratton Generator Model 01819-0 (018190, 01819 0) Parts)
Keep searches simple, eg. "belt" or "pump".

8-32 X 3/8" Pan Slot Taptite Screw
PartSelect #: PS10119009
Manufacturer #: 06-82-7252
$4.99
In Stock


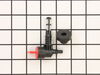
Fuel Valve W/Bushing
PartSelect #: PS8911051
Manufacturer #: 192980GS
Made of durable rubber and plastic components, this Fuel Valve and Bushing are designed for use in over 150 models of generators and pressure washers. This item is sold as a kit, including the valve a...
$19.38
In Stock
 – Part Number: 22-18-0155")
Carbon Brush and Spring (2 Required)
PartSelect #: PS10122154
Manufacturer #: 22-18-0155
No Longer Available


Water Outlet Kit
PartSelect #: PS8911836
Manufacturer #: 201497GS
This is a genuine OEM sourced component which is specially designed for Craftsman pressure washers. It is an identical replacement for a missing or damaged outlet that was originally installed on a ne...
$30.75
In Stock

Fuel Gauge Cap
PartSelect #: PS9314364
Manufacturer #: B4363GS
This OEM replacement fuel gauge cap is designed for use in generators. It comes in a cylindrical shape and has a built-in window to easily view the fuel levels without pulling out the entire cap. It i...
$45.46
Special Order
Common Symptoms of models starting with 0181
[Viewing 2 of 2]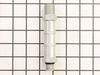
Keep searches simple. Use keywords, e.g. "leaking", "pump", "broken" or "fit".
Wouldn’t start.
I installed a new solenoid starter. Took me a total of 20 minutes. Started right up.
Parts Used:

-
Bruce from CARNATION, WA
-
Difficulty Level:Really Easy
-
Total Repair Time:30 - 60 mins
13 of 29 people
found this instruction helpful.
Was this instruction helpful to you?
Thank you for voting!
Dry rotted rubber
Put some dish soap on the rubber, push into the tank hole, slip 1x2 into the handle of the tank and over the new part and pry down pushing it into the hole. Took about 2 minutes.
Parts Used:
-
James from PICAYUNE, MS
-
Difficulty Level:Very Easy
-
Total Repair Time:Less than 15 mins
6 of 10 people
found this instruction helpful.
Was this instruction helpful to you?
Thank you for voting!
No voltage on secondary side of transformer. Confirmed with meter that transformer windings had infinite resistance.
1. Turn the generator selector switch to "OFF"
2. Remove the 240 volt fuses in the automatic transfer switch to remove power to the transformer.
3. Remove the outside cover from the front of the generator, on the motor end.
4. Remove the 3 screws from the panel covering the controls.
5. Label or make note of which ... Read more terminals the 4 wires on the transformer go to and disconnect from transformer.
6. Using 9/32 nutdriver, remove the two transformer mounting nuts and lock washers.
7. Remove old transformer from studs and install new one. Reinstall nuts and lock washers.
8. Reconnect the 4 transformer wires.
9. Reinstall the control panel cover and the generator housing end cover.
10. Reinstall the fuses in the automatic transfer switch.
11. Put the generator selector switch back in "Automatic"
Read less
Parts Used:
-
Laron from GRAND RAPIDS, MI
-
Difficulty Level:Easy
-
Total Repair Time:15 - 30 mins
-
Tools:Nutdriver, Screw drivers
3 of 3 people
found this instruction helpful.
Was this instruction helpful to you?
Thank you for voting!