JES1344SK05 General Electric Microwave - Overview
Sections of the JES1344SK05
[Viewing 1 of 1]Keep searches simple, eg. "belt" or "pump".

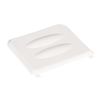
Microwave Wave Guide Cover
PartSelect #: PS1020520
Manufacturer #: WB48X10047
This is the replacement wave guide cover for your microwave. It is white in color and is approximately 3 ½ inches long and 4 inches wide. It has two small tabs at the top that allow it to lock into pl...
No Longer Available

Turntable Guide with Rollers
PartSelect #: PS224055
Manufacturer #: WB02X10806
This microwave turntable guide is located under the glass turntable. It is made of plastic, and comes with rollers.
No Longer Available

High-Voltage Transformer
PartSelect #: PS2321491
Manufacturer #: WB27X10955
This part, in conjuntion with the diode and capacitor, can increase voltage from primary to very high in a short period of time and it converts that high voltage into waves of cooking energy.
$145.48
Special Order
Manuals & Care Guides for JES1344SK05
Click to downloadQuestions And Answers for JES1344SK05
Be the first to ask our experts a question about this model!
✖
Ask a Question
Ask our experts a question on this model and we'll respond as soon as we can.
Sorry, we couldn't find a match for "".
Here's a guide for finding your model number.
Something went wrong. Please try again later.
Your Question Has Been Submitted!
Our experts will send you an email as soon as your question has been answered.
Common Symptoms of the JES1344SK05
[Viewing 1 of 1]Keep searches simple. Use keywords, e.g. "leaking", "pump", "broken" or "fit".
Trip breaker when opening door
Door microswith was stuck on. This is caused, I discovered, by frequently stopping the oven, while running, by opening the door rather than using the stop button. Causes the switch to arc and eventually fail. This causes the safety microswitch to trip the breaker when door is opened. There are little nubs sticking up on the spade connecto
... Read more
rs. You must squeeze them down before you can remove them from the switch. The main door switch is the upper one, mounted at an angle. You have to remove the latch assembly to remove the switch. The problem was obvious once I got the switch out. This problem could also blow the fuse, but in my case the breaker tripped first. Use an ohmmeter to check switch and fuse. The door switch is normally open. The safety switch is normally CLOSED. Instructions inside were helpful and described this problem. So, avoid this repair by always stopping oven with stop button!
Read less
Parts Used:
-
William from KETTLE FALLS, WA
-
Difficulty Level:A Bit Difficult
-
Total Repair Time:30 - 60 mins
-
Tools:Nutdriver, Pliers, Screw drivers
8 of 9 people
found this instruction helpful.
Was this instruction helpful to you?
Thank you for voting!
Wave guide cover one of the pins holding it in place was missing / cover loose
I simply removed the other push pin holding in the old cover and put the bottom in first and snaped into place at the top. The whol job took less than 5 minutes.
Parts Used:
-
Jim from FORT COLLINS, CO
-
Difficulty Level:Really Easy
-
Total Repair Time:Less than 15 mins
1 person
found this instruction helpful.
Was this instruction helpful to you?
Thank you for voting!
Power cut off to Microwave - It was run empty
1. Remove trim kit - Philips head screw driver
2. Remove Microwave from the wall - Philips head screw driver
3. Remove outer microwave cover - required tamper proof torx bit drivers
4. Replace Magnetron thermostat. On this model there are 2. in this case it was on top of the unit tied into the wiring harness to the ma ... Read more in panel.
5. Reinstall microwave and trim kit
Read less
Parts Used:
-
Michael from POTOMAC, MD
-
Difficulty Level:Really Easy
-
Total Repair Time:30 - 60 mins
-
Tools:Screw drivers
1 person
found this instruction helpful.
Was this instruction helpful to you?
Thank you for voting!


