Enter the code USA15 at checkout to apply your discount. Discount will be applied at checkout when the code is entered & applies to all parts. Cannot be combined with any other coupon or special offer & cannot be applied to a previously placed order. Not valid toward tax or shipping & handling. Discount has no cash value. Discount expires on July 4 at 11:59pm EST.
KitchenAid Refrigerator Ice Makers
- Search your model number to find:
- Genuine OEM parts guaranteed to fit
- Free manuals and guides
- Repair instructions and videos

Popular KitchenAid Refrigerator Ice Makers
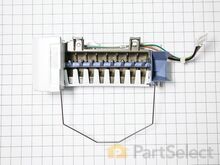
KitchenAid Refrigerator Ice Maker Assembly
PartSelect Number PS11765620
Manufacturer Part Number W10884390
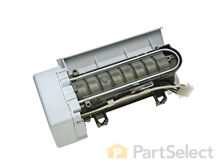
This is an ice maker assembly for various models of refrigerator. This ice maker assembly is used to freeze and eject ice into the ice bucket, then dispense the ice. This ice maker comes with the necessary shut-off arm, as well as a wire harness to properly install it into the freezer compartment of your refrigerator. If your current ice maker is either not producing ice or not breaking the ice up properly, it will need to be replaced. This ice maker assembly is an OEM part and is sold on its own, without any other parts or accessories.
Fixes these symptoms
- Ice maker dispenses too much ice
- Ice maker not making ice
- Ice maker won’t dispense ice
- See more...
Installation Instructions
Raymond from NORTH VENICE, FL
Ice maker did not work in the bottom freezer
Shut down refrigerator at the breaker. Placed freezer items in a cooler. Removed top shelf. You must release roller covers on each side to remove the shelf ( Two front screws must be removed) Took off freezer door. (4 screws holding the door to the bracket) Disconnected ice maker electronic plug. Totally removed bottom screw holding ice maker. Loosen two top screws and remove ice maker. Reverse process to install.
Read more...
KitchenAid Refrigerator Ice Maker
(not sure if this is necessary but is safer)
Remove the ice bucket.
Cover the Ice auger with a hand towel to catch any screws which my get dropped.
Remove four Philips screws holding plastic cover to inside of the door. there are no clip/snaps to worry about but on/off switch needs to be un plugged. Remove cover.
Remove two nut head screws holding old ice maker.
Remove wiring harness from ice maker and lift ice maker up and out. There are two tabs on the door.
Unplug the wiring harness from the ice maker..
Installation: Press the wiring harness into clips on the new ice maker. Install ice maker onto door insuring it is over the tabs on door and the holes for nut screws line up. Plugging the wiring harness in and install two screws.
Plug on/off wiring onto switch and press plastic cover onto inside of door. Take care that it fits inside of rubber door seal. Install four philips screws.
Remove hand towel and install ice bucket making sure the ice maker is switched on. Close door.
Turn on water and electricity.
This took me 25 min. and I am sure would go faster if I had had instructions.
My refrigerator took awhile before it started to make cubes but has been working like new ever since.
This task is easy go for it. Read more...
PartSelect Number PS11738120
Manufacturer Part Number W10873791
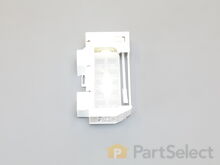
This ice maker is for refrigerators.
Ice maker includes the ice mold and the control device. The ice maker receives water from the water inlet valve and then holds the water in the ice mold until the water freezes solid. It then automatically ejects the ice and refills to continue the process until the ice storage in is full.
Safely store any food that could deteriorate while the power is off and unplug the refrigerator when installing this part. Wear work gloves to protect your hands.
Fixes these symptoms
- Ice maker not making ice
- Ice maker won’t dispense ice
- See more...
Installation Instructions
James from NEW LONDON, NH
Ice maker has stopped making ice and made a loud banging sound
I turned the water and electricity off for the refrigerator.(not sure if this is necessary but is safer)
Remove the ice bucket.
Cover the Ice auger with a hand towel to catch any screws which my get dropped.
Remove four Philips screws holding plastic cover to inside of the door. there are no clip/snaps to worry about but on/off switch needs to be un plugged. Remove cover.
Remove two nut head screws holding old ice maker.
Remove wiring harness from ice maker and lift ice maker up and out. There are two tabs on the door.
Unplug the wiring harness from the ice maker..
Installation: Press the wiring harness into clips on the new ice maker. Install ice maker onto door insuring it is over the tabs on door and the holes for nut screws line up. Plugging the wiring harness in and install two screws.
Plug on/off wiring onto switch and press plastic cover onto inside of door. Take care that it fits inside of rubber door seal. Install four philips screws.
Remove hand towel and install ice bucket making sure the ice maker is switched on. Close door.
Turn on water and electricity.
This took me 25 min. and I am sure would go faster if I had had instructions.
My refrigerator took awhile before it started to make cubes but has been working like new ever since.
This task is easy go for it. Read more...
Your Price
$146.94
In Stock
KitchenAid Refrigerator Replacement Ice Maker
PartSelect Number PS358591
Manufacturer Part Number 4317943
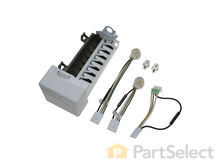
This ice maker (Complete Icemaker Assembly, Whirlpool Icemaker Kit, Ice Maker Assembly, Refrigerator Ice Maker, Icemaker) receives water from the water inlet valve, freezes it, and dispenses it into the ice bucket until the bucket is full. Ice makers will need to be replaced every 3-10 years depending on the frequency of usage, and water quality. You can perform a voltage test with a multimeter or perform an inlet valve test. If you’re unable to make ice, or notice leaks then it may be a sign your ice maker is damaged and could be in need of a replacement. This model measures approximately 11x5 inches, is constructed of plastic and metal, and comes in black/silver. This ice maker is a complete assembly; the whole assembly attaches to the wall of your freezer.
Fixes these symptoms
- Ice maker dispenses too little ice
- Ice maker dispenses too much ice
- Ice maker not making ice
- See more...
Installation Instructions
GLENN from ORLAND PARK, IL
was not making ice
take out ice bucket, just loosen the top 2 screws, remove the bottom screw, slide ice maker up & out, srewdriver to release wiring harness clip, reverse to put back in. was very simple. did not install water inlet kit yet. water under fridge stopped after i changed the ice maker.
Read more...
Your Price
$139.02
In Stock
KitchenAid Refrigerator Replacement Ice Maker
Unplug appliance.
Remove timer cover by hand pressure @ edge.
Remove single attachment screw & bracket at lower front of icemaker.
Disconnect wiring harness from socket @ rear of compartment.
Tricky part was determining what type of connection held the other two attachment points along the long edge of the icemaker. I did not have repair manual or useful drawing but looked @ PartsDirect pic of side brackets & used a small mirror to confirm that mine were also some sort of "snap in" attachment.
Remove icemaker unit by pushing upward and outward on the unit. I takes a good bit of pressure and will pop loose, but be careful not to break attachment bracket from freezer wall.
Scavenge shut off bar and wiring harness from old icemaker once you have it out & attach to new one before installing it back in freezer.
Again, you might find a mirror useful to align those pesky snap-in brackets with the new unit.
Since you probably kept your freezer running while waiting for the part, the plastic snap-ins will be cold and brittle. I warmed them up first by applying a dampened cloth heated in the microwave to make them a little more pliable.
A good push of the new unit towards the snap-ins along with some upward force will get it stable.
Reattach the metal screw in bracket & connect the wiring harness to rear plug... and don't forget to plug the whole thing back in.
It will take awhile for the first batch of cubes dump as the timer may need to cycle completely around to get to the fill cycle... be patient.
Dump the first couple of batches of cubes just to make sure you're free of any residue. Read more...
PartSelect Number PS2121513
Manufacturer Part Number D7824706Q
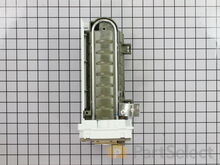
This ice maker (Ice Maker Assembly, Refrigerator Ice Maker) produces ice cubes that are ejected into the storage bucket. It is located in the freezer section of your appliance, mounted on the freezer wall. The ice maker can break from normal wear and accidental damage. If this happens, your refrigerator may no longer make ice cubes, or may not make enough cubes, and the part should be replaced. This model measures approximately 11 inches long and 5 inches wide. It’s constructed of plastic and metal, and comes in black/white/silver. This assembly includes the ice mold and the control device.
Fixes these symptoms
- Clicking sound
- Doesn’t stop running
- Ice maker dispenses too little ice
- See more...
Installation Instructions
Bernie from Diamond Bar, CA
Icemaker producing few or no cubes and often leaving "kling-ons" on ice tray
Interior surface of ice tray felt rough & flaky (coating deteriorated) so cubes would not release.Unplug appliance.
Remove timer cover by hand pressure @ edge.
Remove single attachment screw & bracket at lower front of icemaker.
Disconnect wiring harness from socket @ rear of compartment.
Tricky part was determining what type of connection held the other two attachment points along the long edge of the icemaker. I did not have repair manual or useful drawing but looked @ PartsDirect pic of side brackets & used a small mirror to confirm that mine were also some sort of "snap in" attachment.
Remove icemaker unit by pushing upward and outward on the unit. I takes a good bit of pressure and will pop loose, but be careful not to break attachment bracket from freezer wall.
Scavenge shut off bar and wiring harness from old icemaker once you have it out & attach to new one before installing it back in freezer.
Again, you might find a mirror useful to align those pesky snap-in brackets with the new unit.
Since you probably kept your freezer running while waiting for the part, the plastic snap-ins will be cold and brittle. I warmed them up first by applying a dampened cloth heated in the microwave to make them a little more pliable.
A good push of the new unit towards the snap-ins along with some upward force will get it stable.
Reattach the metal screw in bracket & connect the wiring harness to rear plug... and don't forget to plug the whole thing back in.
It will take awhile for the first batch of cubes dump as the timer may need to cycle completely around to get to the fill cycle... be patient.
Dump the first couple of batches of cubes just to make sure you're free of any residue. Read more...
Your Price
$144.95
In Stock
KitchenAid Refrigerator Ice Maker Assembly - 8 Cube
PartSelect Number PS869316
Manufacturer Part Number 2198597
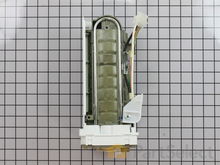
This Ice Maker (Icemaker Assembly, Complete Icemaker Assembly, Ice Maker Assembly, Refrigerator Ice Maker) can be used with 25-27 cubic feet refrigerators that have a vertical auger dispenser located on the freezer door. It’s used to make ice. When this part fails, no ice cubes will be made. It could prevent the icemaker from filling with water or just prevent the harvesting of the ice cubes. This is a sign the part should be replaced. The parts electrical contacts and motor can fail due to normal wear and tear. The icemaker attaches to the ceiling of the freezer compartment. This assembly measures 11 inches by 5 inches, is constructed of plastic and metal, and comes in black/white.
Fixes these symptoms
- Ice maker dispenses too little ice
- Ice maker not making ice
- Ice maker won’t dispense ice
- See more...
Installation Instructions
Phil from Auberry, CA
Ice maker stopped functioning
Remove the icemaker service door... gently pry the door pins from the hinge sockets. Remove the 3 screws from the under side of the icemaker with a nut driver (1/4"). Gently remove the icemaker . It's a tight fit between the top of the compartment and the icemaker lower support tray. Next, disconnect the electrical connector at the right side. You're done! Reverse procedure for installing. Good luck. Remember, your working with cold plastic...take your time and don't force too much.
Read more...
Your Price
$102.49
In Stock
KitchenAid Refrigerator Ice Bucket
PartSelect Number PS11757044
Manufacturer Part Number WPW10670845
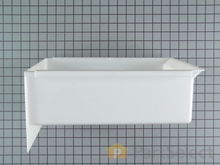
Bucket only. All other parts sold separately. This part holds the ice once it's released from the icemaker.
Fixes these symptoms
- Ice maker not making ice
- Ice maker won’t dispense ice
- Leaking
- See more...
Installation Instructions
Robert from Valencia, CA
Ice maker's ice tray coating coming off, ice bin had foul odor.
I noticed the coating inside the ice maker, the lining on the surface that the water contacts when making ice, was chipping off. I replaced the ice maker with a new unit and now there's no more bits of stuff in my ice. The other problem I had was the ice bin, it had picked up a weird smell over the years and I wanted to replace it. The new bin seems flimsier, but works fine. It didn't have the top attachment hole for the ice auger mechanism drilled out for some reason, it had a little "bump" in the plastic where it should be, but was never drilled out. Easy enough, I drilled the hole out and attached that top screw without any issue.
Read more...
KitchenAid Refrigerator Ice Container
PartSelect Number PS11753329
Manufacturer Part Number WPW10347093
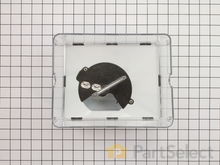
This ice container, also known as an ice bucket or ice bin, is an authentic OEM part that is designed to fit with refrigerators. It consists of a white base attached to a transparent plastic dish with a metal rod in the center known as an auger. It is where produced ice is collected and stored. The container serves as a reservoir for the ice and allows for convenient access to ice cubes or crushed ice whenever needed. It also prevents the ice from scattering throughout the freezer compartment. If you notice water leakages, visible damage on the ice container, experience difficulties dispensing ice, or notice ice clumping together in large masses, then you will likely need to replace the container.
Fixes these symptoms
- Ice maker not making ice
- Ice maker won’t dispense ice
- See more...
Installation Instructions
Kevin from VALDOSTA, GA
KitchenAid Refrigerator Ice Maker Assembly
PartSelect Number PS11769140
Manufacturer Part Number W10882923
This is an ice maker assembly for refrigerators. This assembly is responsible for freezing and breaking water that comes from the water line within your refrigerator. If your ice maker is not producing ice cubes anymore, and this assembly is turned on, you should test it with a multimeter before replacing it. This ice maker assembly features a primarily plastic construction, with a metal shut-off arm and two wire harnesses that supply it power. This ice maker assembly is an OEM part, and must be installed with the new wire harness in order for it to work.
Fixes these symptoms
- Ice maker not making ice
- Ice maker won’t dispense ice
- See more...
Installation Instructions
Greg from ALISO VIEJO, CA
Stopped making ice, confirmed ice in trough, not ejecting ice or cycling
Please note I had to remove the complete old wire harness from and install the new proper one as my part number was replaced with a new part number. The new ice maker repair kit comes with 2 new harnesses each slightly different one for a 22 cubic foot model the other for the 25cf model. It looks intimidating initially, just take pictures FIRST BEFORE removing old harness to see all the connections. I was surprised this was necessary but it is, as the 'H" pin on the front of the new ice maker motor was different from my old one. Would have only taken me 15 minutes or so to replace the old ice maker but with having to remove the old harness and re-route the new harness it will take you a bit of time and patience but you can do it. Another note you will have to remove the Electromagnet to get to the green grounding screw on the ice maker itself. There are good videos on Part Select and youtube showing how to remove the ice maker itself, but did not find one on the wire harness, like I said just take lots of good pictures showing all the connection points on the old harness and take your time. It was not too hard. And now I have ice again!
Read more...
KitchenAid Refrigerator Ice Maker
PartSelect Number PS11749920
Manufacturer Part Number WPW10190965
This is an icemaker for your refrigerator/freezer. Take note that this part does not include the front cover, the wire harness, or the shut-off arm. These must be ordered separately or recycled from your old unit. This unit as a whole will allow your appliance to produce ice. This model makes eight radius ice cubes.If your ice maker is no longer making ice, dispensing ice, or if it is leaking, it will need to be replaced.
Fixes these symptoms
- Ice maker not making ice
- Ice maker won’t dispense ice
- Leaking
- See more...
Installation Instructions
Jamie from Mitchell, SD
Ice maker quit working
First I removed the three screws with a nut driver and then disconnected the wire plug from the old ice maker. I plugged in the new unit and re-installed the screws and instantly the unit started to work. I did have to adjust the water level on the unit ...just turn the small plastic knob (use a slotted screw driver) on the side of the unit counterclockwise to increase the water level (do not turn more than one full turn or you could damage the unit) . It works perfect and saved me lots of money!!
Read more...
KitchenAid Refrigerator Coupling
PartSelect Number PS11739763
Manufacturer Part Number WP2220458
This coupling is used for indoor ice dispensers.
Fixes these symptoms
- Ice maker not making ice
- Ice maker won’t dispense ice
- See more...
Installation Instructions
patrick from fairfax, VA
ice maker gear broken
I removed the ice bucket,the gear is located under the ice bucket and engages when ice bucket sits on it and turns the tray for ice to fall in the shute,2 screws to remove and the gear comes off and I put the new one on and put the screws back,very easy to do, total time 5 minutes,repair man wanted to charge $114 for the part and $100 for labor,I did it all for $25 thru this site,I love this site,it gsaved me alot of money,thanks partselect.,
Read more...
Related KitchenAid Refrigerator Parts
- All KitchenAid Refrigerator parts
- KitchenAid Refrigerator Brackets and Flanges
- KitchenAid Refrigerator Caps and Lids
- KitchenAid Refrigerator Circuit Boards and Touch Pads
- KitchenAid Refrigerator Compressors
- KitchenAid Refrigerator Deflectors and Chutes
- KitchenAid Refrigerator Dispensers
- KitchenAid Refrigerator Doors
- KitchenAid Refrigerator Drawers and Glides
- KitchenAid Refrigerator Drip Bowls
- KitchenAid Refrigerator Ducts and Vents
- KitchenAid Refrigerator Elements and Burners
- KitchenAid Refrigerator Fans and Blowers
- KitchenAid Refrigerator Filters
- KitchenAid Refrigerator Grates
- KitchenAid Refrigerator Grilles and Kickplates
- KitchenAid Refrigerator Handles
- KitchenAid Refrigerator Hardware
- KitchenAid Refrigerator Hinges
- KitchenAid Refrigerator Hoses and Tubes
- KitchenAid Refrigerator Insulations
- KitchenAid Refrigerator Knobs
- KitchenAid Refrigerator Lights and Bulbs
- KitchenAid Refrigerator Motors
- KitchenAid Refrigerator Seals and Gaskets
- KitchenAid Refrigerator Springs and Shock Absorbers
- KitchenAid Refrigerator Switches
- KitchenAid Refrigerator Tanks and Containers
- KitchenAid Refrigerator Thermostats
- KitchenAid Refrigerator Trays and Shelves
- KitchenAid Refrigerator Trims
- KitchenAid Refrigerator Valves
- KitchenAid Refrigerator Wheels and Rollers
- KitchenAid Refrigerator Wire Plugs and Connectors


