Your coupon for will be reflected when you check out!
✖
Your coupon for
✖
Hello!
You're visiting the PartSelect site in U.S.
Would you like to shop on the Canadian site?
Stay on this site
Go to Canadian site
✖
Model Number Locations
1Select Category Type
Select Category Type
2Select Product Type
Select Product Type
3Select {MODEL} Type
Select {MODEL} Type
Sample Model Number Tags
Model numbers can be made up of numbers (1005400, for example) or a combination of letters and numbers (LAT1000AAE). The model number will most likely appear on either a paper sticker or a metal plate. Your appliance's model number tag may look similar to the sample model number tags shown here (model number highlighted in yellow):
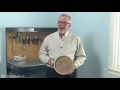
Range Dual Surface Element 2500w/1200w Specifications
This is the replacement large surface element for your cooktop or range. It is approximately 10-inches in diameter and is 1200/2500 watts. The large surface element is installed under the cooktop and heats up the area directly above it. You will need to replace the element if it does not heat up properly. As you will be working around electricity, be sure that your range is disconnected from power before you begin this repair. This is an OEM part sourced directly from the manufacturer.
How Buying OEM Parts Can Save You Time and Money
Why buy the real thing?
OEM stands for Original Equipment Manufacturer. Simply put, this means that the company who made your appliance is also supplying the replacement part for it.
Keep searches simple. Use keywords, e.g. "leaking", "pump", "broken" or "fit".
Sorry, we couldn't find any existing reviews that matched. Try using some different or simpler keywords.
★★★★★
★★★★★
Charles L - November 20, 2018
Verified Purchase
Part fit perfectly.
Easy repair and correct part on order.
★★★★★
★★★★★
Daniel P - March 14, 2022
Verified Purchase
The part came quickly and works well.
It was a little tricky to figure out the installation as my existing piece was 30 some years old and wired differently. But if I need to replace another it should be simple as I have an example to look at. I am very satisfied with my purchase.
★★★★★
★★★★★
Kelly E - June 2, 2020
Verified Purchase
Whirlpool oven dual burner replacement
The burner was a little tricky to install but after a couple tries it worked perfectly. We thought we might have to completely replace our stove but with this repair, it looks like we’ll have a little more time before we have to buy a new one.
★★★★★
★★★★★
Scott A - November 22, 2018
Verified Purchase
Easy Repair
The part was delivered in good time and the repair was easily done.
★★★★★
★★★★★
Karen G - November 13, 2018
Verified Purchase
Easy repair
The first part we ordered was broke when we got it, but sometimes that happens! The customer service rep was great to deal with, got everything straight and sent us our new burner. Went in easily and we now have a working stove again!
★★★★★
★★★★★
Mark K - November 16, 2020
Verified Purchase
Dual burner
The burner did not fix the problem. I just ordered a new switch to hopefully fix the problem
★★★★★
★★★★★
Patricia B - January 4, 2019
Verified Purchase
Work at as expected
Came fast in good condition
★★★★★
★★★★★
Don K - October 18, 2018
Verified Purchase
Dual element range burner replacement
Fist element I received did not fit correctly. I contacted part select and they sent a replacement element with next day shipping at their expense. replacement burner fit perfectly and works great. Part select refunded the purchase price of the first element promptly. Customer service was great and very easy to deal with. I will definitely use part select as my needs require in the future. Great job part select!!!
★★★★★
★★★★★
Larry H - March 5, 2019
Verified Purchase
Dual Element with failed inner coil
Fairly easy repair, but the terminals did not match up. Took an extra half hour to replace one of the leads and swap their locations on a Whirlpool Stove to get them connected properly. Once that was done, the element worked.
★★★★★
★★★★★
Royal W - July 27, 2022
Verified Purchase
It works after I change the connector
Besides waited for almost two months for the part. One of the connector was the wrong size. I have to buy a pack of connectors to replace the difference size connector in order to get it to work. I still did not get my shipping cost refund back to my credit card as promised.
< Prev
1
2
Next >
Customer Repair Stories
Average Repair Rating: 3.6 / 5.0, 10 reviews.
What's this?
Sort by:
< Prev
1
Next >
Search filter:
Clear Filter
Your search term must have 3 or more characters.
Keep searches simple. Use keywords, e.g. "leaking", "pump", "broken" or "fit".
Sorry, we couldn't find any existing installation instruction that matched.
Dual inner element stopped working. The ceramic portion had a crack most likely from thermal stress over the years.
First I found a YouTube video for Maytag Range Repair – How to replace the Surface Element with Limiter - 6" - 1200W
The steps are very easy- 1. Open oven door and locate and remove 2 screws holding top cook surface. These are located near the top inside edge
2. Lift surface cook top and then remove 4 screws ho
... Read morelding this section to the cook top. This may require 2 people but I was able to hold the cook top and loosen the 4 screws myself. Then put the cook top aside.
3. Take a photo of the element being replaced for wiring connections.
4. Removing the wiring and element holding clips was very easy. I used needle nose pliers for both
5. The clips have to be removed from the old element and put on the new one. Place them in the same locations
6. Make sure to reconnect the wires to the same pin locations. The replacement element I had the red (hot) wire pin 2b was in A different location so I had to use the extension wire supplied with the new replacement element
7. Put everything back together in reverse order.
Easy peasy, took me about 40 minutes to complete the entire replacement and have it back in place working.
Read less
Dominique from ASHLAND, MA
Difficulty Level:
Very Easy
Total Repair Time:
30 - 60 mins
Tools:
Pliers, Screw drivers
2 of 2 peoplefound this instruction helpful.
Was this instruction helpful to you?
Thank you for voting!
Old dual burner lost one half. It appeared the metal strip that wound into and around the circle, broke right where it came into the inside of the entrance, and I wasn't about to try and break everything open to try and fix it, as it didn't look like soldering would be easy, or that it would fix it.
Verified via ohmmeter that one of the two burners was open and not working. I also tested the switch and that appeared to be working okay. I then took out the old unit and compared it to the new one, and found that they upgraded the new unit. I followed the instructions to match the labeled parts and move the wire to the newer location of
... Read more that. i.e the old one had 2B and 2A at the top and 1B and 1A at the bottom. The new one had 2B and 1B at the top and 2A and 1A at the bottom. It did come with wire extenders and insulated tubes on top of them, and extra to cover additional. After a couple of tries, I decided which wire I needed to use on which (small connectors to match small, and large to match large.) In a second try I decided to flip it over to have it face up instead of down. Overall, it worked out very well, and I was very pleased when I did the power up test and everything worked as desired.
Read less
Chris from WHEATON, IL
Difficulty Level:
Easy
Total Repair Time:
30 - 60 mins
Tools:
Nutdriver, Screw drivers
1 personfound this instruction helpful.
Was this instruction helpful to you?
Thank you for voting!
Replace old Element
The new element wiring placements were totally different from the old element. Lucky for me the lettering printed on the terminals for each pole was the same as on the old one. It was just a matter of matching up each terminal pole lettering. The instructions that came with the new element were of no help at all. Youtube was my best help
... Read moreer.
Read less
Patricia Josephine from N RICHLND HLS, TX
Difficulty Level:
A Bit Difficult
Total Repair Time:
30 - 60 mins
Tools:
Pliers, Screw drivers
1 personfound this instruction helpful.
Was this instruction helpful to you?
Thank you for voting!
small inner burnner out
looked on internet on how to remove top. an easy fix after watching video
phillip from RUTH, NV
Difficulty Level:
Easy
Total Repair Time:
15 - 30 mins
Tools:
Pliers, Screw drivers
2 of 2 peoplefound this instruction helpful.
Was this instruction helpful to you?
Thank you for voting!
Dual Surface Element went out
Followed the instructions in the video provided by PartSelect, which was very accurate. They only problem I have encountered is that the wiring from the old element compared to the new element do not match up 100%. I had to call Whirlpool today and schedule a Tech to come out and see if they can resolve the problem. Right now, when the bu
... Read morerner is turned on, both the inner and outer elements turn on.
Read less
Larry from RADCLIFF, KY
Difficulty Level:
Easy
Total Repair Time:
30 - 60 mins
Tools:
Pliers, Screw drivers
1 personfound this instruction helpful.
Was this instruction helpful to you?
Thank you for voting!
Center coil of dual element failed
Easy repair with Phillips screw driver and needle nose pliers. 1. Turn off Breakers or unplug range, Open oven door and remove the two screws holding the glass top to the oven frame. 2. Slide glass top forward and remove the two electrical connectors at the rear of the glass top, one on each side. 3. Remove the Phillips screw holding t
... Read morehe ground wire from the rear top flange of the glass top. 4. Glass top can now be removed and placed glass side down on a padded flat table top. 5. Take a few pictures of the wiring and brackets for reassembly reference. 6. Remove the 4 wires from the defective heating element with needle nose pliers (note locations for reassembly to the new element) 7. Remove the Phillips screw on the rear side of the bracket holding the defective element. Carefully lift off the bracket. 8. Heating element can now be removed. 9. Remove the locating flanges from the defective element and install on the new element in the same locations. Clean glass if necessary and place new element on glass. 10. Carefully locate the flange tangs into the same holes on the bracket, reference photos or other side for locations. Ensure small element bracket was replaced in mounting slot of large bracket and reattach bracket screw. 11. Replace wires to same locations, remove and lightly pinch connectors if they appear loose, then reassemble. 12. Replace glass top on range, reconnect the two electrical connectors and ground wire, slide forward and replace the two mounting screws. 13. Restore power and check new element for function. Extension wires which came with the new element were not needed in this application. Total repair time about 20 min.
Read less
Gary from ELVERSON, PA
Difficulty Level:
Easy
Total Repair Time:
15 - 30 mins
Tools:
Pliers, Screw drivers
11 of 13 peoplefound this instruction helpful.
Was this instruction helpful to you?
Thank you for voting!
bad burner
My dual zone burner would trip my breaker anytime i tried to turn it on. All the other burners would work fine. I searched online and found a way to test my burner, which was shorted or grounded out. I purchased a new burner from the site...It was as cheap or cheaper than other sites. It showed up a few days quicker than i was expecting..
... Read moreI also replaced the switch to the burner, just as a precaution and to save time since i already had the top glass off of my burners....EASY JOB!
Read less
Krystal from Centralia, IL
Difficulty Level:
Really Easy
Total Repair Time:
30 - 60 mins
Tools:
Screw drivers
1 personfound this instruction helpful.
Was this instruction helpful to you?
Thank you for voting!
Radiant element, 2400 watt, under Ceran glass cok top needed replacement.
turned off power removed ceran top from cabinet removed element installed new element replaced top powered up and was done
GEORGE from NEWNAN, GA
Difficulty Level:
Easy
Total Repair Time:
15 - 30 mins
Tools:
Pliers, Screw drivers
167 of 254 peoplefound this instruction helpful.
Was this instruction helpful to you?
Thank you for voting!
Bad Element
Bought new element and installed. Very simple. Used phillips screw driver.
Michael from Howell, MI
Difficulty Level:
Easy
Total Repair Time:
15 - 30 mins
Tools:
Screw drivers
77 of 123 peoplefound this instruction helpful.
Was this instruction helpful to you?
Thank you for voting!
double coil which center coil had burned out on glass top range
Unplug range and remove back panel (4 screws) unplug top burner plugs (2). Open oven door and remove 2 screws from under front of top. Pull top out and up to unhook from back. Remove top and lay cardboard on top of range. Flip over the ranges glass top unit and lay on cardboard. Remove screws from steel bottom and remove from top. Flip ov
... Read moreer steel bottom with burners attached. Remove attaching clips for burner and unscrew them from the burner then reinstall in new burner in the same place as old burner. Lay new burner on top of old burner and remove one wire at a time, transfering it to the matching plug on the new burner. When wiring is done remove old burner and attach 2 clips to steel backing plate. Vacuum off the glass top and reinstall the steel bottom to the glass top. Flip over the top, remove cardboard and slide top into back of range top and lower into place. Attach 2 screws under front. Reattach the tops plugs at the rear and reattach the back panel. Plug in range and slide back into place. Test units and all other burners. Done...
Read less
Frank from Owls Head, ME
Difficulty Level:
A Bit Difficult
Total Repair Time:
15 - 30 mins
Tools:
Nutdriver, Screw drivers
50 of 56 peoplefound this instruction helpful.
Was this instruction helpful to you?
Thank you for voting!
< Prev
1
Next >
Questions and Answers
Ask our experts a question about this part and we'll get back to you as soon as possible!
45 questions answered by our experts.
Sort by:
< Prev
1
2
3
Next >
Search filter:
Clear Filter
Your search term must have 3 or more characters.
Keep searches simple. Use keywords, e.g. "leaking", "pump", "broken" or "fit".
Sorry, we couldn't find any existing answers that matched.Try using some different or simpler keywords, or submit your new question by using the "Ask a Question" button above!
Kathy
September 25, 2017
Front dual burners is on high only regardless of where I set the dial for heat.
For model number KERC500HWH3
Hi Kathy, Thank you for the great question. It sounds like you have a defective Dual Infinite Switch,PartSelect Number PS11747156. This switch should be replaced. Hope this helps!
26 people found this helpful.
Was this helpful?
Thank you for voting!
Louis
January 16, 2020
Hello. My KitchenAid range on the right front dual surface element inner was not heating. What part should be replaced? Thank you.
For model number YKERS205TS5
Hi Louis,
Thank you for your question. If the inner portion of the front dual surface burner element is not heating the issue is the burner switch and it will need to be replaced. The part number listed under your model number for the burner switch is PS11744412. We hope this helps. Thank you and have a great day.
10 people found this helpful.
Was this helpful?
Thank you for voting!
Andrea
November 16, 2017
The two right burners will not stay on. They act as if they will turn on the indicator light turns on but 3 mins later it turns off. The left two work fine. Is this just a simple burner replacement?
For model number KERK807PSS00
Hi Andrea, Thank you for the question.This sounds like an issue with the infinite switches. If the element was defective it would not turn on at all or part of the element would be burnt out. The switch keeps the element on and the light indicating the switch is in the on position, if both are turning off then the switch would need to be replaced. All four switches come in a kit, PartSelect Number PS2378279. Hope this helps!
I am a novice at this kind of repair. Please send me step by step instructions on how to remove the glass cooktop so I can replace a dual coil. I think it is the coil and not the switch since the inner burner is working and the out one is not. Thank you.
For model number RF367LXSY0
Hello Peter,
Thank you for the question. Here are some installation steps that we have listed here .
Unplug range and remove the 4 screws holding the back panel on.Next unplug Dual Burner plugs.Next open the oven door and remove 2 screws from under front of top. Pull top out and up to unhook from the back. Remove the top and flip over the ranges glass top unit and lay on a flat surface. Remove the screws from steel bracket and remove it from the top. Next remove the attaching clips for burner .Next reinstall in new burner in the same place as old burner. Remove one wire at a time, transferring it to the matching plug on the new burner. Once the wiring is attached remove old burner and attach 2 clips to the bracket. Flip over the top and slide top into back of range and lower into place. Attach 2 screws under front. Reattach the tops plugs at the rear and reattach the back panel.
Hope this helps
5 people found this helpful.
Was this helpful?
Thank you for voting!
Dave
October 1, 2017
The front left, circular dual burner only works in the inner burner for a few seconds. A clicking noise comes from the switch and then no more heat. The outer burner does not work. Is this just a switch problem?
For model number KESA907PSS00
Hello Dave, thank you for contacting us. That sounds like it would be the element that is faulty. Good luck with the repair!
4 people found this helpful.
Was this helpful?
Thank you for voting!
Gary
October 2, 2019
Centre element of the dual element no longer works
For model number WERP4120PB
Hello Gary, thank you for writing. You will want to replace this Dual Surface Element, part number PS11764902 for your model. Good luck with your repair!
3 people found this helpful.
Was this helpful?
Thank you for voting!
Clifford
January 3, 2020
My outer left double range heating element only turn on the inner part and not the outer one. I thought it was the element and switched to a new one but the same thing happened. Could it be the switch? If so what part should i order?
For model number YKESS907SS
Good Day Clifford. Thank you for your question in regards to your unit (Model Number YKESS907SS). Based on our research, you may need to replace the Infinite Switch on your unit (PartSelect Number PS11747406). You can order this part either online at our website www.PartSelect.ca or by calling us by phone at 877-910-4613. Best Regards.
2 people found this helpful.
Was this helpful?
Thank you for voting!
Mike
October 30, 2017
First the left now the right front dual elements are having the same problem. Only the large outer part of the elements heat up the centers do not. Will replacing the elements fix this or is it something else? Thanks
For model number GR563LXST0
Hi Mike, Thank you for the question. I suggest testing the Infinite Burner Control Switch and the Element to confirm what part is defective. Hope this helps!
We need to replace the left back burner on the stove. The diameter of the burner is 7 inches. We can only find replacements for the larger 9 inch diameter burners. There does not appear to be enough room for the larger burner to replace the smaller 7 inch burner. Where can be find a 7 inch diameter burner replacement?
For model number Kenmore 95012101
Hello Patricia, Thank you for your inquiry. We show that part number W10823699 is the 7 inch element for this model. Hope this helps!
2 people found this helpful.
Was this helpful?
Thank you for voting!
Vicki
June 4, 2019
I have a 20yr old Whirlpool cooktop. It has a cartridge on the left with two burners and a cartridge on the right with 2 burners divided by a downdraft vent in the middle. The large burner in one of the cartridges will not heat up anymore. I’m assuming i need a new element as all the other burners work perfectly. Please tell me which part number i need to order. My repair guy took the cartridge apart revealing the two elements inside. The large one that won’t work was totally rusted to pieces basically falling all apart when you touched it. The smaller burner was ok but i’d like to replace both of them so i need to know what part numbers i will need for this Whirlpool model no.
For model number RCM30DB
Hello Vicki, thank you for inquiring. The large Surface Element is part PS11764903, and the small Surface Element is part PS11764910.
1 person found this helpful.
Was this helpful?
Thank you for voting!
< Prev
1
2
3
Next >
✖
Ask a Question
Ask our experts a question on this part and we'll respond as soon as we can.
Item is in stock and will ship today if your order is placed before 4:00 PM Eastern Standard Time.
If your order is placed after 4:00 PM EST, the in stock items will ship on the next business day.
On Order
Item is not in stock and usually ships 3-5 business days from the time you place your order.
Special Order
Item is not in stock and usually ships 10-15 business days from the time you place your order.
NLA - No Longer Available
This item is no longer being made by the manufacturer, and cannot be added to your shopping cart.
[{"position":0,"name":"Home","title":"Home","url":"/"},{"position":1,"name":"Range","title":"Range","url":"/Range-Parts.htm"},{"position":2,"name":"Element or Burner","title":"Element or Burner","url":"/Range-Elements-and-Burners.htm"},{"position":3,"name":"W10823692","title":"W10823692","url":""}]
You added 1 item to your cart
✖
% OFF
$
$
Qty:
Total item(s) in cart:
Order Subtotal
$
*Taxes and shipping will be applied during checkout


 Stay on this site
 Go to Canadian site


