Your coupon for will be reflected when you check out!
✖
Your coupon for
✖
Hello!
You're visiting the PartSelect site in U.S.
Would you like to shop on the Canadian site?
Stay on this site
Go to Canadian site
✖
Model Number Locations
1Select Category Type
Select Category Type
2Select Product Type
Select Product Type
3Select {MODEL} Type
Select {MODEL} Type
Sample Model Number Tags
Model numbers can be made up of numbers (1005400, for example) or a combination of letters and numbers (LAT1000AAE). The model number will most likely appear on either a paper sticker or a metal plate. Your appliance's model number tag may look similar to the sample model number tags shown here (model number highlighted in yellow):
The cold water inlet valve on your washing machine dispenses the cold water and bleach into the washer in the prewash cycle. This inlet valve has a standard hose fitting inlet and 2 water outlets facing 45 degrees to the left. The water inlet valve opens to allow water to enter the washing machine. If the water inlet valve is defective, the washer may leak, fill slowly, or not fill at all. To test your valve, unplug the washer when the symptom occurs. If the washer continues to fill, then your inlet valve is defective. This part is approximately 4 inches long x 3 inches wide.
How Buying OEM Parts Can Save You Time and Money
Why buy the real thing?
OEM stands for Original Equipment Manufacturer. Simply put, this means that the company who made your appliance is also supplying the replacement part for it.
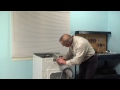
Replacing your LG Washer Washer Inlet Valve Assembly
Troubleshooting
This part fixes the following symptoms:
Leaking | Water Filling Issues | No hot or cold water
This part works with the following products:
Washer, Washer Dryer Combo.
Part# 5220FR2075L replaces these:
AP5986564, 5221ER1003A, AGM73269503
Customer Reviews
Average Rating:
★★★★★
★★★★★
91 Reviews
4.9
Filter By Rating:
5 Stars
81
4 Stars
9
3 Stars
0
2 Stars
1
1 Star
0
Sort by:
< Prev
1
2
3
Next >
Search filter:
Clear Filter
Your search term must have 3 or more characters.
Keep searches simple. Use keywords, e.g. "leaking", "pump", "broken" or "fit".
Sorry, we couldn't find any existing reviews that matched. Try using some different or simpler keywords.
★★★★★
★★★★★
GREG K - September 23, 2018
Verified Purchase
Easy Repair and took 15 Minutes. Solved my leak issue
Our 1.5 year old LG Washer decided to just start leaking on evening. Did not notice until our downstairs ceiling leaked all over the new carpet and my expensive photo books. Oh well, stuff happens. Took washer apart and ran a few loads to see where it might be leaking. After researching YouTube, I finally found the leak in the little cold water pump and this $40 buck part fixed my issue. Wife had already purchased a new washer to replace this one because she thought it was the drum that was leaking. I am so glad that I researched this and this repair took 15 minutes tops. PartSelect also shipped this part overnight to me so that I could go on my 2.5 week vacation and not have to worry about repairs when I got home. This part is just like the OEM original and hopefully this will last longer than 1.5 years. If not, I know that part select will have the part and my back covered. THANKS PartSelect for everything! (Greg - Verified Buyer)
★★★★★
★★★★★
Monika H - February 2, 2018
Verified Purchase
Easy installation
Part was easy to install (thanks to video instructions) and fixed the leaking problem.
★★★★★
★★★★★
James M - April 22, 2019
Verified Purchase
easy repair, worked as expected
The part came fast and installed easily. Washer is working again with no leaks.
★★★★★
★★★★★
Tammy T - January 25, 2021
Verified Purchase
First Time Repair
Easy to install and was back to using my washer in minutes.
★★★★★
★★★★★
Donald S - February 18, 2018
Verified Purchase
Simple and a fast repair. Easy if you pay attention when removing old valve.
Part came in and washer was operational in less than an hour.
★★★★★
★★★★★
John S - February 22, 2018
Verified Purchase
Worked Perfect, Easy to replace, saved a lot.
Part was OEM LG as specified. Easy to replace and worked perfect. Probably saved over $200 by doing it myself. Very easy to find part number and lots of instructions on the net. Thanks much.
★★★★★
★★★★★
Shaun D - May 29, 2025
Verified Purchase
Fixed my washer!
This easy to do fix saved me quite a bit of money and was exactly the right part
★★★★★
★★★★★
Diane T - October 31, 2024
Verified Purchase
Easy repair
Watched the video and when the part came in the mail put in and now my washing machine is working perfectly. Thank you.
★★★★★
★★★★★
Paul H - February 21, 2018
Verified Purchase
easy to replace this valve
Lid off, three hose clips, two screws and you replaced valve and machine is back to business
★★★★★
★★★★★
Keith R - March 1, 2018
Verified Purchase
Easier than expected
Our LG front load washer had been leaking for a while. I expected to find a small hole somewhere but instead found a rusty valve. I looked at a drawing to find the part name, ordered from my phone, received the part a few days later, it’s good as new. The wife is happy... well, not about doing laundry but I’m doing a few loads,too!
< Prev
1
2
3
Next >
Customer Repair Stories
Average Repair Rating: 4.2 / 5.0, 25 reviews.
What's this?
Sort by:
< Prev
1
2
3
Next >
Search filter:
Clear Filter
Your search term must have 3 or more characters.
Keep searches simple. Use keywords, e.g. "leaking", "pump", "broken" or "fit".
Sorry, we couldn't find any existing installation instruction that matched.
Hot & Cold Water Inlet Valves Leak
YouTube is your friend for many such repairs. See this link for an overall description:
https://www.youtube.com/watch?v=WuvLuC8x4_s
I had to remove the top panel to determine exactly which valve was leaking. It turned out both hot and cold-water valves were defective.
After unit is unplugged and top is r
... Read moreemoved, it's a simple matter to remove/replace hose connections and electrical connections. It took me less than an hour to complete the task once parts were in hand.
Again, YouTube is your friend for such repairs.
Read less
Dennis from Prescott, AZ
Difficulty Level:
Really Easy
Total Repair Time:
30 - 60 mins
Tools:
Pliers
3 of 3 peoplefound this instruction helpful.
Was this instruction helpful to you?
Thank you for voting!
Washer would not fill with water and a (I E) Code displayed on the screen.
I looked at the video that is on the partselect.com website. The person that I talked to from the website was very knowledgeable about the problem with my washer and he gave me the part number to type in the search box of the website. When I typed the part number in the search box the part showed up and the installation video showed up al
... Read moreso. The video is an excellent video. It shows exactly how to do it. I also downloaded the operator manual from the website to look up what the error code meant.
Read less
Manuel from MESILLA PARK, NM
Difficulty Level:
Easy
Total Repair Time:
15 - 30 mins
Tools:
Screw drivers
1 personfound this instruction helpful.
Was this instruction helpful to you?
Thank you for voting!
Water was collecting in the machine after it finished its cycle.
Turned off hot and cold water supply. Pulled out machine and disconnected hoses, unplugged power.
Unscrewed 4 screws at back top of machine (holding plastic bracket to cover). Pulled out trays from front where detergent is poured, and removed small screws under trays.
Slid cover back and up. This was the only tric
... Read moreky part. There are pegs that must line up with large holes in cover before you can easily lift cover up. Helps to look from underneath and find pegs on each side.
Using pliers, fully open clamps holding hoses to the inlet valves, and carefully pull off hoses while keeping clamps open with pliers… making sure to keep track of which hose goes to each motor. Take a picture of electrical connectors noting color and sequence of connectors on each inlet valve motor. Pull all connectors off.
Unscrew screws holding each inlet valve to machine. Put new inlet valves in place of old, and screw in place. Reconnect hoses (using pliers to hold open clamps, then slide clamps over tubing and inlet valve connector). Reconnect electrical connectors carefulljng lining up colors of wires and sequence using picture taken in previous step.
Replace cover. Screw all screws back to secure cover. Replace trays.
Cold water inlet valve was leaking where solenoid attaches to valve body.
Hardest part of the job was getting the washer away from the wall. :) Disconnect power & water Remove top panel, two screws at back Remove two screws holding valve to washer body Use pliers to loosen and pull back spring clamps on three water tubes Remove tubes by twisting and pulling Reverse process to ins
... Read moretall new valve.
I am convinced that the original valve began leaking because I had heard water hammer for years as that valve opened and closed during operation. I bought two water hammer arrestors (less than $30) that attach inline with the inlet hoses and I think that will prevent the problem from recurring.
Read less
Fredrick from KAYSVILLE, UT
Difficulty Level:
Really Easy
Total Repair Time:
15 - 30 mins
Tools:
Pliers, Screw drivers
2 of 2 peoplefound this instruction helpful.
Was this instruction helpful to you?
Thank you for voting!
Washer was putting water in tub when it was in the spin cycle
Unpluged -shut off water removed 2 screws on lid,removed lid took 2 screws out holding part on swapped the hoses out and pluged wires in.
John from SOMERSET, KY
Difficulty Level:
Really Easy
Total Repair Time:
30 - 60 mins
Tools:
Nutdriver, Pliers, Screw drivers
2 of 2 peoplefound this instruction helpful.
Was this instruction helpful to you?
Thank you for voting!
Water was leaking into washing machine after the washer was shut off
Removed the cover from the washing machine, the two valves(cold & hot) are located in the read top of the machine, removed the hoses to the valves, removed the nut that holds on the valve to the washer and placed new valve into washer and placed the nut back onto new valve, placed the hoses back onto the new valve.
Old cold water inlet was leaking , as it progressively got worse,it poured.
With my wife's help( 2 shoukder surgeries ), pulled it forward, unplugged power source, turned Both water supplies off. Removed two phillip screws from each upper ( plastic) holder. Bumped top from front( works really well if you can use both arms,and with rubber gloves on for traction, or go to harbor freight purchase a glass s
... Read moreuction cup) . I marked ( with a sharpie) the solenoids/hoses,and wires, ( facing front ,right to left,1,2,3.), removed plugs,loosened clamps and pushed them back,gave each hose a twist,and removed them. Took two screws 5/16 from the back that hold the valve assembly in out. Removed old valve assembly, put new in place, reverse procedure for assembly. Once all is hooked up,and water dried, I plugged in,turned water on watched for two cycles( you need not stand over it,if it leaks you will know it) to double check, installed top,and we pushed it back in place. Very simple to do,these washing machines are so easy to work on. Now we enjoy a dry laundry room,and you can to. ??
Read less
Kevin from DENHAM SPGS, LA
Difficulty Level:
Really Easy
Total Repair Time:
30 - 60 mins
Tools:
Nutdriver, Pliers, Screw drivers
1 personfound this instruction helpful.
Was this instruction helpful to you?
Thank you for voting!
Water not flowing into the washer
Ordered and replaced the hot and cold inlet valves - followed the instructions off of the video posted on the Part Select website ... completed the repair in less than 10 minutes
We're sorry, but our Q&A experts are temporarily unavailable.
Please check back later if you still haven't found the answer you need.
24 questions answered by our experts.
Sort by:
< Prev
1
2
3
Next >
Search filter:
Clear Filter
Your search term must have 3 or more characters.
Keep searches simple. Use keywords, e.g. "leaking", "pump", "broken" or "fit".
Sorry, we couldn't find any existing answers that matched.Try using some different or simpler keywords, or submit your new question by using the "Ask a Question" button above!
Derek
February 4, 2018
Will this fit the wm2650hva model?
For model number wm2650hva
Hello Derek, Thank you for contacting us. I have researched the model you have provided and have found the part you’re looking for is PartSelect Number: PS11728995 for the Cold water and PartSelect Number: PS3527427 for the Hot. Good luck with the repair!
I'm trying to troubleshoot my problem. After running a load of wash, water clears out, no problems. Then if i don't use the washer for a few days, about 3 cups of water fills the washing machine. It's always to aproximatly the same level and it always takes a few days of nonoperation to fill. I'm trying to figure out what to fix.
For model number WM2233HS
Hello Jenna, thank you for your question. This issue could be the water valve itself, that is leaking into the washer after the unit is done its cycles. Its possible the valve is stuck slightly open and is allowing water to come into the tub. Or, the problem might be that water is coming BACK into the unit after its been pumped out. I would recommend checking the drain hoses, and recommendations for how the unit is set up to be sure that the hoses are not kinked, or have moved. Sometimes, if the hoses are not installed properly, water can't get all the way out of the hoses then some comes back in. If the appliance was installed properly, and the hoses are clear, not kinked and set up properly, the issue is probably with the water valve for the appliance. I hope this helps!
8 people found this helpful.
Was this helpful?
Thank you for voting!
David
May 1, 2018
Washer leaking in the front. What do you think is wrong?
For model number WM2016CW/01
Hello David, thank you for your question. The leaking could be coming from one of the water valve, the drain pump, or a hose that has come loose or has cracked or broken. This front load washer also has a large rubber door gasket that can sometimes get ripped and will cause leaking at the front of the unit. I would recommend removing the back panel, and top panel to see if you can locate the leak, then we can provide more information on the parts you would need to fix it! I hope this helps!
7 people found this helpful.
Was this helpful?
Thank you for voting!
Christina
May 16, 2019
The washer continues to fill what is the part number or is this it for the water inlet valve
For model number RTW4516FW2
Hello Christina, thank you for your question. The water valve for this unit is actually PartSelect Number: PS12349269. Please enter the part number into the site for current price and availability. Good luck with your repair!
7 people found this helpful.
Was this helpful?
Thank you for voting!
KEVIN
November 21, 2018
Water is leaking out the top of the inlet valves. If i replace the part is there something, like high water pressure, that i should be concerned about damaging the replacement as well?Thanks
For model number Kenmore 796
Hi Kevin,
Thank you for your question. Before installing the new water inlet valve, you will need to check the water pressure coming from the where it connects to the water inlet valve to make sure the correct amount is coming out. I hope this helps. Thank you and have a great day!
4 people found this helpful.
Was this helpful?
Thank you for voting!
Ray
November 23, 2019
I just have one solenoid leaking. Can i just replace the solenoid instead of the whole valve?
For model number WM2010CW
Hello Ray and thanks for writing.
Yes, you can if you can find the correct solenoid. We do not carry this part on its own it comes as part of the water inlet valve. We hope this helps. Please contact us anytime.
4 people found this helpful.
Was this helpful?
Thank you for voting!
David
February 25, 2018
I got this part but i made a simple but critical mistake. I disconnected the hoses before i marked them. I see that they attache to main, prewash and bleach but i dont know the order. Can you please tell me which hose goes to which calve? I cant believe i did that. Please help.
For model number 5221ER1003A
Hi David,
Thank you for your question. There is a video listed with the part on our website that you may reference on how to install the lines. I hope this helps. Thank you and have a great day!
3 people found this helpful.
Was this helpful?
Thank you for voting!
Jacinta
July 11, 2019
Corrected model# (computer dyslexia!). Should I replace pump and inlet valve if leaking through door bottom? Is one more likely the culprit? Would appreciate if you located correct parts. Thnx.
For model number WM2140C
Hello Jacinta, Thank you for the question. If there is a leak at the door I suggest checking the Door Gasket, PartSelect Number PS3524977 for damage or wear. Hope this helps!


 Stay on this site
 Go to Canadian site


