EasyApplianceParts is now PartSelect! We've merged our sites to provide a better shopping experience for you.   Full Details
Back
Back
Keep typing for more specific results...
Models > WTW4816FW2 > Symptoms > Leaking

Parts That Fix Whirlpool Washer WTW4816FW2 Leaking

Leaking is a commonly reported symptom for the WTW4816FW2 Whirlpool Washer, and we have put together a full guide on how to fix this. This advice is based on feedback from people who own this exact appliance. We have listed the most common parts for your WTW4816FW2 Whirlpool Washer that will fix Leaking. We have included repair instructions, and helpful step-by-step video tutorials. If you are experiencing this issue, not to worry, DIYers just like you have fixed this, and shared their experience to help you!
Fixes Symptom 20% of time

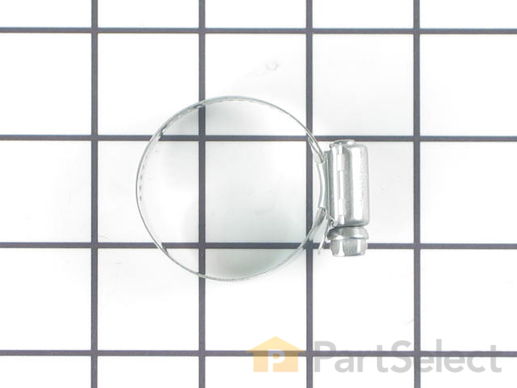
The hose clamp is used to hold the water hose in place which will prevent the hose from leaking water. Sometimes the clamp may lose its ability to latch on, causing a leaking washer. For the installation, you will need a flat head screw driver to replace the clamp and a drill to access the screws to remove the front of the washer. Be careful if you do not have specific clamp pliers as the clamp could fly off. Once the front of the washer has been removed, take a quick look for water damage or any obvious signs of where the leak is coming from. If it is not obvious, run water to test.

$ 9.95
  In Stock
PartSelect Number PS11740613
Manufacturer Part Number WP285655

Replacing your Kenmore Washer Washer Hose Clamp

Replacing your Washer Hose Clamp
Fixes Symptom 15% of time

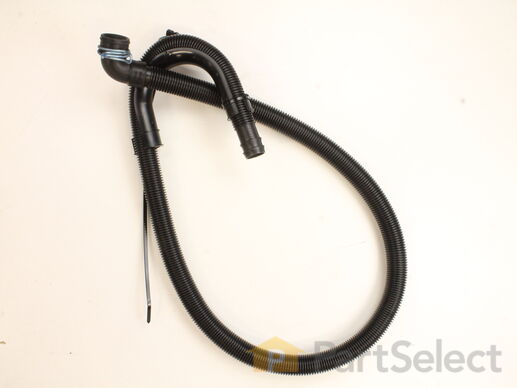
The drain hose carries used water from the washer to your house drain.

$ 25.15
  In Stock
PartSelect Number PS12578897
Manufacturer Part Number W11244231

Replacing your Whirlpool Washer Drain Hose

Replacing your Drain Hose

Customer Repair Stories

My washer's drain hose was leaking.
Step 1: Disconnected power cord and pulled drain hose from the trap in the wall.

Step 2: Loosened clamp on the hose connected to the washer with a set of pliers and pulled the drain hose out of the bottom of the washer.

Step 3: Took the new hose and clamp and placed it back into the bottom of washer, making sure that the clamp was secured around the correct placing on the hose.

Step 4: Placed curved part of the hose back into trap, making sure it was secure.

(Final) Step 5: Plugged the washer back in. Ran through a small washing cycle to make sure hose wasn't leaking out of either end.
  • Kelly from Rockwood, TN
  • Difficulty Level:
    Easy
  • Total Repair Time:
    15 - 30 mins
  • Tools:
    Pliers
4 of 5 people found this instruction helpful.
Was this instruction helpful to you?
Thank you for voting!
replaced drain hose that was missing
slipped the new drain hose on and with locking plyers slipped the wire clap in place after three trys
  • Delmar from EAST TROY, WI
  • Difficulty Level:
    Really Easy
  • Total Repair Time:
    30 - 60 mins
  • Tools:
    Pliers
11 of 18 people found this instruction helpful.
Was this instruction helpful to you?
Thank you for voting!
Fixes Symptom 14% of time

This is an inner cap seal, but may also be known as an O-ring, and it is a part for your washing machine. Some symptoms replacing this part will fix include: leaking from your appliance, uncontrollable shaking and moving, loud noise, pumps but will not spin, or if your appliance will not agitate. This model is off-black in color and 3 inches in diameter. You will find this part inside the agitator in the middle of your washing machine. It is recommended to wipe down the barrier before putting the new seal on.

$ 10.45
  In Stock
PartSelect Number PS11748108
Manufacturer Part Number WPW10072840

Replacing your Whirlpool Washer Washer Inner Cap Seal

Replacing your Washer Inner Cap Seal

Customer Repair Stories

The seal in the upper agitator cap broke
I just unscrewed the top agitator cap and slid the o-ring on and put it back. Done in seconds.
  • Veronica L from Junction City, KS
  • Difficulty Level:
    Really Easy
  • Total Repair Time:
    Less than 15 mins
1 of 3 people found this instruction helpful.
Was this instruction helpful to you?
Thank you for voting!
The cap thingy seal broke and splattered fabric softener.
I pulled out the old cap with my hands and jammed the new thingy into place. The lady of house did the repair. Easy
  • Diane from Corvallis, OR
  • Difficulty Level:
    Really Easy
  • Total Repair Time:
    Less than 15 mins
1 person found this instruction helpful.
Was this instruction helpful to you?
Thank you for voting!
Fixes Symptom 12% of time

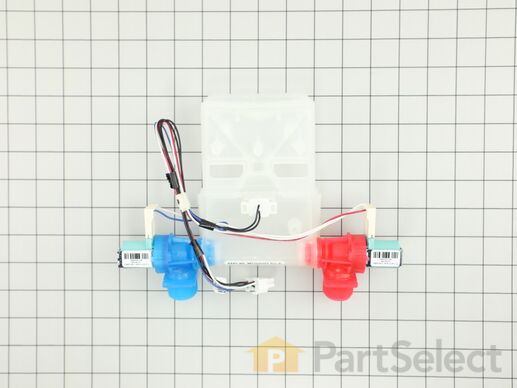
This water inlet valve is for washers. The water inlet valve controls the water flow into the washer. Unplug the washer and shut off the water supply before installing this part. Wear work gloves to protect your hands.

$ 63.35
  In Stock
PartSelect Number PS12349267
Manufacturer Part Number W11210459

Replacing your Whirlpool Washer Water Inlet Valve

Replacing your Water Inlet Valve

Customer Repair Stories

No cold water
Cold and hot water valve .easy as pie.
  • Greg from HAVELOCK, IA
  • Difficulty Level:
    Very Easy
  • Total Repair Time:
    15 - 30 mins
  • Tools:
    Nutdriver, Pliers
7 of 7 people found this instruction helpful.
Was this instruction helpful to you?
Thank you for voting!
Water would not fill the washer except for 4 inches.
Once we put in the new Water Inlet Valve, the auto sensor works now and I can wash any size load
  • Patricia from MURPHYSBORO, IL
  • Difficulty Level:
    Really Easy
  • Total Repair Time:
    Less than 15 mins
  • Tools:
    Nutdriver, Screw drivers
37 of 50 people found this instruction helpful.
Was this instruction helpful to you?
Thank you for voting!
Fixes Symptom 11% of time

Introducing the Whirlpool Washer Tub Seal - a reliable and genuine OEM part. Ideally positioned in the center of the outer tub at the transmission basket drive shaft, this tub seal is essential for maintaining the efficient operation of your washing machine. If you've been experiencing water leakage issues from above the transmission, chances are this seal has suffered some wear or damage. Fear not, our Tub Seal is a perfect and effective replacement, designed to prevent water leakage through the outer tub. Before installation, ensure the washer is unplugged and remember to protect your hands with work gloves. With this Whirlpool Washer Tub Seal, your washing machine will be functioning optimally in no time.

$ 56.09
  In Stock
PartSelect Number PS3407958
Manufacturer Part Number W10324647

Replacing your Whirlpool Washer Washer Sealtub

Replacing your Washer Sealtub
Fixes Symptom 10% of time

The tub-to-pump hose carries the water from the tub to the drain pump. Unplug the washer and shut off the water supply before installing this part. Wear work gloves to protect your hands

$ 25.95
  In Stock
PartSelect Number PS11765836
Manufacturer Part Number W10899966

Replacing your Whirlpool Washer Washer Tub to pump Hose Assembly

Replacing your Washer Tub to pump Hose Assembly
Fixes Symptom 9% of time

The O-Ring is included with this cap. It can be purchased separately as Part #WPW10072840.

$ 16.74
  In Stock
PartSelect Number PS11748113
Manufacturer Part Number WPW10074580

Replacing your Whirlpool Washer Washer Agitator Cap Barrier w/Seal

Replacing your Washer Agitator Cap Barrier w/Seal

Customer Repair Stories

Seal Was Broken
Pulled the top off and placed the cap in place with seal in place.
  • JANET from BUFFALO, MN
  • Difficulty Level:
    Really Easy
  • Total Repair Time:
    Less than 15 mins
0 of 1 people found this instruction helpful.
Was this instruction helpful to you?
Thank you for voting!
Found seal had split on agitator cap
I clean out the fabric softner dispenser on my machine on a regular basis and found the seal split. After looking at several sites to try and find this part, I found this one. Ordering couldn't have been easier and repair only required pulling up the cup for the softner and installing the cap.

Thanks for making finding part so easy . . . .
  • Kim from Cleveland, OH
  • Difficulty Level:
    Really Easy
  • Total Repair Time:
    Less than 15 mins
3 of 4 people found this instruction helpful.
Was this instruction helpful to you?
Thank you for voting!
Fixes Symptom 4% of time

This part goes on the agitator retaining bolt.

$ 12.58
  In Stock
PartSelect Number PS11742027
Manufacturer Part Number WP3949550

Replacing your Whirlpool Washer Washer Washer

Replacing your Washer Washer

Customer Repair Stories

agitator broke
very easy to repair , instructions very clear , parts person very good to talk to, parts got here fast
  • Joseph from Kalkaska, MI
  • Difficulty Level:
    Really Easy
  • Total Repair Time:
    Less than 15 mins
  • Tools:
    Socket set
1 of 2 people found this instruction helpful.
Was this instruction helpful to you?
Thank you for voting!
Fixes Symptom 3% of time

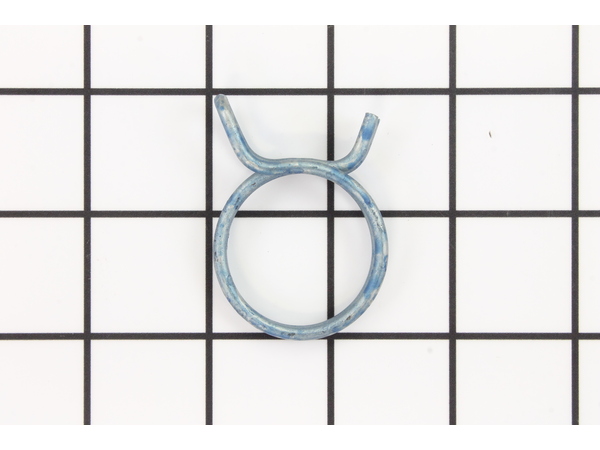
This clamp helps to prevent leaking by holding the end of water hose in place.

$ 9.95
  In Stock
PartSelect Number PS11741854
Manufacturer Part Number WP356138
Fixes Symptom 2% of time

This part is for large capacity belt drive and direct drive appliances.

$ 18.95
  In Stock
PartSelect Number PS11741977
Manufacturer Part Number WP389140

Replacing your Kenmore Washer Washer Drive Block 2 5/16 High

Replacing your Washer Drive Block 2 5/16 High

Customer Repair Stories

Loud Banging Sound At The End Of Spin Cycle
First I removed the two screws on the back of the control console( at the bottom, phillips head). Flip that up and out of the way. Then you could remove the 2 big clips that hold the back of the washer to the cabinet. Disconnect the lid switch and flip the cabinet forward and out of the way. Remember when putting the cabinet back on, line up the slots on the bottom of the cabinet with the toungues on the base. Next pull off the fabric softner dispenser, then reach down in there and pull out the bottom seal of that to expose the bolt that hold the agitator on. Remove that bolt and pull off the agitator. Remove that little clip and the plastic piece above the spanner nut. I didn't have a spanner wrench so I hade to use a small extension from my socket set and a hammer to loosen it. Once that is removed then you could remove the ring around the top of the tub, and pull the tub off. Now you could see the block and probably all the metal shavings it's been creating. If the two ears that stick up and fit in to the block are worn, you should replace that too. I think you hve to replace that from the bottom. Now just put it all back together. Print out the exploded diagram from the web sit so you have it right there. Good luck!
  • John from Hawley, PA
  • Difficulty Level:
    Easy
  • Total Repair Time:
    30 - 60 mins
  • Tools:
    Pliers, Screw drivers, Socket set
133 of 541 people found this instruction helpful.
Was this instruction helpful to you?
Thank you for voting!
My washer was making a loud noise and moving about a foot.
Removerd the drum. Replaced the driver block. Removed and replaced the suspension rods. Reassembled the drum and agitator.
  • George from Leesburg, FL
  • Difficulty Level:
    Very Easy
  • Total Repair Time:
    1- 2 hours
  • Tools:
    Pliers, Screw drivers, Socket set, Wrench (Adjustable)
2 of 3 people found this instruction helpful.
Was this instruction helpful to you?
Thank you for voting!