


WHD3090GW0 Whirlpool Dryer - Overview
Sections of the WHD3090GW0
[Viewing 8 of 8]


 Diagram and Parts List for Whirlpool Dryer")

Keep searches simple, eg. "belt" or "pump".

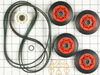
Dryer Repair Kit
PartSelect #: PS373088
Manufacturer #: 4392067
The Whirlpool Dryer Repair Kit is a universal maintenance kit for 27-inch dryers, compatible with various models from Whirlpool, Kenmore, Maytag, and others. It includes a belt, drum rollers, an idler...
$37.75
In Stock
 – Part Number: 72017")
Refrigerator Touchup Paint (White)
PartSelect #: PS385132
Manufacturer #: 72017
This touch-up paint can be used on a wide variety of household appliances. It is most often used on washers, dryer, refrigerators, dishwashers, ranges, freezers, trash compactors, or microwaves. It is...
$12.58
In Stock
 – Part Number: 350930")
White Appliance Paint (12oz)
PartSelect #: PS347819
Manufacturer #: 350930
Appliance spray paint is a great way to cover up any chips and scratches that have appeared on your appliances. Instead of replacing the part entirely, this is an easy fix. This is also a great way to...
$26.17
In Stock

FILTER
PartSelect #: PS12728631
Manufacturer #: W11382898
This Whirlpool Dryer HX Filter Assembly is a genuine OEM part, specifically designed for a wide variety of Whirlpool models. Notably versatile, this part not only fits select Whirlpool appliances but ...
$93.67
In Stock

Washer Noise Filter 275v And 50/60hz
PartSelect #: PS11753813
Manufacturer #: WPW10367632
$55.39
In Stock


Questions And Answers for WHD3090GW0
We're sorry, but our Q&A experts are temporarily unavailable.
Please check back later if you still haven't found the answer you need.
Sort by:
- < Prev
- 1
- Next >
Search filter:
Clear Filter
Your search term must have 3 or more characters.
Keep searches simple. Use keywords, e.g. "leaking", "pump", "broken" or "fit".
Sorry, we couldn't find any existing answers that matched.Try using some different or simpler keywords, or submit your new question by using the "Ask a Question" button above!
Sasha
August 27, 2021
I just spent over $100 to replace the heat exchange filter structure for my dryer unit, and only really needed a new filter pad (foam/plastic mesh). Financially, and environmentally, this makes no sense at all, unless you are trying to hold your consumers hostage. When trying to find the pad only, all official Canadian websites refer back to purchasing the whole filter structure. However, filters (only) for similar Whirlpool vent less dryers are available for purchase (from 3rd party sellers like amazon) in packages of 2, 4 and 6 in the UK(starting at £10) and Germany (starting at €12), and manuals suggest changing the filter every 6 months. The same filter has been in my machine for 3 years. For the last 2 (since I purchased the property) I have been diligently washing and vacuuming mine because I didn't know where to seek a new one out. When will it be possible to buy the filters only, for a reasonable amount?
For model number WHD3090GW0
Hello Sasha, Thank you for contacting PartSelect.com. Since we only sell OEM parts direct from the manufacture we can only sell them how they are sent to us from Whirlpool sorry. We suggest contacting Whirlpool directly for more information. We hope this helps!
Was this helpful?
Thank you for voting!
- < Prev
- 1
- Next >
Common Symptoms of the WHD3090GW0
[Viewing 5 of 5]Noisy
Fixed by
these parts
these parts
Show All
Drum Not Spinning
Fixed by
these parts
these parts
Show All
Won’t Start
Fixed by
these parts
these parts
Show All
Door won’t close
Fixed by
these parts
these parts

Show All
Marks left on clothes
Fixed by
these parts
these parts
Show All


Keep searches simple. Use keywords, e.g. "leaking", "pump", "broken" or "fit".
very loud squeeling sound
The issue was the idler pulley. First I began opening up the front panel based on a youtube video but soon realized the model was slightly different and required a lot more items to remove. I saw the pulley in the back with nothing in the way so I put the front panel crap back on and removed the rear panel. There it was, very simple to re
... Read more
move and replace. I'm not looking forward to drum rollers though. Hopefully they're aren't as difficult as they appear.
Read less
Parts Used:
-
jason from HOLDEN, MA
-
Difficulty Level:Really Easy
-
Total Repair Time:30 - 60 mins
-
Tools:Socket set
94 of 100 people
found this instruction helpful.
Was this instruction helpful to you?
Thank you for voting!
Squeaky Dryer Noise
I purchased the dryer repair kit with the drum belt, wheels and idler pulley. I watched the instructional videos online and it seemed fairly straight forward. Breaking down the dryer and replacing the pulleys was easy enough. My problem began when I tried to feed the drum belt around the idler pulley. After finishing the job, the dryer wo
... Read more
uld not turn and the sensor light stayed on. I thought something else was broken with the dryer and spent hours trouble shooting other problems that I was having. Finally I figured out that the drum belt was not installed correctly around the idler pulley. However, I could not get it properly installed from the front of the machine so I tried from the rear still with no avail. I finally had to fish the old belt out of the garbage can that I had thrown away earlier. I lined up the old belt with the new one in the kit and discovered that the new belt was much smaller, so I put the old one back on the drum. Here's the lesson I learned...make sure the belts are the same size before attempting to install. The old idler was responsible for the squeaking and that stopped but I am still using the same old drum belt. Hope it lasts.
Read less
Parts Used:
-
Eddie from PELZER, SC
-
Difficulty Level:A Bit Difficult
-
Total Repair Time:More than 2 hours
-
Tools:Nutdriver, Screw drivers
72 of 79 people
found this instruction helpful.
Was this instruction helpful to you?
Thank you for voting!
Motor out
I found that the dryer would not start turning by itself. Could manually help it start and it would run fine. Anyway, after a new set of rollers, belt, etc. found that the motor still would not start by itself. Ordered new motor and it was taken care of. You have to take the back off, remove the belt and remove the tumbler. After tha
... Read more
t, it is fairly easy. Two screws hold the motor down and then you can take the whole motor assembly out. Be careful removing the fan as it takes a 3/8 socket drive and it is plastic. Two clips hold the motor to the assembly. Needle nose pliers takes care of it. Replace and all should be good.
Read less
Parts Used:
-
Jeff from Hutchinson, KS
-
Difficulty Level:Easy
-
Total Repair Time:30 - 60 mins
-
Tools:Nutdriver, Pliers, Screw drivers, Socket set
94 of 190 people
found this instruction helpful.
Was this instruction helpful to you?
Thank you for voting!