


WGT4027HW2 Whirlpool Dryer - Overview
Sections of the WGT4027HW2
[Viewing 1 of 1]
Keep searches simple, eg. "belt" or "pump".

Washer Drive Pulley
PartSelect #: PS10057144
Manufacturer #: W10721967
This is a replacement clutch assembly or cam kit for your washer. The clutch assembly is mounted on the drive shaft on the bottom of your washer. You may need to replace the clutch assembly if the spl...
$37.76
In Stock

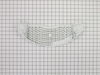
Dryer Outlet Screen Door Grille
PartSelect #: PS12070617
Manufacturer #: W11086603
Top cover for lint filter.
$28.29
In Stock


Questions And Answers for WGT4027HW2
We're sorry, but our Q&A experts are temporarily unavailable.
Please check back later if you still haven't found the answer you need.
Common Symptoms of the WGT4027HW2
[Viewing 11 of 11]Will not agitate
Fixed by
these parts
these parts


Show All
Spinning Issues
Fixed by
these parts
these parts
Show All
Noisy and Marks Left on Clothes
Fixed by
these parts
these parts
Show All
Spins slowly
Fixed by
these parts
these parts
Show All
Noisy
Fixed by
these parts
these parts

Show All
Burning smell
Fixed by
these parts
these parts
Show All
Will not drain
Fixed by
these parts
these parts
Show All
Marks left on clothes
Fixed by
these parts
these parts
Show All
Shaking and Moving
Fixed by
these parts
these parts
Show All
Cycle Not Advancing
Fixed by
these parts
these parts
Show All
Will Not Start
Fixed by
these parts
these parts
Show All


Keep searches simple. Use keywords, e.g. "leaking", "pump", "broken" or "fit".
Noise, grinding sounds. Wash tub stopped turning but motor and cycles kept functioning. Process of elimination, must be the clutch assembly.
Easy, just followed the repair video. Recommend also ordering the drive belt. Bought one locally during my repair.
Parts Used:
-
David from BLOOMINGTON, IN
-
Difficulty Level:Easy
-
Total Repair Time:30 - 60 mins
-
Tools:Screw drivers, Socket set
58 of 80 people
found this instruction helpful.
Was this instruction helpful to you?
Thank you for voting!
Making loud noises.
The video you sent me was very helpful told me the exact tools I needed and how to do it.
Thank you
Thank you
Parts Used:
-
Roy from BROOKLYN, NY
-
Difficulty Level:Really Easy
-
Total Repair Time:30 - 60 mins
-
Tools:Nutdriver, Pliers, Screw drivers, Socket set
15 of 21 people
found this instruction helpful.
Was this instruction helpful to you?
Thank you for voting!
When the washer goes into a spin cycle, I would hear an intermittent loud clattering noise. I think the clutch teeth above (the cup part that is spring loaded) and the belted pulley's teeth below are not fully seating on each other during the spin cycle.
W10721967 Splutch Cam Kit
Assuming the pulley nut was properly tightened at the factory. I think this problem occurs because of ever-so-slight rounding of the splutch cam teeth from the actuator engaging and disengaging over whatever time frame there is before a clattering noise develops.
When I took off the 13mm ... Read more nut using the adjustable strap tool, it felt tight to me...Was it put on as tight as it should have been at the factory? Who knows. I don't have the torque specification of this nut on that plastic pulley.
Watch the videos to remove and replace the belt cover and belt, actuator and splutch cam kit.
Pay particular attention to tightening up the nut. I put the pulley on and hand-tightened the nut. I used the adjustable strap tool and before I tightened everything, I pushed up on the pulley to press against the spring pressure in order to mesh the teeth together. After the nut was tight, I repositioned the strap tool and gave it another go, further tightening it. You see earlier that day, I only tightened it up once because I thought it was good and tight. I put everything back and within a half-hour it was clattering again and I could loosen the nut I thought was tight by hand! I fooled myself. That's why I did it twice, and don't be afraid to give it a good second tightening effort. Two weeks now and the wife is currently very happy.
Read less
Parts Used:
-
TERRY from WAUKEE, IA
-
Difficulty Level:Easy
-
Total Repair Time:15 - 30 mins
-
Tools:Nutdriver, Socket set
8 of 13 people
found this instruction helpful.
Was this instruction helpful to you?
Thank you for voting!