Parts That Fix Whirlpool Washer Dryer Combo WGT4027HW0 Not Heating
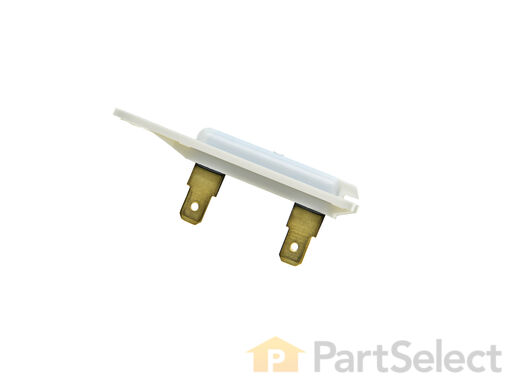
The Dryer Thermal Fuse (Thermal Cutoff, Temperature Fuse) is a 2 by ½ inch, white, plastic safety mechanism that stops the flow of electricity to the motor circuit when a dryer overheats. If the fuse is missing or broken, your dryer will not start. A thermal fuse fails when the exhaust temperature exceeds the fuse rating, that is when the temperature rises above the temperature that the fuse is designed to handle. This can occur when a heating element is shorted, a regulating thermostat or thermister fails, or with a partially restricted exhaust vent. The fuse attaches to the blower wheel housing. It must be replaced when there is no longer continuity between the terminals. This is a one-time fuse, meaning it cannot be re-set. The replacement part features two 3/16 inch terminals.
Replacing your Whirlpool Dryer Dryer Thermal Fuse

Customer Repair Stories
Ascertaining the problem was the most time consuming part.
The actual repair was quite simple and did ... Read more n't take but 15-20 minutes.
-
Dana from Grassvally, CA
-
Difficulty Level:A Bit Difficult
-
Total Repair Time:More than 2 hours
-
Tools:Screw drivers
Not knowing what the problem was I started looking at the coils and could not see any broken parts.
So then checked the thermal fuse for continuity I removed the two wires from it with a small pair of ... Read more needle nose pliers, it was held in place by two screws, once they were removed the fuse came out easily, I checked continuity with a volt meter placing the meter on X1 Ohms and could not get a reading.
I replaced with a new one and put it all back together the way I took it apart.
Then I plugged it in and it worked first time, I now have warm dry clothes.
-
ANTHONY from CHESHIRE, CT
-
Difficulty Level:Easy
-
Total Repair Time:15 - 30 mins
-
Tools:Nutdriver, Pliers, Screw drivers
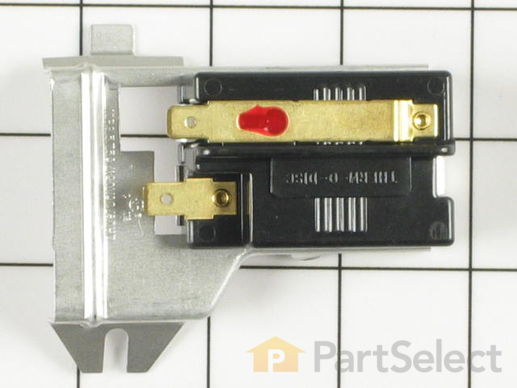
This thermostat (Dryer Operating Thermostat, Dryer Cycling Thermostat, Cycling Thermostat, Dryer Thermostat) is used to maintain a temperature of 155 degrees in the dryer drum. The internal bias heater also allows this thermostat to provide a low heat temperature of approximately 140 degrees when the low temperature setting is selected. The part measures 2 by 1.5 inches, comes in black/silver and is constructed of plastic and metal. The thermostat attaches to the blower wheel housing.
Replacing your Whirlpool Dryer Dryer Internal-Bias Thermostat

Customer Repair Stories
-
Luke from Elmira, NY
-
Difficulty Level:Easy
-
Total Repair Time:Less than 15 mins
-
Tools:Nutdriver
-
Wiliam from Belleville, MI
-
Difficulty Level:Really Easy
-
Total Repair Time:15 - 30 mins
-
Tools:Nutdriver
When the igniter reaches a high enough temperature, these coils (Coil Valve, Dryer Gas Valve Coil Kit, Dryer Valve Coil Kit, Gas Valve Solenoid) work together to open the gas valve and allow the gas to enter the burner. This is a safety mechanism to ensure that there are no unsafe buildups of gas inside your appliance. The coils are attached to the dryer gas valve. If the dryer does not heat or heats intermittently, the coil may not be opening the gas valve. Both coils must be operational for the valve to open. No continuity would indicate a defective coil, but they can be intermittent and fail when they get hot. Both coils should be replaced when one of them is broken. This part can break as a result of material fatigue from normal use. This part measures approximately 1 inch in diameter and 1 inch in height, and is constructed of plastic and metal. It comes in black/beige. This part features a 3-terminal boost/hold coil and a 2-terminal secondary coil
Customer Repair Stories
-
Robert from Seattle, WA
-
Difficulty Level:Really Easy
-
Total Repair Time:Less than 15 mins
-
Tools:Nutdriver, Screw drivers
-
Gary from Haverhill, NH
-
Difficulty Level:Easy
-
Total Repair Time:30 - 60 mins
-
Tools:Nutdriver, Screw drivers, Socket set
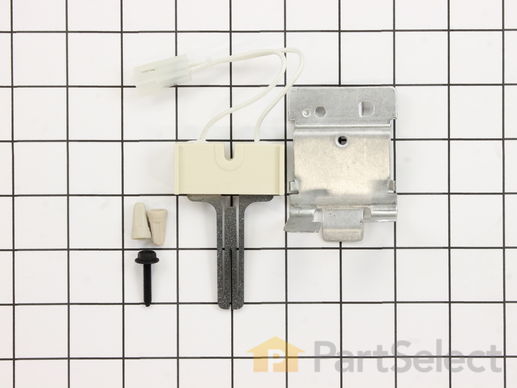
If your dryer will not heat, takes too long to dry, or does not provide enough heat, you might want to replace your igniter kit. This silicone carbide igniter with ceramic holder kit includes the 3-inch flat igniter, bracket, 4-inch wire leads, and the plug. The kit can replace both round and flat igniters and is used for many gas clothes dryers. Be sure to disconnect the power source from your dryer before you do this repair. The igniter is located within the burner assembly, so you will require tools to complete the repair. You will need a putty knife, a small flat blade screwdriver, a 5/16 nut driver, and a 5/16 socket with a ratchet.
Replacing your Whirlpool Dryer Dryer Igniter Kit

Customer Repair Stories
-
rex from streator, IL
-
Difficulty Level:Really Easy
-
Total Repair Time:15 - 30 mins
-
Tools:Nutdriver, Wrench (Adjustable)
This was easy to do and sure saved money. I reccommend others try to do repairs for themselves and using PartSelect was less expensive too.
-
Karen from Pine Mtn. Club,, CA
-
Difficulty Level:Easy
-
Total Repair Time:15 - 30 mins
-
Tools:Screw drivers, Socket set
If your gas dryer is not heating up or igniting, then replacing the flame sensor, located in the burner assembly, could solve it. This part senses heat from the igniter to monitor if it is hot enough to ignite gas to light the burner. Once the igniter is hot enough it will open the valve and allow gas to flow. This is a safety mechanism to prevent dangerous levels of gas from building up. To repair, the main top of the dryer should be lifted, as well as the front panel to access the component. This flame sensor assembly is made of both plastic and metal.
Replacing your Kenmore Dryer Dryer Radiant Flame Sensor

Customer Repair Stories
-
Roger from Bonners Ferry, ID
-
Difficulty Level:Really Easy
-
Total Repair Time:Less than 15 mins
-
Tools:Nutdriver, Screw drivers
-
FRED from BRIELLE, NJ
-
Difficulty Level:A Bit Difficult
-
Total Repair Time:15 - 30 mins
-
Tools:Nutdriver, Screw drivers


