Back
Back
Keep typing for more specific results...
Models > WED92HEFW0 > Symptoms > Drum Not Spinning

Parts That Fix Whirlpool Dryer WED92HEFW0 Drum Not Spinning

Drum Not Spinning is a commonly reported symptom for the WED92HEFW0 Whirlpool Dryer, and we have put together a full guide on how to fix this. This advice is based on feedback from people who own this exact appliance. We have listed the most common parts for your WED92HEFW0 Whirlpool Dryer that will fix Drum Not Spinning. We have included repair instructions, and helpful step-by-step video tutorials. If you are experiencing this issue, not to worry, DIYers just like you have fixed this, and shared their experience to help you!
Fixes Symptom 55% of time

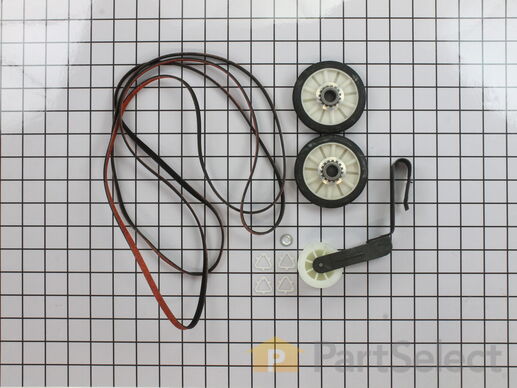
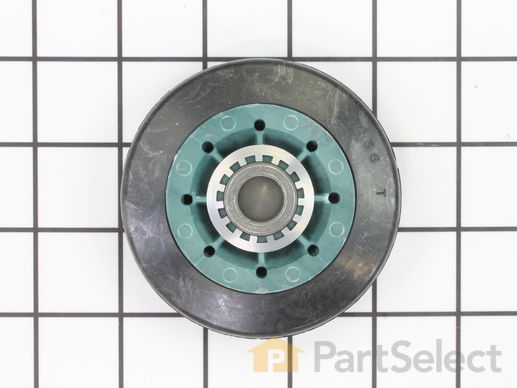
The drum support roller kit (Dryer Repair Kit) allows the dryer to tumble properly by supporting the drum cylinder. The idler pulley provides the tension required for a multi-ribbed belt. The belt attaches to the drum, idler pulley, and motor pulley. If your dryer is damaged, it may be making loud, squeaking, and/or squealing noises while the drum is turning. This is from normal wear and tear. The drum may eventually stop turning all together. This is a sign the part should be replaced. This is one complete maintenance kit. The kit includes the drum belt, drum support rollers, one idler pulley, four tri-rings, and one clip. The parts are constructed of plastic, metal, and rubber, and come in black/white/silver.

$ 34.58
  In Stock
PartSelect Number PS373087
Manufacturer Part Number 4392065

Replacing your Whirlpool Dryer Dryer Maintenance Kit

Replacing your Dryer Maintenance Kit

Customer Repair Stories

Dryer making extra noise while running
1st Unpluged power.
2nd removed two screws under lint screen cover.
3rd poped up lid with flathead screwdryer, then removed (2) 5/16 screws from door cover and unpluged lid switch, lifted up dryer door pannel
4th removed drum
5th took out plastic triangle wheel rings
6th removed old belt guild (to motor pully) ... Read more />7th removed old wheels and plastic rings stops
8th cleaned excessive hair dust with shopvac
9th put new replaicment part in dryer. made sure to turn manually to make sure belt was lined up properly, then put all dryer peices back.
10th aditional work, took back cover off and removed the (4) 1/4 screws for lint screen case (left side in dryer) vacumed out any excessive dirt lint ect, also cleaned any excessive dust I found in back of dryer, dryer , exhaust ect, and put all back together.
JUst like a new dryer aain after all PM was complete.
  • Michael from Haines City, FL
  • Difficulty Level:
    A Bit Difficult
  • Total Repair Time:
    1- 2 hours
  • Tools:
    Nutdriver, Screw drivers, Wrench (Adjustable)
82 of 92 people found this instruction helpful.
Was this instruction helpful to you?
Thank you for voting!
Broken drive belt
Grow a second set of hands. Always unplug any appliance. Remove lint screen. remove two screws (philips Head). I took a wooden shim lightly tapped w/hammer to pop front of dryer top free. Mine worked on hinges and just flipped back til it rested against the wall. Removed two 5/16 screws inside holding face on carefully raise face section off the support clips at either side on the bottom. Pull drum out (I have the large style drum commercial size [approx.). Clean the inside free of all lint (known to be fire hazard). Sling new belt around drum. Get newly grown set of hands to hold drum in place. Pinch belt to fit between tensioner, lift tensioner and place belt around motor pulley. Spin drum couple times to make certain belt isn't twisted. Reverse dismantle proccess to put back together. Replace all parts that come with kit, you'll feel better knowing you got a new dryer, almost.
  • DENNIS from ALTOONA, FL
  • Difficulty Level:
    A Bit Difficult
  • Total Repair Time:
    1- 2 hours
  • Tools:
    Nutdriver, Screw drivers
281 of 308 people found this instruction helpful.
Was this instruction helpful to you?
Thank you for voting!
Fixes Symptom 21% of time

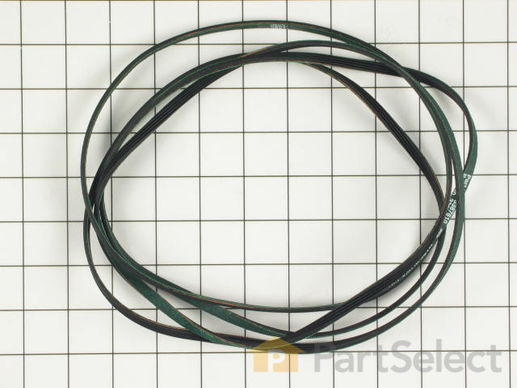
The Drive Belt is a 93 1/2" belt which wraps around the dryer drum to allow tension and movement. If broken the dryer will not turn properly, or there may be loud noises. The part is rated as "medium" difficulty to install. Refer to your model number and user manual to ensure this part is correct for you. To complete this repair you will need a Phillips screwdriver, 1/4 inch nut driver, a putty knife, and a pair of needle nose pliers. Ensure you disconnect your power to the dryer before beginning this repair, which should take between 30 and 60 minutes maximum to complete.

$ 24.11
  In Stock
PartSelect Number PS382430
Manufacturer Part Number 661570

Replacing your Whirlpool Dryer Multi Rib Belt

Replacing your Multi Rib Belt

Customer Repair Stories

Dryer not spinning
I took off the front panel via 2 screws on the inside of the dryer with the top panel in the maintenance position. Pulled out the tub(cut my hand pretty bad in the process but continued). Did some cleaning and I had to google how the belt tensioner goes into place. Rather difficult on your own i held the belt and placed the tub back into place while placing the belt around the tub putting it in the correct area. thats pretty much it and began reinstalling the parts i had removed.. easy fix now that i have done it once. This is all after my landlords said they werent replacing it and just to have this one hauled off, so all in all i have a 26 dollar dryer now:)
  • john from goldsboro, NC
  • Difficulty Level:
    A Bit Difficult
  • Total Repair Time:
    30 - 60 mins
  • Tools:
    Nutdriver, Pliers, Screw drivers
33 of 49 people found this instruction helpful.
Was this instruction helpful to you?
Thank you for voting!
broken belt
First I removed back and top of dryer, then the support braces holding the drum, after that I took the drum out and the blower covers and cleaned the whole dryer of lint and other debris. Installed the new belt and then reassembled the dryer.
  • Larry from exeter, RI
  • Difficulty Level:
    Easy
  • Total Repair Time:
    30 - 60 mins
  • Tools:
    Nutdriver, Screw drivers
66 of 77 people found this instruction helpful.
Was this instruction helpful to you?
Thank you for voting!
Fixes Symptom 13% of time

The WP8066184 is a dryer motor pulley that is used in some dryer models. It supports the motor belt where it connects with the motor. Symptoms of failure include squealing or grinding noise during drum rotation. Please use the model number of the appliance to check for compatibility before purchasing.

$ 38.95
  In Stock
PartSelect Number PS11744884
Manufacturer Part Number WP8066184

Replacing your Whirlpool Dryer Dryer Motor Pulley

Replacing your Dryer Motor Pulley

Customer Repair Stories

Needed to repair and replace dryer motor pulley and pully
this was very was very easy. But I deviated from the You Tube instructions. One to release the motor pulley. I needed to use 2 adjustable wrenches for a longer lever. I needed to use a hammer to help release pulley. Second to remove the dryer cable I needed to use a small screw driver to aid in the release. ---- the part from the company was a perfect fit.
  • Rob from GAITHERSBURG, MD
  • Difficulty Level:
    Really Easy
  • Total Repair Time:
    30 - 60 mins
  • Tools:
    Wrench (Adjustable)
6 of 6 people found this instruction helpful.
Was this instruction helpful to you?
Thank you for voting!
Replaced a broken pulley.
Half of my pulley was broken off so there were no wrench flats to take it off. I was able to remove it using Channel Locks and the 7/16 wrench shown in the video.

Hint: Use a one gallon ice cream bucket to hold up the drum while connecting the belt. It makes it much easier and gives you more clearance.
  • Brian from IMLAY CITY, MI
  • Difficulty Level:
    Very Easy
  • Total Repair Time:
    15 - 30 mins
  • Tools:
    Nutdriver, Pliers, Screw drivers, Wrench set
10 of 12 people found this instruction helpful.
Was this instruction helpful to you?
Thank you for voting!
Fixes Symptom 6% of time

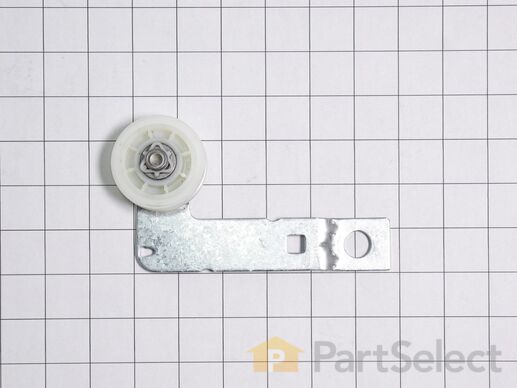
The idler pulley with bracket ensures proper tension on the dryer’s drive belt, allowing the drum to spin effectively. This assembly includes the pulley and arm, making it ideal for replacing a worn or damaged component. Designed for various Whirlpool, KitchenAid, Maytag, Jenn-Air, Amana, Inglis, and Magic Chef dryers, this genuine OEM part guarantees reliability and performance. If your dryer is noisy or the drum is not turning properly, this part may be the solution. Always disconnect power and wear gloves during installation.

$ 27.24
  In Stock
PartSelect Number PS11726337
Manufacturer Part Number W10837240

Replacing your Whirlpool Dryer Idler Pulley w/Bracket

Replacing your Idler Pulley w/Bracket

Customer Repair Stories

Idler pulley wore out
Removed the back panel and saw that the idler pulley was worn out. It only took me 5min. To replace, it was very easy to replace.
  • Peter from HUEYTOWN, AL
  • Difficulty Level:
    Very Easy
  • Total Repair Time:
    15 - 30 mins
  • Tools:
    Screw drivers, Socket set
10 of 11 people found this instruction helpful.
Was this instruction helpful to you?
Thank you for voting!
Dryer made a terrible screeching noise when tumbling.
I followed the repair Vedic and took the drum out and replaced the pulls and bracket. Very straightforward job. Dryer is now as quite as the first day we bought it.
  • Richard from SAUGERTIES, NY
  • Difficulty Level:
    A Bit Difficult
  • Total Repair Time:
    30 - 60 mins
  • Tools:
    Nutdriver, Screw drivers, Socket set
13 of 14 people found this instruction helpful.
Was this instruction helpful to you?
Thank you for voting!
Fixes Symptom 4% of time

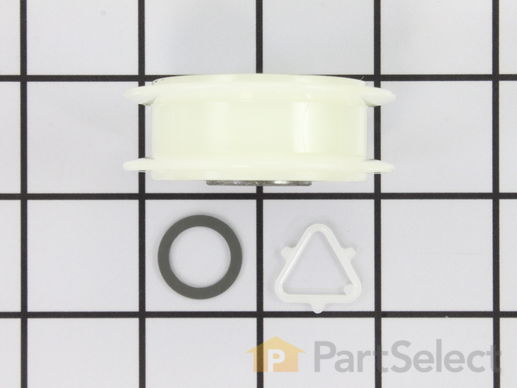
This Idler Pulley includes the tri-ring and gasket and everything included here is manufacturer-certified. This part maintains correct tension on the drive belt in order to spin the drum properly. If damaged or broken the dryer will not dry properly, will not tumble properly, or may not even start. Installation is rated as "Medium" difficulty. This part is located on the dryer drum, around the tension pulley. Refer to your user manual and model number for repair instructions and to ensure this part is right for you. For this repair project, the tools needed are a Phillips screwdriver, 1/4 inch nut driver, putty knife, small flat blade screw driver, and needle nose pliers.

$ 25.95
  In Stock
PartSelect Number PS334244
Manufacturer Part Number 279640

Replacing your Whirlpool Dryer Dryer Idler Pulley

Replacing your Dryer Idler Pulley

Customer Repair Stories

TOb stopped turning after a week or so of high pitched "squeals" coming from inside the dryer.
I recommend you order the idler pulley as soon as you start to hear the unusual noise indicating metal against metal. Replace the idler pulley before it fails and possibly causes more damage to the drive system. Simply removed the power cord at the back of the dryer and then the multiple screws holding the back panel in place as well as the clip holding the exhaust vent in place. You may need to remove the top panel to access a few of these screws. A diagram of the belt routing is in the paperwork I found behind the front lower panel of the dryer. This too is easily removed with just a few screws.
  • Robert from Princeton, WV
  • Difficulty Level:
    Really Easy
  • Total Repair Time:
    Less than 15 mins
  • Tools:
    Nutdriver, Screw drivers
42 of 47 people found this instruction helpful.
Was this instruction helpful to you?
Thank you for voting!
Very Loud Squeaking Noise
1) Disconnected power cord from wall. 2) Disconnected vent hose from back of dryer. 3)Removed dryer rear panel. 4)Disengaged tension spring on idle wheel arm. 5) Removed worn idle wheel. 6)Installed new Idler wheel assembly. 7) Vacuumed dust from rear of dryer (optional, recommended). 8) Reinstalled rear cover, vent hose and power cord. Easy repair 15-30
  • GREGORY from Wilsonville, OR
  • Difficulty Level:
    Easy
  • Total Repair Time:
    15 - 30 mins
  • Tools:
    Nutdriver, Pliers, Screw drivers
75 of 96 people found this instruction helpful.
Was this instruction helpful to you?
Thank you for voting!
Fixes Symptom 2% of time

This drum support roller is sold individually. Most dryers require two. The tri-rings are included. This is a drum support roller for a dryer. It is a genuine replacement part. This part is sold separately. Most dryers require two drum rollers. It is recommended to check and replace both drum support rollers at the same time to ensure proper drum rotation and because they often wear at the same rate. The drum support roller holds the drum in the proper position while it spins on the support wheels. If rollers are worn out, they will cause the dryer to be noisy.

$ 18.88
  In Stock
PartSelect Number PS11752609
Manufacturer Part Number WPW10314173

Replacing your Whirlpool Dryer Dryer Drum Support Roller

Replacing your Dryer Drum Support Roller

Customer Repair Stories

A high pitched squeal when drum was rolling.
First my son and I moved the dryer to the garage as we believed there would be a lot of lint possible during disassembly. Used a flat head screwdriver to pop the top from dryer housing. Then removing 2 nuts to facilitate the removal of the front of the dryer. The drum was able to be removed to diagnose the offending drum roller wheel. The drum roller wheel has experienced a failure as it had melted off of the metal spacer. Removing it and replacing with the new one was pretty easy. We then used a shop vac and an air hose to clean out all the lint, coins, paper clips and lost jewelry. Surprisingly there was not a single sock in there. Put it all back together in reverse order and plugged it in and now spins like a dream.
  • Robert from GOODRICH, TX
  • Difficulty Level:
    Easy
  • Total Repair Time:
    30 - 60 mins
  • Tools:
    Nutdriver, Pliers, Screw drivers, Socket set
22 of 24 people found this instruction helpful.
Was this instruction helpful to you?
Thank you for voting!
noisy drum
the job would have gone faster if the right parts had been sent in the first place. I would have never paid for two day shipping. In the repair, I removed the rear panel, clipped the plastic triangle holding the bearing, installed the new bearing and new clip.
  • Jeff from Mesa, AZ
  • Difficulty Level:
    A Bit Difficult
  • Total Repair Time:
    30 - 60 mins
  • Tools:
    Nutdriver, Screw drivers, Wrench (Adjustable), Wrench set
27 of 37 people found this instruction helpful.
Was this instruction helpful to you?
Thank you for voting!