


TD-V10180EM LG Dryer - Overview
Sections of the TD-V10180EM
[Viewing 1 of 1]
Keep searches simple, eg. "belt" or "pump".

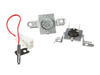
Hi-Limit Thermostat And Thermistor Kit
PartSelect #: PS16878105
Manufacturer #: AGM30045804
This dryer thermistor temperature sensor helps monitor and regulate the temperature inside a dryer. This part includes the wire harness. If your dryer overheats, does not produce enough heat, or takes...
$93.89
In Stock

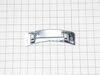
Dryer Thermostat
PartSelect #: PS3530485
Manufacturer #: 6931EL3003D
This thermal fuse acts as a high-limit thermostat, and shuts off the heating element when the dryer overheats by cutting off power to the dryer. If the thermal fuse has blown, the dryer will not start...
$17.80
In Stock

Dryer Sensor
PartSelect #: PS3529161
Manufacturer #: 6500EL3001A
The sensor controls the temperature in your dryer and will turn off once your clothes have reached the desired dryness level. If you notice that your dryer is not giving off enough heat to dry the clo...
$20.67
In Stock

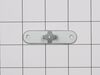
Thermostat Assembly
PartSelect #: PS3530481
Manufacturer #: 6931EL3001E
The high limit thermostat on your dyer prevents your dryer from overheating. When the dryer heats up too much, the high limit thermostat will sense it and automatically shut off the heating element. I...
$40.88
In Stock

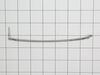
Dryer Felt Seal
PartSelect #: PS3522851
Manufacturer #: 4036EL3001A
This genuine OEM felt gasket provides a cushioned seal between the inner tub of your electric dryer and the rear panel. It prevents your clothes from getting snagged and helps in heat retention. You w...
$48.28
In Stock

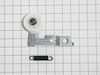
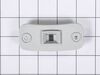
Safety Switch Assembly
PartSelect #: PS16551445
Manufacturer #: EBF61496102
Introducing the LG Dryer Safety Switch Assembly, a crucial and authentic product for your LG Dryer. This switch assembly, emphasizing safety, is diligently crafted to prevent your dryer from operating...
$44.83
In Stock

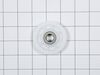
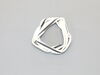
Pulley Idle
PartSelect #: PS3523032
Manufacturer #: 4560EL3001A
This genuine LG product is an Idle Pulley meticulously designed for LG electric dryers. It plays a crucial role in maintaining the correct tension on the drive belt, enabling it to spin the drum effec...
$28.31
In Stock

Dryer Locker Assembly
PartSelect #: PS3522843
Manufacturer #: 4027EL1001A
Ideal for LG dryers, the genuine LG Dryer Door Latch Replacement serves as an essential part to ensure efficient performance of your appliance. It is a locker assembly piece that functions as a door c...
$28.71
In Stock

Dryer Baffle
PartSelect #: PS3522961
Manufacturer #: 4432EL1002A
Designed exclusively for your LG dryer, the Drum Baffle - Lifter is a premium, OEM (Original Equipment Manufacturer) component guaranteed for an exact fit and superior performance. This drum baffle li...
$44.83
On Order

Hinge
PartSelect #: PS3523444
Manufacturer #: 4774EL2001A
Crafted with precision, this genuine LG door hinge is a high-quality and durable solution for your LG dryer door. This essential part, straight from the original equipment manufacturer, boasts an impr...
$93.89
In Stock

Drive Motor
PartSelect #: PS3523290
Manufacturer #: 4681EL1008A
This motor works with the belt to drive your dryer's drum.
$273.93
In Stock

Motor Pulley Assembly
PartSelect #: PS3523033
Manufacturer #: 4561EL3002A
Discover the Motor Pulley Assembly for LG dryers, designed to efficiently maintain the correct tension of the drive belt to spin the drum. This high-quality item is crafted by LG, ensuring you of its ...
$63.16
In Stock
Questions And Answers for TD-V10180EM
We're sorry, but our Q&A experts are temporarily unavailable.
Please check back later if you still haven't found the answer you need.
Common Symptoms of the TD-V10180EM
[Viewing 6 of 6]Not Heating
Fixed by
these parts
these parts

Show All
Noisy
Fixed by
these parts
these parts
Show All
Door won’t close
Fixed by
these parts
these parts
Show All
Won’t Start
Fixed by
these parts
these parts
Show All
Marks left on clothes
Fixed by
these parts
these parts
Show All
Door Sags
Fixed by
these parts
these parts
Show All


Keep searches simple. Use keywords, e.g. "leaking", "pump", "broken" or "fit".
Dryer would run with no heat
I actually went to mr fix it on u tube. Great instruction on how to take dryer apart. First I unplugged the dryer. I found I could reach the heating system by removing the lint tube in the back of the dryer. I put my I phone with the light on inside the back of the dryer and tested the connections to see if all were working. The thermal f
... Read more
use was not working. I removed the two wires , red on top and white on the bottom. Then used a small Phillips screwdriver to remove the two mounting screws and removed the fuse. I then used a vacuum to clear any lint from the back of the dryer and inside the dryer. This took me about an hour and a half. I did it this way because I did not want to disassemble the entire dryer to get to the components. I received the fuse in 3 days and tested it. It was fine. I then put it in the dryer screwed it in place, connected the wires. Replaced the lint tube. This took about 10 minutes. Dryer is running great.
Read less
Parts Used:
-
Richard from ORMOND BEACH, FL
-
Difficulty Level:Easy
-
Total Repair Time:30 - 60 mins
-
Tools:Screw drivers
87 of 100 people
found this instruction helpful.
Was this instruction helpful to you?
Thank you for voting!
The dryer worked fine except the dryer did not heat up
I unplugged the dryer and disconnected the vent.
I pulled the dryer away from the wall so I had room to work on it.
Pulled the top cover off (slides back).
Took the door off
Took the front adjustable feet on the bottom off
Unscrewed all of the face screws on the front of the dryer
Took the two screws off of t ... Read more he back of the control panel holding the control panel to the metal frame.
Gently pulled on the control panel to reveal 4 screws under the control panel to be able to take the front cover off.
Pulled the front cover off (the dryer door front cover).
Pulled the dryer vent cover off (two screws).
I could now see the heating element with sensor/fuse (right side).
Did a continuity test (beep) on all visable sensors/fuses on the heating element. No beep on the thermal fuse (used website diagram to locate parts to test and replacement part numbers).
Got the part after about a week, tested the parted (it beeped), replaced with new part and put dryer back together, plugged in and the dryer heated. Problem solved.
Read less
Parts Used:
-
Catherine from COVINGTON, WA
-
Difficulty Level:Really Easy
-
Total Repair Time:30 - 60 mins
-
Tools:Screw drivers
25 of 28 people
found this instruction helpful.
Was this instruction helpful to you?
Thank you for voting!
No heat; flow-sense error diagnosed but no blockage in exhaust.
The first thing I did was locate a copy of the Service Manual (not the User / Owner Manual). After looking at that and looking online I learned that there is no sensor for the Flow Sense feature itself. The Flow Sense doesn't detect a blockage. It detects excessive heat and the manufacturer has simply concluded that too much heat is most
... Read more
likely caused by a blocked duct and then it activates the Flow Sense safety feature: cutting off the heat source. Since I knew it was a heat problem I figured I'd get inside and check the two thermostats and the igniter. Igniter was fine, one thermostat was fine, the other one - the High Limit Thermostat - was giving inconsistent readings. I replaced it. Here's how: First I took the dryer apart. This is a little time consuming. There are a lot of parts that need to come out. I recommend that you put the screws in small baggies with a note as to where you took them out of so that you know where they go when you put it back together. You need to remove part of the back, the top and the front. I removed the electrical box because that is what is shown in the manual but I'm not convinced that I needed to. See if you can get the rest of the dryer apart without removing it but if you have to remove it it's not that big of a deal. It's a little tricky to detach the wire harnesses is all. And extra steps, of course. I did not remove the drum. Instead I just reached inside with the front off and pulled the wires off the thermostats to test them for resistance with a multimeter. It was kind of a pain and a little awkward but I did not want to mess with the drum tensioner. Once I figured out that the High Limit Thermostat was the likely culprit I removed it - which required a very short Phillips head screw driver and some patience since I could not actually see one of the screws. But all good. Just remember which wire goes on which terminal. Make a note for yourself: gray back / red front - something like that. Then I ordered the part and installed the new one and rebuilt the dryer in reverse from what I did.
Now, here's the thing: I actually did two things: aside from changing the thermostat I also thoroughly cleaned out the dryer. Somehow a lot of lint built up in there - no idea how since it all appeared to leave the dryer through the vent. but there must be some small gap somewhere. I cleaned everything including the flame detector. When I put it all back together it worked but I'm not 100% sure that the thermostat was bad. It's at least possible that all the lint and dirt was messing with the way the thermostats behaved. So what I would recommend, if you have this problem, is to clean it out first and then put it back together enough to run it and see of the heat comes on. It will take maybe 30-60 seconds for the heat to come on while the igniter lights. If not, go ahead and replace whichever thermostats or other parts you think are broken.
Now, here's the thing: I actually did two things: aside from changing the thermostat I also thoroughly cleaned out the dryer. Somehow a lot of lint built up in there - no idea how since it all appeared to leave the dryer through the vent. but there must be some small gap somewhere. I cleaned everything including the flame detector. When I put it all back together it worked but I'm not 100% sure that the thermostat was bad. It's at least possible that all the lint and dirt was messing with the way the thermostats behaved. So what I would recommend, if you have this problem, is to clean it out first and then put it back together enough to run it and see of the heat comes on. It will take maybe 30-60 seconds for the heat to come on while the igniter lights. If not, go ahead and replace whichever thermostats or other parts you think are broken.
Read less
Parts Used:
-
Daniel from MANALAPAN, NJ
-
Difficulty Level:A Bit Difficult
-
Total Repair Time:1- 2 hours
-
Tools:Screw drivers
12 of 12 people
found this instruction helpful.
Was this instruction helpful to you?
Thank you for voting!