Parts That Fix Roper Dryer RGD4440VQ1 Noisy
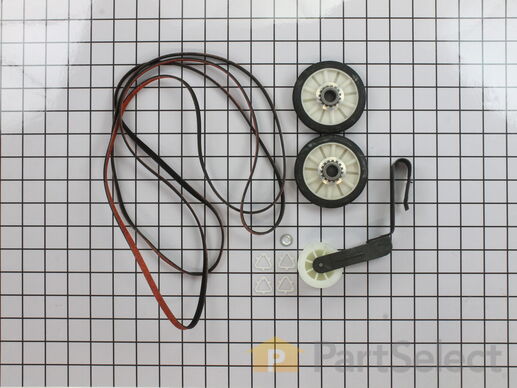
The drum support roller kit (Dryer Repair Kit) allows the dryer to tumble properly by supporting the drum cylinder. The idler pulley provides the tension required for a multi-ribbed belt. The belt attaches to the drum, idler pulley, and motor pulley. If your dryer is damaged, it may be making loud, squeaking, and/or squealing noises while the drum is turning. This is from normal wear and tear. The drum may eventually stop turning all together. This is a sign the part should be replaced. This is one complete maintenance kit. The kit includes the drum belt, drum support rollers, one idler pulley, four tri-rings, and one clip. The parts are constructed of plastic, metal, and rubber, and come in black/white/silver.
Replacing your Whirlpool Dryer Dryer Maintenance Kit

Customer Repair Stories
2nd removed two screws under lint screen cover.
3rd poped up lid with flathead screwdryer, then removed (2) 5/16 screws from door cover and unpluged lid switch, lifted up dryer door pannel
4th removed drum
5th took out plastic triangle wheel rings
6th removed old belt guild (to motor pully)
... Read more />7th removed old wheels and plastic rings stops
8th cleaned excessive hair dust with shopvac
9th put new replaicment part in dryer. made sure to turn manually to make sure belt was lined up properly, then put all dryer peices back.
10th aditional work, took back cover off and removed the (4) 1/4 screws for lint screen case (left side in dryer) vacumed out any excessive dirt lint ect, also cleaned any excessive dust I found in back of dryer, dryer , exhaust ect, and put all back together.
JUst like a new dryer aain after all PM was complete.
-
Michael from Haines City, FL
-
Difficulty Level:A Bit Difficult
-
Total Repair Time:1- 2 hours
-
Tools:Nutdriver, Screw drivers, Wrench (Adjustable)
-
DENNIS from ALTOONA, FL
-
Difficulty Level:A Bit Difficult
-
Total Repair Time:1- 2 hours
-
Tools:Nutdriver, Screw drivers
The drum support roller kit allows the dryer to tumble properly by supporting the drum cylinder. The kit includes two drum rollers, four tri-rings, and one palnut (or retaining washer). The kit does not include a belt or idler pulley and rollers are not sold individually. The drum support roller kit may need to be replaced if the dryer is noisy or will not tumble. The tools needed to complete this repair are a putty knife, Phillips screw driver, and a 5/16 nut driver. This is an OEM part sourced directly from the manufacturer.
Replacing your Kenmore Dryer Dryer Rear Drum Support Roller Kit

Customer Repair Stories
Step 2: removed screws from lent catcher.
Step 3: removed top lid.
Step 4: removed front panel.
Step 5: removed drum.
Step 6: removed plastic washers.
Step 7: removed old wheels.
Step 8: installed new wheels.
Reversed steps to put everything back.
-
Tyrik from KENNESAW, GA
-
Difficulty Level:Very Easy
-
Total Repair Time:15 - 30 mins
-
Tools:Screw drivers, Socket set, Wrench (Adjustable)
1 Remove power.
2 Open the lint filter cover and remove the 2 Phillip screws.
3 Pry the front of the top cover up to separate the cover from the plastic clips that secure to the top front panel.
4 Remove the 2 nut screws securing the top of the ... Read more front panel to each side cover.
5 Pull front panel out slightly to detach wiring from the cover switch.
6 Pull front panel straight up and set aside.
7 Remove drum belt from tensioner and motor pulley under the drum.
8 Remove drum by pulling it toward the front between the 2 sides.
9 Locate the 2 support rollers and their mounting shafts. Change the shafts at this point if they are worn. (Mine were OK)
10 Remove the support bracket from the shaft if present.
11 Remove the plastic triangular retainer from the shaft and slide the old wheel off of the shaft.
12 Clean the shaft from any bearing debris.
13 Replace the rollers and retainers.
14 Insert drum through the front side panels making sure the seal on the rear of the drum is centered around the opening and not folded inside the opening.
15 Place the belt on the drum and thread the belt through the tensioner and around the motor pulley.
16 Position the front cover on the lower clips on each of the sides.
17 Re-attach the 2 wires for the cover switch.
18 Pull the drum up so the opening on the drum and front cover align.
19 Screw together the side panels to the front panel using the 2 hex headed screws.
20 Check for binds by rotating the drum several times by hand.
21 Press the front of the top panel down toward the front panel to engage the plastic clips attaching the top to the front. Watch for the lint filter housing alignment as you push the top panel down.
22 Replace the 2 screws to attach the lint filter to the top cover.
23 Plug in machine and test.
Good luck, It s not as bad as it sounds.
-
Gary from Canton, CT
-
Difficulty Level:Easy
-
Total Repair Time:15 - 30 mins
-
Tools:Nutdriver, Pliers, Screw drivers
This dryer drum belt (Whirlpool Dryer Belt, Drive Belt) has four ridges, three grooves and is 1/4" wide, and 92 1/4 inches in length. It comes in black and is made of rubber. The belt transfers the rotation of the motor to turn the drum. The belt attaches to the drum, idler pulley, and motor pulley.
Replacing your Kenmore Dryer Dryer Drive Belt

Customer Repair Stories
-
Gary from Oakland, MD
-
Difficulty Level:Really Easy
-
Total Repair Time:15 - 30 mins
-
Tools:Nutdriver, Screw drivers
2. Removed the bolts from upper rear of dryer
3. Pried off the dryer top from the front (it rests on rear hinges)
4. Disconnected dryer door wiring
5. Removed bolt from inside upper front corners; removed front panel (be careful: the edges are sharp and the tumbler will fall ... Read more when it loses support)
6. Removed broken belt and lint from interior parts; removed tensioner (which had fallen out of place). Note: The newer models have a tensioner pulley; my older model had a smooth semicircle that was confusing at first glance
7. Flipped dryer onto its back (for easier reinsertion of new belt and tumbler)
8. Placed new belt on tumbler; reinserted tumbler
9. Inserted new belt through tensioner, inserted tensioner "legs" into grooves on floor. Note: The belt will pull the tensioner upright when it's inserted properly (which isn't obvious at first)
10. Made sure belt and tumbler seal were properly installed
11. Replaced parts in reverse order
The process took over an hour because I couldn't figure out how to insert the belt through the tensioner. The trick is to insert the folded belt through the tensioner and onto the motor pulley. If I had to do it again, it would take about 30 minutes (including cleaning lint)
-
Michael from San Antonio, TX
-
Difficulty Level:Easy
-
Total Repair Time:30 - 60 mins
-
Tools:Screw drivers, Wrench set
This part provides the tension required for a multi-ribbed belt. It also helps the belt rotate the drum and attaches to the idler pulley wheel. If your dryer will not start or tumble, takes too long to dry, or is noisy during operation, you may need to replace the idler pulley assembly. Make sure to disconnect power before installing this part, and wear work gloves to protect your hands. While the dryer is disassembled for this repair, consider replacing the drive belt as well. You will need a putty knife, a Phillips screwdriver, and a 5/16 nut driver for this repair.
Replacing your Kenmore Dryer Dryer Idler Pulley Assembly

Customer Repair Stories
Lubricated motor and guide wheels but squealing still there. Then noticed the "idler pulley assembly" (the part that keeps the belt tight against ... Read more the drum) looked a bit old and worn. Ordered a replacement part on this site because it was much much cheaper than a service call, installed it.... and NO SQUEAL!!!
-
Will from Charlotte, NC
-
Difficulty Level:A Bit Difficult
-
Total Repair Time:15 - 30 mins
-
Tools:Screw drivers, Socket set
-
Oscar from Dallas, TX
-
Difficulty Level:Really Easy
-
Total Repair Time:30 - 60 mins
-
Tools:Screw drivers
If you notice that your dryer is noisy or will not tumble, you may need to replace the tri ring. This part is triangular, and is less than an inch in size. Tri rings can be found both on the idler pulley shaft, or on the rear drum roller shaft. In either case, you will need to remove the front panel of the dryer and the drum to access the part for repair. Once you have accessed the damaged tri ring, you will simply need to slip it off and replace it with the new one. This part is sold individually. Be sure to disconnect the power source from the dryer before you begin this repair.
Replacing your Kenmore Dryer Dryer Tri Ring

Customer Repair Stories
-
Danny from Oolitic, IN
-
Difficulty Level:Really Easy
-
Total Repair Time:Less than 15 mins
-
Tools:Nutdriver, Pliers
-
Joe from St. Louis, MO
-
Difficulty Level:Easy
-
Total Repair Time:30 - 60 mins
-
Tools:Nutdriver, Pliers
This is a genuine OEM replacement rear drum seal for your dryer. This seal is made of felt and comes with the adhesive required for installation. The purpose of the seal is to prevent hot air from escaping the drum while the dryer is operating. If you notice that it is taking too long for your laundry to dry, that marks are left on your laundry, or the machine is noisy or will not tumble, then you may need to replace the seal.
Replacing your Whirlpool Dryer Dryer Drum Felt Seal

Customer Repair Stories
-
Cleo from Laurinburg, NC
-
Difficulty Level:Easy
-
Total Repair Time:1- 2 hours
-
Tools:Nutdriver, Screw drivers
-
Grace from Phoenix, AZ
-
Difficulty Level:Easy
-
Total Repair Time:30 - 60 mins
-
Tools:Screw drivers, Socket set
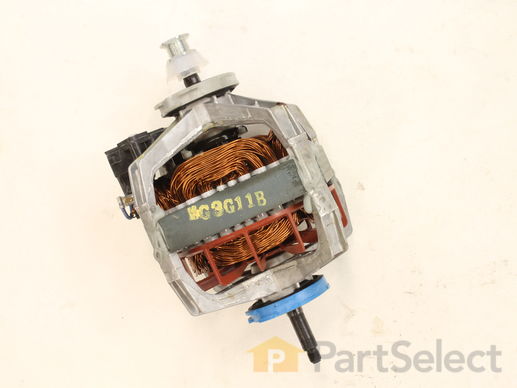
This motor fits most Whirlpool incorporated dryer brands before 1996. NOTE: Pulley is NOT available separately.
Replacing your Kenmore Dryer Dryer Drive Motor w/Pulley

Customer Repair Stories
-
charles from parker, CO
-
Difficulty Level:A Bit Difficult
-
Total Repair Time:More than 2 hours
-
Tools:Nutdriver, Screw drivers
-
James from Moscow, IA
-
Difficulty Level:Easy
-
Total Repair Time:30 - 60 mins
-
Tools:Nutdriver, Screw drivers
This is a replacement bearing ring kit for your dryer. The bearing rings are found on the top and bottom lips of the dryer drum. If your dryer is unusually noisy, or the drum will not turn during operation, or if there are marks left on your clothes after a cycle, you may need to replace the bearing ring kit. The kit comes with 2 bearings, one for the top and one for the bottom of the dryer drum. Remove the front panel of your dryer to access the dryer drum for this repair. At this point you can use a pair of needle nose pliers to release the old bearing rings from the drum. Snap the new bearing rings on, and reassemble the dryer to complete your repair.
Replacing your Whirlpool Dryer Dryer Two-piece Split Ring Bearing

Customer Repair Stories
-
Terry from Lindsay, CA
-
Difficulty Level:Really Easy
-
Total Repair Time:15 - 30 mins
-
Tools:Nutdriver, Pliers, Screw drivers
-
Ellen from Los Banos, CA
-
Difficulty Level:Easy
-
Total Repair Time:30 - 60 mins
-
Tools:Screw drivers, Socket set
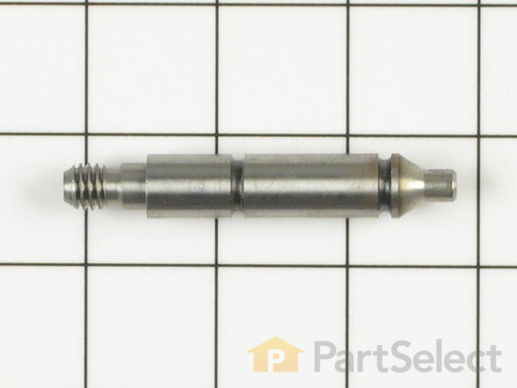
Replace the shaft of your left side drum support roller with this part from Whirlpool/Kenmore. This replacement shaft is 2-7/8 inches long. It is meant for use with many of Whirlpool/Kenmore's gas and electric clothes dryers that have been manufactured since 1965. Also known as Drum Roller Shaft.
Replacing your Kenmore Dryer Dryer Drum Roller Shaft Left Side

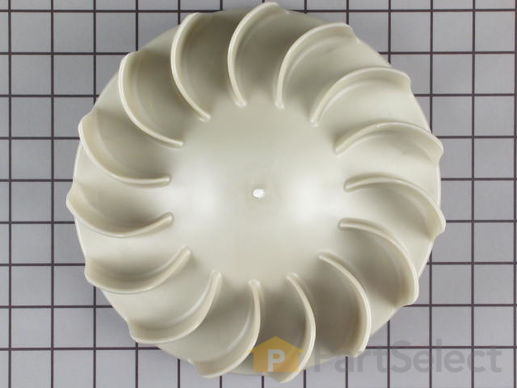
The blower wheel is a squirrel cage type wheel whose purpose is to move the air through the room or appliance. The blower wheel spins on the motor shaft to blow air through the dryer drum and out through the exhaust.
Replacing your Kenmore Dryer Dryer Blower wheel

Customer Repair Stories
2. Opened cabinet. Easy sheet metal screws and fairly obvious how everything goes together. NB: You'll need a block (or a helper to hold things while you run to look for one) to hold the drum while removing the front.
3. The motor is connected with a single harness, so wiring is a snap ... Read more .
4. Removing the blower wheel from the back was hard. I braced the motor shaft and turned with all the leverage I could muster, but it was stuck. Plan B: Recip saw to cut the shaft. Motor comes out one side and the fan comes out the other.
5. The fan, of course, was unusable because there was still a piece of motor shaft stuck in the thread. This is why I had to spring for a new wheel.
6. Put everything back together and receive wife's adoring praise...
-
Robert from Glencoe, IL
-
Difficulty Level:A Bit Difficult
-
Total Repair Time:1- 2 hours
-
Tools:Screw drivers, Socket set
-
Daniel from Coatesville, PA
-
Difficulty Level:Easy
-
Total Repair Time:More than 2 hours
-
Tools:Nutdriver, Screw drivers, Wrench (Adjustable)
Replace the shaft of your right side drum support roller with this part. This replacement shaft is 3-3/16 inches long, but does not require a washer or a nut.
Replacing your Kenmore Dryer Dryer Drum Support Roller Shaft Right Side

Customer Repair Stories
-
Harold from Worth, IL
-
Difficulty Level:Easy
-
Total Repair Time:30 - 60 mins
-
Tools:Nutdriver
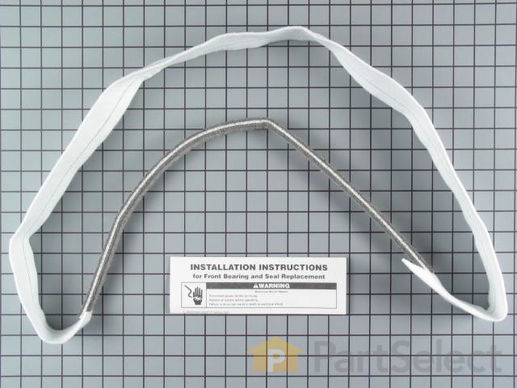
This front panel seal kit doesn't include the plastic retainers, reuse the old retainers. No glue is needed, the seal stretches to fit.
Replacing your Whirlpool Dryer Dryer Seal And Bearing

Customer Repair Stories
-
Chuck from Cross Lanes, WV
-
Difficulty Level:Easy
-
Total Repair Time:1- 2 hours
-
Tools:Nutdriver, Screw drivers
-
Stephen from Charlotte, NC
-
Difficulty Level:Easy
-
Total Repair Time:30 - 60 mins
-
Tools:Nutdriver, Screw drivers
Sold Individually.
If your washer shakes or vibrates loudly when it reaches its max speed, check that the leveling legs are even. To ensure that the washer is firmly on the ground using all four legs, adjust the legs so that the machine is level, and tighten the locking nuts on the legs that are threaded. Keep the washer as close to the floor as possible. Your model might have rear legs that level themselves, or it might have threaded legs all around. Make sure the rubber feet have not worn out. Replace any missing or damaged legs and feet. This replacement part is sold individually.
Replacing your Kenmore Dryer Washer Leveling Foot

Customer Repair Stories
-
Beth from Valley Springs, CA
-
Difficulty Level:Really Easy
-
Total Repair Time:1- 2 hours
-
Tools:Screw drivers
Instructions:
1. Tip dryer over onto a non-scratch surface. I used a tarp on the floor.
Insert leveling foot into the foot opening on the bottom of the dryer &
screw in with fingers until it is difficult to turn.
2. Use t ... Read more he adjustable wrench on the hexed foot (not the threads) to adjust to the desired level.
3. Tip dryer upright taking care not to exert pressure on the feet closest to floor. I used a folded-up tarp under the bottom edge of the dryer while lifting it to the upright position.
4. Use a level, back to front & side to side, to determine if feet need further adjustment.
5. Adjustments can be made with the dryer in the upright position, using the adjustable wrench on the hexed foot.
-
Bobbie from BEND, OR
-
Difficulty Level:Very Easy
-
Total Repair Time:Less than 15 mins
-
Tools:Wrench (Adjustable)
The WP8066184 is a dryer motor pulley that is used in some dryer models. It supports the motor belt where it connects with the motor. Symptoms of failure include squealing or grinding noise during drum rotation. Please use the model number of the appliance to check for compatibility before purchasing.
Replacing your Whirlpool Dryer Dryer Motor Pulley

Customer Repair Stories
-
Rob from GAITHERSBURG, MD
-
Difficulty Level:Really Easy
-
Total Repair Time:30 - 60 mins
-
Tools:Wrench (Adjustable)
Hint: Use a one gallon ice cream bucket to hold up the drum while connecting the belt. It makes it much easier and gives you more clearance.
-
Brian from IMLAY CITY, MI
-
Difficulty Level:Very Easy
-
Total Repair Time:15 - 30 mins
-
Tools:Nutdriver, Pliers, Screw drivers, Wrench set
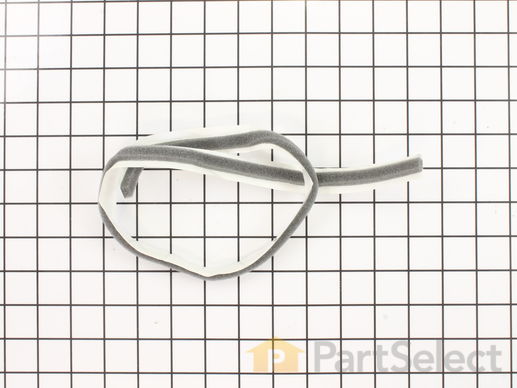
This is foam seal for your dryer. It forms a seal to prevent air from escaping the rear of the dryer drum and the lint duct. This model comes with adhesive backing and is located in between the lint chute and the bulkhead of your appliance. This foam seal is just over 28 inches long and under 1 inch wide. You may need to replace this part if your clothing is taking too long to dry, or if your dryer is not generating enough heat or no heat at all.
Replacing your Kenmore Dryer Dryer Lint Trap Housing Seal

This part is the replacement single front panel clip for your dryer. It is made of metal and is approximately 2 inches long and ¾ inch wide. The front panel retainer clip is what holds the front panel on to the dryer. If the clip is damaged or missing, or if the front panel appears loose, you may need to replace the clip. This part is sold individually and is an authentic OEM part.
Customer Repair Stories
-
Roger from Twinsburg, AL
-
Difficulty Level:Easy
-
Total Repair Time:30 - 60 mins
-
Tools:Nutdriver, Screw drivers
This seal comes with the adhesive backing.
Replacing your Kenmore Dryer Dryer Seal

When the igniter reaches a high enough temperature, these coils (Coil Valve, Dryer Gas Valve Coil Kit, Dryer Valve Coil Kit, Gas Valve Solenoid) work together to open the gas valve and allow the gas to enter the burner. This is a safety mechanism to ensure that there are no unsafe buildups of gas inside your appliance. The coils are attached to the dryer gas valve. If the dryer does not heat or heats intermittently, the coil may not be opening the gas valve. Both coils must be operational for the valve to open. No continuity would indicate a defective coil, but they can be intermittent and fail when they get hot. Both coils should be replaced when one of them is broken. This part can break as a result of material fatigue from normal use. This part measures approximately 1 inch in diameter and 1 inch in height, and is constructed of plastic and metal. It comes in black/beige. This part features a 3-terminal boost/hold coil and a 2-terminal secondary coil
Customer Repair Stories
-
Robert from Seattle, WA
-
Difficulty Level:Really Easy
-
Total Repair Time:Less than 15 mins
-
Tools:Nutdriver, Screw drivers
-
Gary from Haverhill, NH
-
Difficulty Level:Easy
-
Total Repair Time:30 - 60 mins
-
Tools:Nutdriver, Screw drivers, Socket set
1 1/2 diameter.


