EasyApplianceParts is now PartSelect! We've merged our sites to provide a better shopping experience for you.   Full Details
Back
Back
Keep typing for more specific results...
Models > PT7800SH4SS > Symptoms > Won’t turn on

Parts That Fix General Electric Microwave Oven Combo PT7800SH4SS Won’t turn on

Won’t turn on is a commonly reported symptom for the PT7800SH4SS General Electric Microwave Oven Combo, and we have put together a full guide on how to fix this. This advice is based on feedback from people who own this exact appliance. We have listed the most common parts for your PT7800SH4SS General Electric Microwave Oven Combo that will fix Won’t turn on. We have included repair instructions, and helpful step-by-step video tutorials. If you are experiencing this issue, not to worry, DIYers just like you have fixed this, and shared their experience to help you!
Fixes Symptom 63% of time

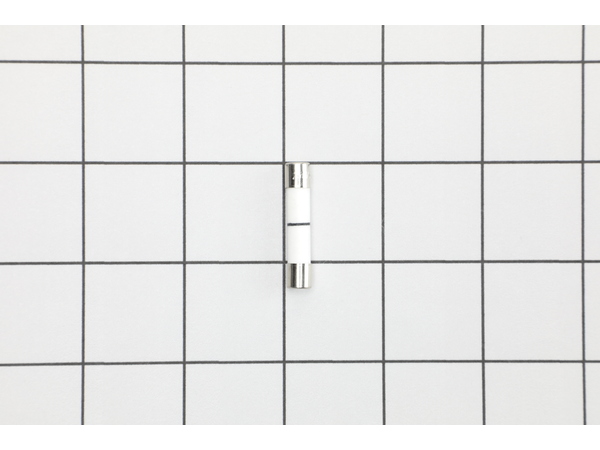
This ceramic microwave fuse is just over an inch in length. It is white in the center, and metal on both ends. This is a 20-amp fuse, and is used to power your microwave. If the touch pad on the microwave becomes unresponsive, the microwave produces little to no heat, or the appliance simply does not turn on, it could mean that your fuse is at fault and needs to be replaced. Because this part contains an electrical charge, remember to disconnect power to the microwave unit before you begin this repair. NOTE: Before you start this repair, ensure that the microwave is unplugged, and the capacitor is discharged. A capacitor stores large amounts of electricity even after your microwave is unplugged.

$ 19.95
  In Stock
PartSelect Number PS1481237
Manufacturer Part Number WB27X10928

Customer Repair Stories

I diagnosed the problem incorrectly: based on a previous repair.
The old fuse is perfectly good. The new ones arrived within a day.
  • Ralph from Brandon, FL
  • Difficulty Level:
    Easy
  • Total Repair Time:
    Less than 15 mins
  • Tools:
    Pliers, Screw drivers
64 of 137 people found this instruction helpful.
Was this instruction helpful to you?
Thank you for voting!
Microwave completely stopped working
Turned out the issue was easily solved by replacing a single, inexpensive fuse.

First off, UNPLUG THE MICROWAVE.

The fuse is located under the plastic grill at the top of the microwave. It's held on by two screws. Once you've removed the screws and taken off the plastic grill, you go to the right side of the microwave and remove another screw that holds a small metal grill in place. Removing the small metal grill is probably the toughest part of this repair. You kind of have to rock it back and forth a bit to get it to release. Once that's off, you can get to the fuse. I removed the burnt out one with a pair of needle nose pliers. I also put a small piece of cardboard under the fuse when I did this so I didn't accidentally drop it into the innards of the microwave. I did the same thing when I replaced the new fuse. I then plugged the appliance back in and made sure it worked. Once that was confirmed, I replaced both grills.
  • Kim from Cliffside Park, NJ
  • Difficulty Level:
    Really Easy
  • Total Repair Time:
    15 - 30 mins
  • Tools:
    Screw drivers
962 of 1249 people found this instruction helpful.
Was this instruction helpful to you?
Thank you for voting!
Fixes Symptom 16% of time

This interlock switch is located in the door latch.

$ 42.95
  In Stock
PartSelect Number PS237015
Manufacturer Part Number WB24X10047

Customer Repair Stories

Microwave runs with the door open
Remove microwave outer cover. Turn on side & locate the upper & lower door switches. Better to replace in pairs even if one is ok. Remove the wire harness to each switch. Then replace switch and re connect the wire harness. Re attach outer cover
and test to see if that solved the problem. If so then well done!!
  • Thomas from Andover, NJ
  • Difficulty Level:
    Really Easy
  • Total Repair Time:
    15 - 30 mins
  • Tools:
    Pliers, Screw drivers
37 of 57 people found this instruction helpful.
Was this instruction helpful to you?
Thank you for voting!
Microwave would turn on and count down, but not heating and not rotate turntable. Pressing door up would occasionally start heat.
First I disconnected the power and opened the door. Then I removed the top screws holding the top vent louvers, then removed the screw at the top of the touch pad. The touch pad removes by sliding up slightly then tilting top out. I unscrewed two screws holding the door latch assembly. Press the tab to remove and replace switch. Reconnect wires, reseat latch mount by placing top bracket tab in place first, allign and secure with screws. Reseat touch pad by placing bottom tabs in first, tilt forward and press up to seat top tabs, secure with top screw. Secure vent louver screws, plug in and watch your microwave work again.
  • Michael from Ridgefield, CT
  • Difficulty Level:
    Really Easy
  • Total Repair Time:
    Less than 15 mins
  • Tools:
    Screw drivers
40 of 65 people found this instruction helpful.
Was this instruction helpful to you?
Thank you for voting!
Fixes Symptom 8% of time

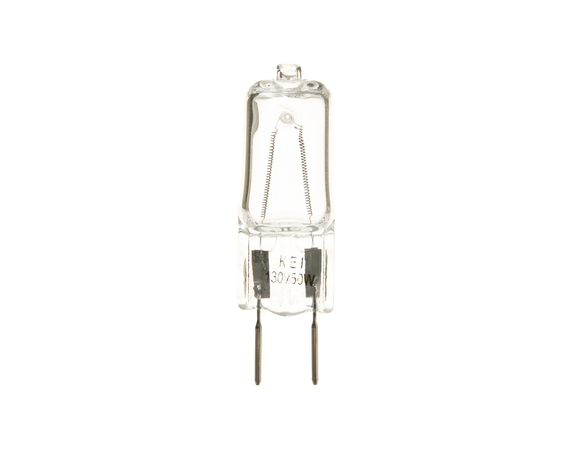
Introducing the GE Halogen Lamp, an essential component for your beloved appliance. This halogen lamp is specifically designed by GE to yield optimum performance and long life. Its prime function is to illuminate with high-intensity light, providing clear visibility. Crafted with quality materials, it ensures durability and is a guaranteed component known for its reliability. Equipped with high lumen output, it offers superior light quality for your appliance needs. Trust in the efficiency and effectiveness of this GE Halogen Lamp to boost your appliance's functionality.

$ 24.95
  In Stock
PartSelect Number PS16216934
Manufacturer Part Number WB02X35488

Customer Repair Stories

Replaced under hood surface light bulb
Very easy to replace. This replacement part is the perfect fit for my microwave since the original part has been discontinued. It does have the night light and bright light feature.
  • Dottie from NEW MILFORD, CT
  • Difficulty Level:
    Very Easy
  • Total Repair Time:
    Less than 15 mins
  • Tools:
    Screw drivers
3 of 4 people found this instruction helpful.
Was this instruction helpful to you?
Thank you for voting!
Microwave bulb was burnt out
It is easy to repair the burnt out bulb if one has the correct bulb. Your website is very user friendly and your service is great. I was not able to replace the bulb at this time because our RV is at the repair shop for some other matters. I am sure the installation of the new bulb will go smoothly. Thanks for asking. Sharry Kiehl
  • Sharry from Lititz, PA
  • Difficulty Level:
    Really Easy
  • Total Repair Time:
    Less than 15 mins
  • Tools:
    Screw drivers
7 of 12 people found this instruction helpful.
Was this instruction helpful to you?
Thank you for voting!
Fixes Symptom 6% of time

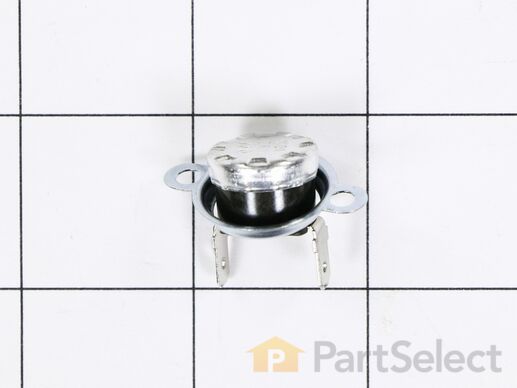
Introducing the GE Microwave Thermostat - a vital safety component for your microwave. Crafted with precision, this thermostat is specifically designed to prevent overheating scenarios which can cause hazards. Its main function is to promptly cut off power and shut down the microwave if a potential overheating problem is detected. Due to the potential risks associated with high-voltage capacitors within the microwave, the installation of this part should ideally be handled by a professional service technician. Invest in this GE Microwave Thermostat for optimal safety and maximum performance of your appliance. Trust GE for reliable and safe microwave operation.

$ 18.95
  In Stock
PartSelect Number PS3491479
Manufacturer Part Number WB20X10048

Customer Repair Stories

All power out. No display, not operational
Remove microwave and set on flat surface. Remove all screws on top. Remove all screws around back edge holding top on. Finally remove the screws on botton holding top on and remove top. On left side on top, remove 6 screws holding black channel in place. Also remove 3 screws holding metal top in place. Now lift black channel up and unplug 2 wires on cutout. Replace cutout and reinstall everything in reverse order. Worst part is taking microwave down and reinstalling.
  • Steven from Gardiner, ME
  • Difficulty Level:
    A Bit Difficult
  • Total Repair Time:
    1- 2 hours
  • Tools:
    Screw drivers
15 of 22 people found this instruction helpful.
Was this instruction helpful to you?
Thank you for voting!
Original part was fried
Had to remove microwave from the wall. Then disassemble entire top assembly to get to the part. Easy enough to replace after that. Then just reassemble and reinstall. About 2hrs. total
  • michelle from virginia beach, VA
  • Difficulty Level:
    Difficult
  • Total Repair Time:
    1- 2 hours
  • Tools:
    Screw drivers
20 of 33 people found this instruction helpful.
Was this instruction helpful to you?
Thank you for voting!
Fixes Symptom 4% of time

This is the replacement monitor switch for your microwave. It is black in color and measures approximately 1 inch by ¾ of an inch. This switch monitors the door latch position of your microwave and communicates to the electronic control board whether the latch is open or closed. If the switch is damaged, your microwave may not start, even though the door latch is closed. You can check the continuity of the switch by using a multimeter. Be sure to disconnect the microwave from power before you begin this repair.

$ 36.95
  In Stock
PartSelect Number PS11766871
Manufacturer Part Number WB24X25397
Fixes Symptom 3% of time

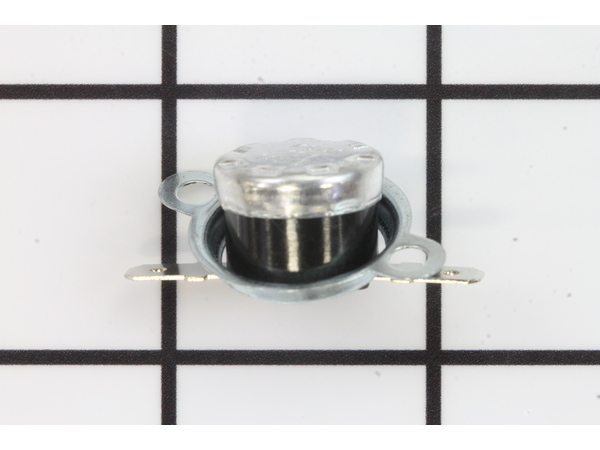
This GE Thermostat Thermal Cut-off is a crucial safety component for microwaves. Specifically designed to prevent overheating, it functions as a protective measure by shutting down the appliance if temperatures rise above safe levels. As a key safeguard, it contributes to the long life and efficient performance of your microwave. Due to the potentially hazardous high-voltage capacitors found in microwaves, installation is best performed by a qualified service technician. Make safety a priority; enhance your microwave's performance with this GE Thermostat.

$ 25.95
  In Stock
PartSelect Number PS2321366
Manufacturer Part Number WB21X10149