


PSE25KYHEHFS General Electric Refrigerator - Overview
Sections of the PSE25KYHEHFS
[Viewing 1 of 1]
Keep searches simple, eg. "belt" or "pump".

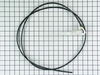
Refrigerator Temperature Sensor
PartSelect #: PS304103
Manufacturer #: WR55X10025
This sensor (Temperature Sensor, Thermistor, Refrigerator Temperature Sensor) sends the temperature reading of the compartment to the control board. If you notice your refrigerator is too warm, too co...
$28.95
In Stock

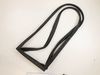
Refrigerator Dispenser Door Assembly Or Flapper
PartSelect #: PS964304
Manufacturer #: WR17X11653
This “Dispenser Door Assembly” (Door Recess Assembly, Ice Door Assembly, Dispenser Door, Refrigerator Dispenser Ice Chute Door Kit, Dispenser Door Flap, Ice Chute Door, Flapper) keeps the room air fro...
$22.95
In Stock

Refrigerator Fan Grommet
PartSelect #: PS963756
Manufacturer #: WR02X12008
If you notice that your refrigerator or freezer is noisy or too warm, you may need to replace the evaporator fan grommet. This part is red in color, and is about 1 inch in diameter. The evaporator fan...
$12.95
In Stock

Refrigerator Dispenser Door Solenoid Assembly
PartSelect #: PS1483583
Manufacturer #: WR62X10055
This genuine OEM solenoid is designed for use with GE refrigerators and controls the opening and closing of the ice chute door. It serves as a direct replacement for a worn or faulty solenoid, helping...
$53.41
In Stock

Refrigerator Module Shelf Insert
PartSelect #: PS2323441
Manufacturer #: WR71X10764
This shelf insert is a genuine OEM replacement part for your refrigerator. The shelf insert can be installed without any tools. Simply pull out the existing shelf and insert the new one.
$48.95
In Stock

Refrigerator Recess Door Spring
PartSelect #: PS285013
Manufacturer #: WR02X10585
This door recess spring or dispenser lever spring in your refrigerator is used to return the ice door to the closed position or the dispenser lever to the home position once released. You will find th...
$13.95
In Stock

Refrigerator Union Connector 5/16 To 5/16
PartSelect #: PS758446
Manufacturer #: WR02X11330
Quick connector for plastic water line - 5/16" to 5/16"
$14.95
In Stock

REFRIGERATOR DOOR LIGHT SWITCH
PartSelect #: PS12727313
Manufacturer #: WR23X31507
This is the light switch that goes in your refrigerator. If the light is not working or stays on, you may need to replace the switch. It is made of mainly white plastic, and is an OEM part, directly f...
$15.95
In Stock

Refrigerator Ring
PartSelect #: PS1015726
Manufacturer #: WR02X12149
This compression ring is meant to hold the evaporator fan motor in place in the freezer compartment of your refrigerator. This is is a genuine OEM part. The tools needed to complete this repair are a ...
$13.95
In Stock

Refrigerator Water Filter
PartSelect #: PS16217433
Manufacturer #: XWFE
This water filter is found in the rear upper-right corner of the interior of the refrigerator. If your model has a replacement indicator light it will turn red to signal the need for a replacement. If...
$74.64
In Stock

Refrigerator Water Tank Assembly
PartSelect #: PS783769
Manufacturer #: WR17X11440
This tank stores water until the water actuator is activated and water is requested.
$53.41
In Stock

White Refrigerator Handle
PartSelect #: PS963897
Manufacturer #: WR12X10625
For freezer baskets.
$37.95
In Stock
Questions And Answers for PSE25KYHEHFS
We're sorry, but our Q&A experts are temporarily unavailable.
Please check back later if you still haven't found the answer you need.
Sort by:
- < Prev
- 1
- Next >
Search filter:
Clear Filter
Your search term must have 3 or more characters.
Keep searches simple. Use keywords, e.g. "leaking", "pump", "broken" or "fit".
Sorry, we couldn't find any existing answers that matched.Try using some different or simpler keywords, or submit your new question by using the "Ask a Question" button above!
Dawn
June 29, 2025
Light are dim
For model number PSE25KYHEHFS
Hello Dawn, thank you for getting in touch. According to our understanding, the issue is most probably with the LED light assembly, part number PS11767930. You may need to replace it to fix the issue. We hope this helps!
Was this helpful?
Thank you for voting!
Related Parts:
Light Board Assembly


$81.43
In Stock
- < Prev
- 1
- Next >
Common Symptoms of the PSE25KYHEHFS
[Viewing 25 of 25]Leaking
Fixed by
these parts
these parts


Show All
Fridge too warm
Fixed by
these parts
these parts


Show All
Noisy
Fixed by
these parts
these parts


Show All
Not dispensing water
Fixed by
these parts
these parts

Show All
Freezer section too warm
Fixed by
these parts
these parts

Show All
Light not working
Fixed by
these parts
these parts


Show All
Ice maker won’t dispense ice
Fixed by
these parts
these parts

Show All
Door Sweating
Fixed by
these parts
these parts
Show All
Door won’t open or close
Fixed by
these parts
these parts
Show All
Fridge too cold
Fixed by
these parts
these parts
Show All
Freezer not defrosting
Fixed by
these parts
these parts
Show All
Frost buildup
Fixed by
these parts
these parts
Show All
Door latch failure
Fixed by
these parts
these parts
Show All
Will Not Start
Fixed by
these parts
these parts
Show All
Fridge and Freezer are too warm
Fixed by
these parts
these parts
Show All
Ice maker not making ice
Fixed by
these parts
these parts
Show All
Too warm
Fixed by
these parts
these parts
Show All
Fridge runs too long
Fixed by
these parts
these parts
Show All
Freezer too cold
Fixed by
these parts
these parts
Show All
Clicking sound
Fixed by
these parts
these parts
Show All
Ice maker dispenses too little ice
Fixed by
these parts
these parts

Show All
Ice maker dispenses too much ice
Fixed by
these parts
these parts
Show All
Doesn’t stop running
Fixed by
these parts
these parts
Show All
Too cold
Fixed by
these parts
these parts
Show All
Leaks water
Fixed by
these parts
these parts
Show All


Keep searches simple. Use keywords, e.g. "leaking", "pump", "broken" or "fit".
my refigerator was warm but the freezer was cold and working correcttly
I went to a GE repair center to explain my problem, the service center reccomended that I have a techinician come out o look at it. $75.00 for the visit and what ever labor and materials wuld cost.
I went on line to see if there were others having this same problem and found that there were many with the same problem.
... Read more
/>After reading some of the ways that people found out what was wrong ...it became a matter of three components, the timer, heater or thermostat.
I tried the most common component and the less expensive one first , the thermostat switch I installed it very easily snipping two wires and attaching the news using wire nuts I used the diagram on this website to pinpoint the component and there has not been a problem since.
I went on line to see if there were others having this same problem and found that there were many with the same problem.
I tried the most common component and the less expensive one first , the thermostat switch I installed it very easily snipping two wires and attaching the news using wire nuts I used the diagram on this website to pinpoint the component and there has not been a problem since.
Read less
Parts Used:
-
michele from North Smithfield, RI
-
Difficulty Level:Really Easy
-
Total Repair Time:15 - 30 mins
-
Tools:Pliers
296 of 380 people
found this instruction helpful.
Was this instruction helpful to you?
Thank you for voting!
Flapper Door Stuck Open Allowing Ice Tube To Frost Shut
I read in a previous post how to do the job from outside fridge which saved me lots of time. No need to remove inner door lining. Here is my procedure:
1.Turned off power. 2.Snapped off outside trim ring. 3.Located three small holes inside lip just above ice tube. The center hole was not used. 4.Pushed rather firmly up through ... Read more two remaining holes with small Allen wrench to release front control panel. 5.Removed (3) wire connectors from printed circuit board. Firmly pull/pry them straight out as lifting on retaining clip will break it off. I broke one & had to elect. tape it back in place later although I doubt it would have ever come off. 6.Release secondary panel by removing (4) screws. The problem was obvious as the solenoid had broken the crank arm off the flapper rod & trapped it open 7.Replaced solenoid, crank arm with flapper attached, spring & micro switch. Switch was okay but I changed anyway. 8.Cleaned all areas with 1/10 bleach water to sanitize. 9.Re-installed evrything in reverse order & all is okay. Thanks to someone for telling about those two small holes. Made job easy versus a very hard one.
1.Turned off power. 2.Snapped off outside trim ring. 3.Located three small holes inside lip just above ice tube. The center hole was not used. 4.Pushed rather firmly up through ... Read more two remaining holes with small Allen wrench to release front control panel. 5.Removed (3) wire connectors from printed circuit board. Firmly pull/pry them straight out as lifting on retaining clip will break it off. I broke one & had to elect. tape it back in place later although I doubt it would have ever come off. 6.Release secondary panel by removing (4) screws. The problem was obvious as the solenoid had broken the crank arm off the flapper rod & trapped it open 7.Replaced solenoid, crank arm with flapper attached, spring & micro switch. Switch was okay but I changed anyway. 8.Cleaned all areas with 1/10 bleach water to sanitize. 9.Re-installed evrything in reverse order & all is okay. Thanks to someone for telling about those two small holes. Made job easy versus a very hard one.
Read less
Parts Used:

-
Joe from Maryville, TN
-
Difficulty Level:Easy
-
Total Repair Time:30 - 60 mins
-
Tools:Screw drivers, Wrench set
165 of 221 people
found this instruction helpful.
Was this instruction helpful to you?
Thank you for voting!
refrigerator was getting too cold
I removed the old temperature sensor by cutting the wires. I attached the wires of the new sensor with wire nuts and mounted it in the same bracket.
Parts Used:
-
Larry from Menomonie, WI
-
Difficulty Level:A Bit Difficult
-
Total Repair Time:15 - 30 mins
149 of 215 people
found this instruction helpful.
Was this instruction helpful to you?
Thank you for voting!