


PEM31RF1SS General Electric Microwave - Overview
Sections of the PEM31RF1SS
[Viewing 3 of 3]


Keep searches simple, eg. "belt" or "pump".

Microwave Tray
PartSelect #: PS8755334
Manufacturer #: WB48X21336
Discover the GE Microwave Turntable Tray designed to help make your meal preparation simple and efficient. This genuine GE product, superbly crafted and sturdily built, ensures a uniform heat distribu...
$101.71
In Stock

Microwave Door Interlock Switch Bracket
PartSelect #: PS3486543
Manufacturer #: WB14X10049
The door interlock switch bracket houses and supports the door switches.
$47.95
In Stock

ROLLER GUIDE RING
PartSelect #: PS8753560
Manufacturer #: WB02X21331
Discover the perfect balance of functionality and efficiency with the GE Roller Guide Ring. Designed to support your microwave?s turntable tray, this product ensures convenient rotation for even heati...
$49.95
In Stock


Manuals & Care Guides for PEM31RF1SS
Click to downloadQuestions And Answers for PEM31RF1SS
We're sorry, but our Q&A experts are temporarily unavailable.
Please check back later if you still haven't found the answer you need.
Common Symptoms of the PEM31RF1SS
[Viewing 1 of 1]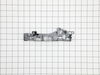
Keep searches simple. Use keywords, e.g. "leaking", "pump", "broken" or "fit".
Door locks. Not opening.
Slide a Butter knife at left side by open push knob door will open. Then open all screws from top cover push cover top side front way then door locks Bracket have 3 microswitch pulls out switches mark them top medium and bottom. Remove 3 screws holding brackets will come out. On bottom see a Cam has 1/4” holes can holding Saft broken then
... Read more
install new door lock bracket install microswitch put 3screw and slide Cam on saft . I put a small screw on saft to hold cam on place. There was no screw . That’s why cam saft was broke. Put top cover tight all the screws and door lock fixed.
Read less
Parts Used:
-
Jay from WESLEY CHAPEL, FL
-
Difficulty Level:Really Easy
-
Total Repair Time:1- 2 hours
-
Tools:Screw drivers
4 of 6 people
found this instruction helpful.
Was this instruction helpful to you?
Thank you for voting!
the cover for the tray motor was attached to the bottom cover at 6 points. they were 3mm to 4mm long.
I used small wire cutter I use in fly tying hobby. The metal was easy to cut. When cover was removed I unplugged the motor,removed it and plugged the new one in.
To replace the cover -- reverse it,place the 2 tabs on one edge into the slots that are already part of the base. On the opposite edge there is a domed shaped tab with a h ... Read more ole in center. Place the small screw that was provided back in and thighten.
Your Done
To replace the cover -- reverse it,place the 2 tabs on one edge into the slots that are already part of the base. On the opposite edge there is a domed shaped tab with a h ... Read more ole in center. Place the small screw that was provided back in and thighten.
Your Done
Read less
Parts Used:
-
James A from SILVERDALE, WA
-
Difficulty Level:Really Easy
-
Total Repair Time:15 - 30 mins
-
Tools:Screw drivers
1 of 2 people
found this instruction helpful.
Was this instruction helpful to you?
Thank you for voting!