Your coupon for will be reflected when you check out!
✖
Your coupon for
✖
Hello!
You're visiting the PartSelect site in U.S.
Would you like to shop on the Canadian site?
Stay on this site
Go to Canadian site
✖
Model Number Locations
1Select Category Type
Select Category Type
2Select Product Type
Select Product Type
3Select {MODEL} Type
Select {MODEL} Type
Sample Model Number Tags
Model numbers can be made up of numbers (1005400, for example) or a combination of letters and numbers (LAT1000AAE). The model number will most likely appear on either a paper sticker or a metal plate. Your appliance's model number tag may look similar to the sample model number tags shown here (model number highlighted in yellow):
PEB9159DJ2BB General Electric Microwave - Overview
Save your modelModel Saved!
Save your model for later to make things easier.
Model has been saved to My Models. If you're not signed in, your lists are available on this device and will expire within 30 days.
Model has been saved to My Models.
This turntable tray is for microwaves.
Turntable tray rotates in the center of the microwave to help ensure the food cooks evenly.
Follow the instructions in the owner's manual when installing this part.
$135.31
In Stock
Order within the next 8 hrs and your part ships today!
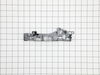
Presenting the GE Lever Switch, an essential component for your microwave. This door interlock switch lever serves a critical duty - it activates the interlock switch whenever the microwave door is cl...
$36.95
In Stock
Order within the next 8 hrs and your part ships today!
This turntable motor is for microwaves.
The turntable motor rotates the glass tray inside the microwave oven.
Because high-voltage capacitors in a microwave can retain a lethal electrical charge...
$66.28
In Stock
Order within the next 8 hrs and your part ships today!
Introduce an important component for your kitchen needs with the GE Rotating Ring Assembly. This high-quality product is an essential for the proper functioning of your microwave, aiding in evenly dis...
$47.95
In Stock
Order within the next 8 hrs and your part ships today!
Order within the next 8 hrs and your part ships today!
Questions And Answers for PEB9159DJ2BB
Ask our experts a question about this model and we'll get back to you as soon as possible!
3 questions answered by our experts.
Sort by:
< Prev
1
Next >
Search filter:
Clear Filter
Your search term must have 3 or more characters.
Keep searches simple. Use keywords, e.g. "leaking", "pump", "broken" or "fit".
Sorry, we couldn't find any existing answers that matched.Try using some different or simpler keywords, or submit your new question by using the "Ask a Question" button above!
Bard
June 26, 2023
How do I open or take off the control panel to get to the door switches for replacement?
For model number PEB9159DJ2BB
Hi Brad, thank you for contacting us. We would suggest following these general instructions for control panel disassembly: Remove the top grill by unscrewing the screws holding it. Lift the control panel to detach it. Make sure to note down the wiring connections before removing the wires from the control board. Pull out the plugs and remove the door switch bracket to replace the switches. We hope this helps!
Was this helpful?
Thank you for voting!
Edward
October 24, 2023
Microwave tray does not rotate Microwave does not heat Neither convection heat or microwave geat
For model number PEB9159DJ2BB
Hello Edward, thank you for your inquiry. Based on the description that you have provided, we would recommend checking the main control board, part number PS12295369. We hope this helps, good luck with the repair!
The keypad works sometime, and sometimes it doesn’t work
For model number PEB9159DJ2BB
Hello Clarence, Thank you for your inquiry. Researching your model, it could be an issue with the touchpad (which is only available as part of the control panel assembly) or the control board. Check for any visible damage or loose connections. Good luck with your repair.
1. Take out the case by unscrew 8 screws on the back and side of the case 2. Take out the control panel by unscrew 1 screw on the top and slide up 3. Take out the latch by unscrew 2 screws, and slide out 3 electric switches that clipped on the latch 4. Clip the switches onto the new latch 5. Slide in lever switch into
... Read morelatch 6. Put back the latch 7. Put back the control panel 8. Put back the case
Slide a Butter knife at left side by open push knob door will open. Then open all screws from top cover push cover top side front way then door locks Bracket have 3 microswitch pulls out switches mark them top medium and bottom. Remove 3 screws holding brackets will come out. On bottom see a Cam has 1/4” holes can holding Saft broken then
... Read more install new door lock bracket install microswitch put 3screw and slide Cam on saft . I put a small screw on saft to hold cam on place. There was no screw . That’s why cam saft was broke. Put top cover tight all the screws and door lock fixed.


 – Part Number: WB24X10146")