EasyApplianceParts is now PartSelect! We've merged our sites to provide a better shopping experience for you.   Full Details
Back
Back
Keep typing for more specific results...
Models > MVWC555DW1 > Symptoms > Shaking and Moving

Parts That Fix Maytag Washer MVWC555DW1 Shaking and Moving

Shaking and Moving is a commonly reported symptom for the MVWC555DW1 Maytag Washer, and we have put together a full guide on how to fix this. This advice is based on feedback from people who own this exact appliance. We have listed the most common parts for your MVWC555DW1 Maytag Washer that will fix Shaking and Moving. We have included repair instructions, and helpful step-by-step video tutorials. If you are experiencing this issue, not to worry, DIYers just like you have fixed this, and shared their experience to help you!
Fixes Symptom 80% of time

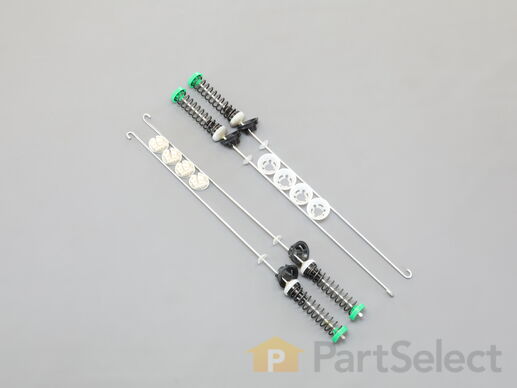
This suspension rod kit is a genuine OEM replacement kit that is compatible with various models of washing machine. The kit is responsible for supporting the inner tub of the washing machine and absorbing any excessive vibrations and movement caused during the washing and spinning cycles. This helps to protect the tub and interior of the washer from damage. If the suspension rods in your washer are faulty, you will likely notice loud banging, knocking, or scraping sounds as the tub makes contact with the washer cabinet. Each kit includes four suspension rods and springs as well as the suspension ball cups. It is advised you replace all suspension rods at the same time, as they tend to wear at similar rates.

$ 82.95
  In Stock
PartSelect Number PS12347546
Manufacturer Part Number W11130362

Replacing your Whirlpool Washer Suspension

Replacing your Suspension

Customer Repair Stories

Replacing shock absorbers on Maytag washer
Used video provided,but while reinstalling shocks pull the shock absorbers thru holes in washer deck using a stiff wire or a metal coat hanger will also work. This made installation so much easier!
  • William from JAX BCH, FL
  • Difficulty Level:
    Really Easy
  • Total Repair Time:
    30 - 60 mins
  • Tools:
    Nutdriver, Screw drivers
17 of 18 people found this instruction helpful.
Was this instruction helpful to you?
Thank you for voting!
Washer wobble during spin cycle.
Watched a video to get a general idea. Moved washer to garage. Raised lid, supported with s-hook and light chain. Front springs were easy, except no hole for the rod to hang in so used chain and small screwdriver through mounting hole. Back springs were not as easy. Finally removed the back panel to get to the rods. Bingo, much easier and only took 5 min to remove the back panel. reassemble and she works like a charm. Suggest to find a video reflecting your particular brand and model as all are similar but uniquely different. Easy project though.
  • Jesusa from JEFFERSON CTY, MO
  • Difficulty Level:
    Easy
  • Total Repair Time:
    1- 2 hours
  • Tools:
    Nutdriver, Screw drivers
21 of 23 people found this instruction helpful.
Was this instruction helpful to you?
Thank you for voting!
Fixes Symptom 9% of time

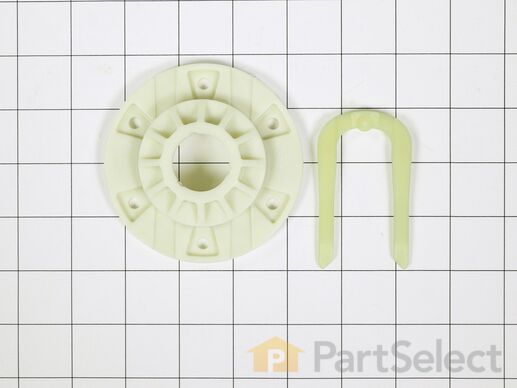
This drive hub kit (part number W10528947VP) is for washers. Drive hub kit W10528947VP connects the spin basket to the spin shaft that spins the basket. The kit may include multiple parts; refer to your parts diagram for a complete list of parts included. Unplug the washer before installing this part. Wear work gloves to protect your hands.

$ 28.29
  In Stock
PartSelect Number PS6012095
Manufacturer Part Number W10528947

Replacing your Whirlpool Washer Drive Hub Kit

Replacing your Drive Hub Kit

Customer Repair Stories

Waher would not spin and made noise
Removed center cap, loosened center nut, pry lightly up on center plate and tap center nut. Center plate comes loose, remove nut, remove center plate. Pry lock clip out and remove, remove screw with electric impact (screw drive will work, but slower), remove drive hub. Install new drive hub (be sure to check screw hole alignment), install and tighten screws (be sure to follow a skip pattern and bring it down even), install lock clip, install center plate, install and tighten nut, replace center cap. Done!
  • Andrew from SYLVANIA, OH
  • Difficulty Level:
    Very Easy
  • Total Repair Time:
    Less than 15 mins
  • Tools:
    Screw drivers, Wrench (Adjustable)
17 of 20 people found this instruction helpful.
Was this instruction helpful to you?
Thank you for voting!
Hub had warn its grooved teeth off and washer wouldnt agitate
ordered hub and it shipped quickly. I was able to put the hub in place and screw the screws in. you want to tighten them down slowly and go around to each screw tightening a little at a time so you don't break the hub. as you tighten the screws down the hub slides down flush. its impossible to just push the hub on with your hand. Buttoned it back up and got caught up on laundry. good day when the washer is fixed.
  • Allison from RICHFORD, NY
  • Difficulty Level:
    Easy
  • Total Repair Time:
    15 - 30 mins
  • Tools:
    Screw drivers
56 of 73 people found this instruction helpful.
Was this instruction helpful to you?
Thank you for voting!
Fixes Symptom 8% of time

This is an impact absorber, also known as a sound dampening pad, for washing machines. This sound dampening pad attaches to the top of your washing machine drum to reduce the severity and harshness of vibrations and movement during the washing and spinning cycle, to produce a quieter laundry experience. If your washer is shaking excessively during operation, this pad may be worn out or simply missing, and in need of replacement. To replace this pad, you will need a screwdriver or wrench to access the inner portion of your washing machine and remove the old one and install the new one. This OEM pad measures 5-inches by 3-inches and is sold individually.

$ 9.95
  In Stock
PartSelect Number PS11746560
Manufacturer Part Number WP8564458
Fixes Symptom 3% of time

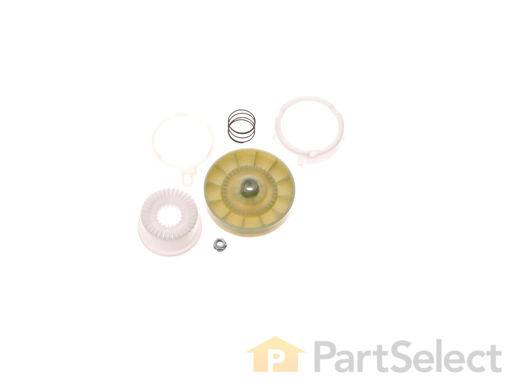
This is a replacement clutch assembly or cam kit for your washer. The clutch assembly is mounted on the drive shaft on the bottom of your washer. You may need to replace the clutch assembly if the splines on the clutch assembly are stripped and the washer is making noise, or if you are having problems with the wash and spin cycles. You will need to access the bottom of the washer for this repair. It is easiest to if you disconnect your washer from both the water and power source, and lay it on its back. The clutch assembly contains 6 parts, and all are included with the kit. It is also important to change out the entire assembly, rather than individual pieces.

$ 37.76
  In Stock
PartSelect Number PS10057144
Manufacturer Part Number W10721967

Replacing your Whirlpool Washer Washer Drive Pulley

Replacing your Washer Drive Pulley

Customer Repair Stories

Making loud noises.
The video you sent me was very helpful told me the exact tools I needed and how to do it.
Thank you
  • Roy from BROOKLYN, NY
  • Difficulty Level:
    Really Easy
  • Total Repair Time:
    30 - 60 mins
  • Tools:
    Nutdriver, Pliers, Screw drivers, Socket set
15 of 21 people found this instruction helpful.
Was this instruction helpful to you?
Thank you for voting!
Noise, grinding sounds. Wash tub stopped turning but motor and cycles kept functioning. Process of elimination, must be the clutch assembly.
Easy, just followed the repair video. Recommend also ordering the drive belt. Bought one locally during my repair.
  • David from BLOOMINGTON, IN
  • Difficulty Level:
    Easy
  • Total Repair Time:
    30 - 60 mins
  • Tools:
    Screw drivers, Socket set
58 of 80 people found this instruction helpful.
Was this instruction helpful to you?
Thank you for voting!