Back
Back
Keep typing for more specific results...
Models > MEDC215EW1 > Symptoms > Too hot

Parts That Fix Maytag Dryer MEDC215EW1 Too hot

Too hot is a commonly reported symptom for the MEDC215EW1 Maytag Dryer, and we have put together a full guide on how to fix this. This advice is based on feedback from people who own this exact appliance. We have listed the most common parts for your MEDC215EW1 Maytag Dryer that will fix Too hot. We have included repair instructions, and helpful step-by-step video tutorials. If you are experiencing this issue, not to worry, DIYers just like you have fixed this, and shared their experience to help you!
Fixes Symptom 47% of time

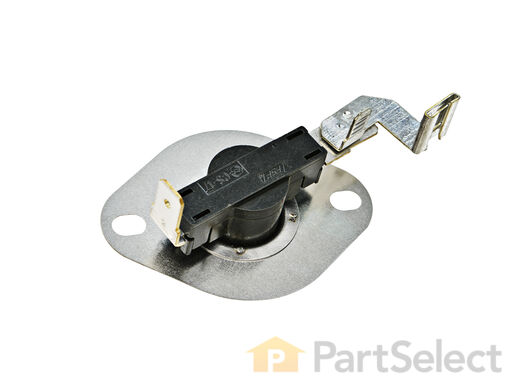
This thermostat (Dryer Operating Thermostat, Dryer Cycling Thermostat, Cycling Thermostat, Dryer Thermostat) is used to maintain a temperature of 155 degrees in the dryer drum. The internal bias heater also allows this thermostat to provide a low heat temperature of approximately 140 degrees when the low temperature setting is selected. The part measures 2 by 1.5 inches, comes in black/silver and is constructed of plastic and metal. The thermostat attaches to the blower wheel housing.

$ 27.25
  In Stock
PartSelect Number PS11741405
Manufacturer Part Number WP3387134

Replacing your Whirlpool Dryer Dryer Internal-Bias Thermostat

Replacing your Dryer Internal-Bias Thermostat

Customer Repair Stories

Dryer would leave clothes damp
First, I unplugged the dyer and then I removed all of the screws for the panel that covers the rear of the dryer. This exposed the cycling thermostat's location. I then removed the wires, one at a time so I would be able to put them back on in the same place. Then I removed the one screw using a nut driver and then put the new cycling thermostat in place. It was pretty easy.
  • Luke from Elmira, NY
  • Difficulty Level:
    Easy
  • Total Repair Time:
    Less than 15 mins
  • Tools:
    Nutdriver
10 of 15 people found this instruction helpful.
Was this instruction helpful to you?
Thank you for voting!
Dryer would not shut off on auto dry settings
I removed the discharge duct from the back of the dryer. Then, I removed the screws on the back of the dryer and the back itself. This exposed the cycling thermostat. I removed the screw holding the thermostat. I took the wires off the defective thermostat and reinstalled them on the new thermostat. Then, I reassembled in reverse order.
  • Wiliam from Belleville, MI
  • Difficulty Level:
    Really Easy
  • Total Repair Time:
    15 - 30 mins
  • Tools:
    Nutdriver
40 of 46 people found this instruction helpful.
Was this instruction helpful to you?
Thank you for voting!
Fixes Symptom 22% of time

The thermal cut-off (Dryer Thermal Cut-Off Fuse Kit, Dryer Thermal Cut-Off Kit) prevents the dryer from overheating when the dryer high limit thermostat fails in a closed circuit condition. This part fails when the heater housing does not have adequate airflow through it; this is normally caused by restriction in the exhaust vent, plugged lint screen, or broken blower wheel. If this part fails, the dryer may not produce any heat. This kit includes one high-limit thermostat with a limit of 250 degrees Fahrenheit, and one thermal cut-off fuse (309 degrees), jumper wires, and new female spade terminals. Both components are mounted on the heater housing, and measure approximately 2 inches long and 1.5 inches wide each. This kit comes in silver and is constructed of metal.

$ 46.18
  In Stock
PartSelect Number PS334299
Manufacturer Part Number 279816

Replacing your Whirlpool Dryer Dryer Thermal Cutoff Kit

Replacing your Dryer Thermal Cutoff Kit

Customer Repair Stories

heating coil was'nt heating up and after i change the coil realize the little thermal regulator had to also be change.
I basically took the back offo the drive, then detach
the heating coil. Afterwards had to go back in and
change the thermal regulator an the job was completed.
  • Rube from Houston, TX
  • Difficulty Level:
    Really Easy
  • Total Repair Time:
    30 - 60 mins
  • Tools:
    Wrench set
452 of 482 people found this instruction helpful.
Was this instruction helpful to you?
Thank you for voting!
No Heat
First tried heating element and thermal fuse with no luck. Ordered thermal cutoff and fixed problem. Had I used an ohm meter first I would have determined problem before having ordered heating element and fuse, as both had resistance. I wast just lazy and ordered the took the most common failed components first before taking dryer back off.
  • Vernon from Niceville, FL
  • Difficulty Level:
    Really Easy
  • Total Repair Time:
    15 - 30 mins
  • Tools:
    Nutdriver
897 of 963 people found this instruction helpful.
Was this instruction helpful to you?
Thank you for voting!
Fixes Symptom 19% of time

A dryer high-limit thermostat (High Limit Thermostat, Hi-Limit Thermostat, Dryer High-Limit Thermostat) is a switch that is actuated by temperature change. This high limit thermostat acts as a safety mechanism to keep the dryer from overheating. If your thermostat is malfunctioning, your dryer may not heat. This thermostat is located beneath the dryer vent at the back of the appliance. The terminal extension arm connects to the heater element terminal. You can test the high limit thermostat with a multimeter. Test the thermostat for continuity at room temperature. If your reading indicates a defective thermostat, it must be replaced. This model is made of metal and plastic, and comes in silver/black. This part features 1 high limit thermostat with a terminal extension arm.

$ 19.93
  In Stock
PartSelect Number PS11742185
Manufacturer Part Number WP3977767

Replacing your Whirlpool Dryer Dryer High Limit Thermostat

Replacing your Dryer High Limit Thermostat

Customer Repair Stories

Dryer too hot in all heat settings.
My dryer was running way too hot and the temperature settings didn't make any difference. Clothes were shrinking and coming out almost scalding hot. I followed simple directions posted on you tube for troubleshooting this problem. I checked that there were no lint blockages, visually inspected all connections and hardware. All seemed good. Metered out all thermostats and fuses. Everything checked good for continuity. For the reset-able thermostats, I heated them on a hot plate to verify that the normally closed switches opened near their specified temperatures. Dont do this for the non-resetable fuses and thermostats. If you're
not sure, avoid this step. Only the hi-limit thermostat seemed to open a little higher than expected but I couldn't with 100% accuracy determine the exact temp it opened. Made sure the heating element wasn't shorted in its housing or that too might give the dryer the same symptoms. That checked good too. Only thing left I could think of was to change that hi-limit thermostat. Ordered part, removed and replaced. Perfect fit. Op-checked good. All heat settings now operate normally. No more shrunken clothes that are too hot to touch even on the lowest setting lol. Hope this helps, happy hunting.
  • Jon from SALINAS, CA
  • Difficulty Level:
    Really Easy
  • Total Repair Time:
    30 - 60 mins
  • Tools:
    Nutdriver, Pliers
6 of 6 people found this instruction helpful.
Was this instruction helpful to you?
Thank you for voting!
No heat in dryer
Once I unpluged the dryer and then removed the back cover, I located the heating unit and then removed the thermostat. Once that was done, I installed the new thermostat and connected the wires. I tested the dryer to make sure that it would heat. Then I replaced the back cover.
  • Kenneth from Durham, NC
  • Difficulty Level:
    Easy
  • Total Repair Time:
    15 - 30 mins
  • Tools:
    Nutdriver
17 of 20 people found this instruction helpful.
Was this instruction helpful to you?
Thank you for voting!
Fixes Symptom 9% of time

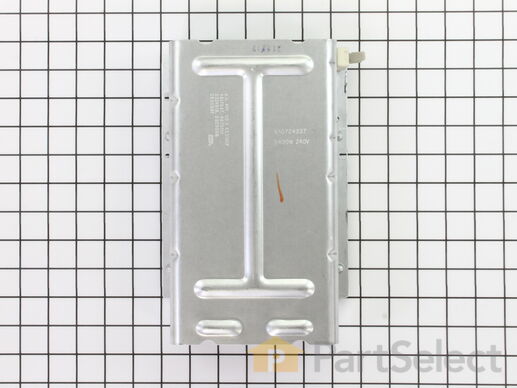
The heating element (Flat Can Heating Element 5400W, Heating Element, Whirlpool Dryer Heating Element, Dryer Heating Element) provides heat to the dryer. It is metal and measures 10.5 inches long, 7.5 inches wide, 2 inches deep. The element attaches to the heater housing. This part can break as a result of wear and tear. This can be material fatigue or prolonged high temperature exposure. If broken your clothes may not dry because of a lack of heat. It must be replaced when there is no longer continuity between the terminals. First check the thermal fuse on the blower housing before deciding to replace the heating element.

$ 54.01
  In Stock
PartSelect Number PS334313
Manufacturer Part Number 279838

Replacing your Whirlpool Dryer Dryer Heating Element

Replacing your Dryer Heating Element

Customer Repair Stories

Dryer would run with no heat.
The repair was easy. the most time consuming part was vacuuming the dust from the back of the Dryer, The repair required removing screw from the back panel of the dryer. Then removing screws from the heating element and unplugging the wires. The only moderately diffculy part was swapping the sensor form the old element.
  • Remie from Mahopac, NY
  • Difficulty Level:
    Really Easy
  • Total Repair Time:
    15 - 30 mins
  • Tools:
    Nutdriver
720 of 752 people found this instruction helpful.
Was this instruction helpful to you?
Thank you for voting!
Dryer motor runs, but no heat
To reach the heating element you only need to open the back cover of the dryer (about 8 nut-head screws). Remember to disconnect the power.

To remove the heating element there are two small nut-head screws. Remove the two electric wires. Then you can pull the heating element away.

You can check the heating element with an ohm-meter or visually inspect it to see if the heating element spiral wire is broken.

Don't hurry to dispose the old element. My model includes a small electric safety part. You'll need to transfer it to the new heating element (that comes without it)..

Good luck.
  • Gadi from Irvine, CA
  • Difficulty Level:
    Really Easy
  • Total Repair Time:
    30 - 60 mins
  • Tools:
    Nutdriver
2285 of 2476 people found this instruction helpful.
Was this instruction helpful to you?
Thank you for voting!
Fixes Symptom 1% of time

This is foam seal for your dryer. It forms a seal to prevent air from escaping the rear of the dryer drum and the lint duct. This model comes with adhesive backing and is located in between the lint chute and the bulkhead of your appliance. This foam seal is just over 28 inches long and under 1 inch wide. You may need to replace this part if your clothing is taking too long to dry, or if your dryer is not generating enough heat or no heat at all.

$ 10.45
  In Stock
PartSelect Number PS11741506
Manufacturer Part Number WP339956

Replacing your Kenmore Dryer Dryer Lint Trap Housing Seal

Replacing your Dryer Lint Trap Housing Seal
Fixes Symptom 1% of time

This kit is used for electric clothes dryers, and it comes with a yellow wire nut.

$ 9.95
  In Stock
PartSelect Number PS334206
Manufacturer Part Number 279457

Replacing your Whirlpool Dryer Dryer Heating Element Wire Kit

Replacing your Dryer Heating Element Wire Kit

Customer Repair Stories

Dryer stopped heating
(Always unplug dryer before making any repairs) I opened the dryer and checked the heating element. Making sure that the connection was good and nothing was damaged, I determined the problem was overheated wires. They melted and lots connection. I replaced them with the heating element wire connection kit. Easy to install and simple to get right. I cleaned the dryer again with a vaccum cleaner, removing all the lint, and checked the vents, making sure they were clear...I turned the breaker on (it was tripped when the dryer overheated)and everything worked great.
  • Joseph from Austin, TX
  • Difficulty Level:
    Really Easy
  • Total Repair Time:
    15 - 30 mins
  • Tools:
    Screw drivers, Socket set
5 of 6 people found this instruction helpful.
Was this instruction helpful to you?
Thank you for voting!
couldn't get the wire connection anywhere after we bought the heating element.
we received the two heating element wires in 3 days and connected the heating element with no problem works great.
  • Betty from Erie, PA
  • Difficulty Level:
    Really Easy
  • Total Repair Time:
    15 - 30 mins
  • Tools:
    Socket set
5 of 5 people found this instruction helpful.
Was this instruction helpful to you?
Thank you for voting!
Fixes Symptom 1% of time

This is a genuine OEM replacement rear drum seal for your dryer. This seal is made of felt and comes with the adhesive required for installation. The purpose of the seal is to prevent hot air from escaping the drum while the dryer is operating. If you notice that it is taking too long for your laundry to dry, that marks are left on your laundry, or the machine is noisy or will not tumble, then you may need to replace the seal.

$ 40.95
  In Stock
PartSelect Number PS8691753
Manufacturer Part Number W10612022

Replacing your Whirlpool Dryer Dryer Drum Felt Seal

Replacing your Dryer Drum Felt Seal

Customer Repair Stories

Aft seal deterioated and causing brown spot on clothing due to netal to metal contact.
Removed top and front of dryer then drum and followed the instructions in the package. It was a real simple procedure. I did additional cleaning while the dryer was disassembled.
  • Cleo from Laurinburg, NC
  • Difficulty Level:
    Easy
  • Total Repair Time:
    1- 2 hours
  • Tools:
    Nutdriver, Screw drivers
11 of 12 people found this instruction helpful.
Was this instruction helpful to you?
Thank you for voting!
Rear Dryer Seal was old and staining clothing
After unplugging the dryer,I removed 2 bolts on the back top of the dryer, then removed the two screws in the lint box area. I used a screw driver to help force the top panel of the dryer up. When open, I removed the top screws that held the front and side panels together. I then lifted the front panel up and away from the dryer, so there would be room to take the drum out. I removed the belt from the pulley (located under the drum) and slid the drum out. I removed the old seal, cleaned up the drum and the inside of the dryer, then glued the new seal on. After the glue was dry, I put the drum back in (with the belt on the drum), put the belt back on the pulley and proceeded to put the dryer front back on. Once the front was on, I put the top back on and replaced the bolts on the back of the dryer. I plugged it in and it is working great! By the way, before this, I had NEVER attempted to repair a dryer before and I am female. If I could do it, so can anyone else willing to try :)
  • Grace from Phoenix, AZ
  • Difficulty Level:
    Easy
  • Total Repair Time:
    30 - 60 mins
  • Tools:
    Screw drivers, Socket set
58 of 65 people found this instruction helpful.
Was this instruction helpful to you?
Thank you for voting!