EasyApplianceParts is now PartSelect! We've merged our sites to provide a better shopping experience for you.   Full Details
Back
Back
Keep typing for more specific results...
Models > MED7230HW1 > Symptoms > Drum Not Spinning

Parts That Fix Maytag Dryer MED7230HW1 Drum Not Spinning

Drum Not Spinning is a commonly reported symptom for the MED7230HW1 Maytag Dryer, and we have put together a full guide on how to fix this. This advice is based on feedback from people who own this exact appliance. We have listed the most common parts for your MED7230HW1 Maytag Dryer that will fix Drum Not Spinning. We have included repair instructions, and helpful step-by-step video tutorials. If you are experiencing this issue, not to worry, DIYers just like you have fixed this, and shared their experience to help you!
Fixes Symptom 37% of time

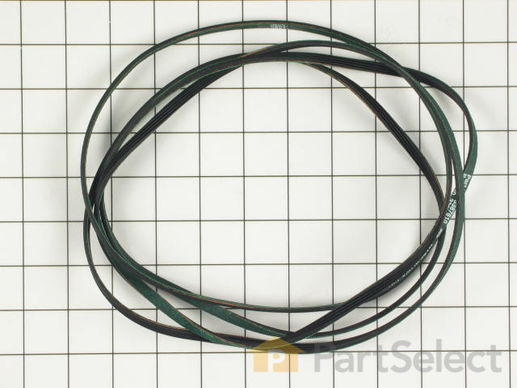
The Drive Belt is a 93 1/2" belt which wraps around the dryer drum to allow tension and movement. If broken the dryer will not turn properly, or there may be loud noises. The part is rated as "medium" difficulty to install. Refer to your model number and user manual to ensure this part is correct for you. To complete this repair you will need a Phillips screwdriver, 1/4 inch nut driver, a putty knife, and a pair of needle nose pliers. Ensure you disconnect your power to the dryer before beginning this repair, which should take between 30 and 60 minutes maximum to complete.

$ 24.04
  In Stock
PartSelect Number PS382430
Manufacturer Part Number 661570

Replacing your Whirlpool Dryer Multi Rib Belt

Replacing your Multi Rib Belt

Customer Repair Stories

Dryer not spinning
I took off the front panel via 2 screws on the inside of the dryer with the top panel in the maintenance position. Pulled out the tub(cut my hand pretty bad in the process but continued). Did some cleaning and I had to google how the belt tensioner goes into place. Rather difficult on your own i held the belt and placed the tub back into place while placing the belt around the tub putting it in the correct area. thats pretty much it and began reinstalling the parts i had removed.. easy fix now that i have done it once. This is all after my landlords said they werent replacing it and just to have this one hauled off, so all in all i have a 26 dollar dryer now:)
  • john from goldsboro, NC
  • Difficulty Level:
    A Bit Difficult
  • Total Repair Time:
    30 - 60 mins
  • Tools:
    Nutdriver, Pliers, Screw drivers
33 of 49 people found this instruction helpful.
Was this instruction helpful to you?
Thank you for voting!
broken belt
First I removed back and top of dryer, then the support braces holding the drum, after that I took the drum out and the blower covers and cleaned the whole dryer of lint and other debris. Installed the new belt and then reassembled the dryer.
  • Larry from exeter, RI
  • Difficulty Level:
    Easy
  • Total Repair Time:
    30 - 60 mins
  • Tools:
    Nutdriver, Screw drivers
66 of 77 people found this instruction helpful.
Was this instruction helpful to you?
Thank you for voting!
Fixes Symptom 35% of time

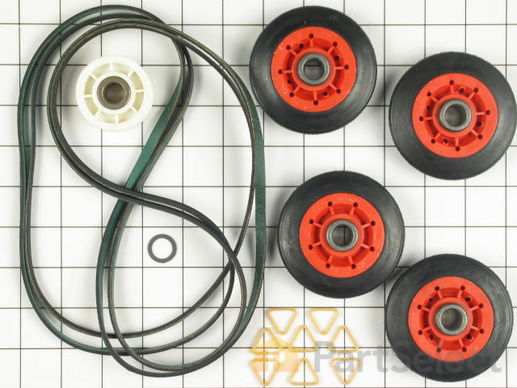
This Whirlpool Dryer Repair Kit is a convenient solution for fixing noise and drum movement problems in 27-inch dryers. Compatible with models from Whirlpool, Kenmore, Maytag, and more, the kit includes a drive belt, drum support rollers, an idler pulley, mounting clips, and a washer. It’s designed for straightforward installation using standard tools, and should only be installed after disconnecting power. Ideal for restoring smooth, quiet dryer performance, this kit combines essential components in one package to save time and effort during repairs. Installation requires disassembling the dryer to replace parts using standard tools. Ensure the dryer is unplugged before starting. This durable OEM kit provides reliable repairs for quieter, more efficient operation.

$ 37.64
  In Stock
PartSelect Number PS373088
Manufacturer Part Number 4392067

Replacing your Whirlpool Dryer Dryer Repair Kit

Replacing your Dryer Repair Kit

Customer Repair Stories

Squeaky Dryer Noise
I purchased the dryer repair kit with the drum belt, wheels and idler pulley. I watched the instructional videos online and it seemed fairly straight forward. Breaking down the dryer and replacing the pulleys was easy enough. My problem began when I tried to feed the drum belt around the idler pulley. After finishing the job, the dryer would not turn and the sensor light stayed on. I thought something else was broken with the dryer and spent hours trouble shooting other problems that I was having. Finally I figured out that the drum belt was not installed correctly around the idler pulley. However, I could not get it properly installed from the front of the machine so I tried from the rear still with no avail. I finally had to fish the old belt out of the garbage can that I had thrown away earlier. I lined up the old belt with the new one in the kit and discovered that the new belt was much smaller, so I put the old one back on the drum. Here's the lesson I learned...make sure the belts are the same size before attempting to install. The old idler was responsible for the squeaking and that stopped but I am still using the same old drum belt. Hope it lasts.
  • Eddie from PELZER, SC
  • Difficulty Level:
    A Bit Difficult
  • Total Repair Time:
    More than 2 hours
  • Tools:
    Nutdriver, Screw drivers
72 of 79 people found this instruction helpful.
Was this instruction helpful to you?
Thank you for voting!
very loud squeeling sound
The issue was the idler pulley. First I began opening up the front panel based on a youtube video but soon realized the model was slightly different and required a lot more items to remove. I saw the pulley in the back with nothing in the way so I put the front panel crap back on and removed the rear panel. There it was, very simple to remove and replace. I'm not looking forward to drum rollers though. Hopefully they're aren't as difficult as they appear.
  • jason from HOLDEN, MA
  • Difficulty Level:
    Really Easy
  • Total Repair Time:
    30 - 60 mins
  • Tools:
    Socket set
94 of 100 people found this instruction helpful.
Was this instruction helpful to you?
Thank you for voting!
Fixes Symptom 11% of time

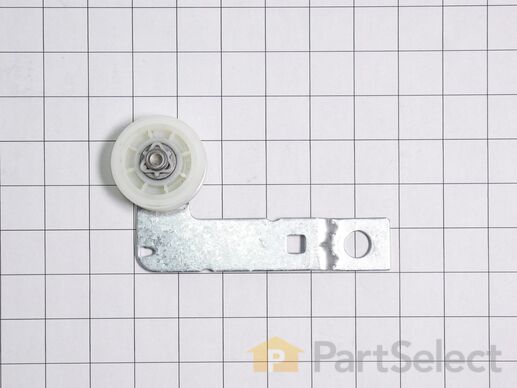
The idler pulley with bracket ensures proper tension on the dryer’s drive belt, allowing the drum to spin effectively. This assembly includes the pulley and arm, making it ideal for replacing a worn or damaged component. Designed for various Whirlpool, KitchenAid, Maytag, Jenn-Air, Amana, Inglis, and Magic Chef dryers, this genuine OEM part guarantees reliability and performance. If your dryer is noisy or the drum is not turning properly, this part may be the solution. Always disconnect power and wear gloves during installation.

$ 27.16
  In Stock
PartSelect Number PS11726337
Manufacturer Part Number W10837240

Replacing your Whirlpool Dryer Idler Pulley with Bracket

Replacing your Idler Pulley with Bracket

Customer Repair Stories

Idler pulley wore out
Removed the back panel and saw that the idler pulley was worn out. It only took me 5min. To replace, it was very easy to replace.
  • Peter from HUEYTOWN, AL
  • Difficulty Level:
    Very Easy
  • Total Repair Time:
    15 - 30 mins
  • Tools:
    Screw drivers, Socket set
10 of 11 people found this instruction helpful.
Was this instruction helpful to you?
Thank you for voting!
Dryer made a terrible screeching noise when tumbling.
I followed the repair Vedic and took the drum out and replaced the pulls and bracket. Very straightforward job. Dryer is now as quite as the first day we bought it.
  • Richard from SAUGERTIES, NY
  • Difficulty Level:
    A Bit Difficult
  • Total Repair Time:
    30 - 60 mins
  • Tools:
    Nutdriver, Screw drivers, Socket set
13 of 14 people found this instruction helpful.
Was this instruction helpful to you?
Thank you for voting!
Fixes Symptom 7% of time

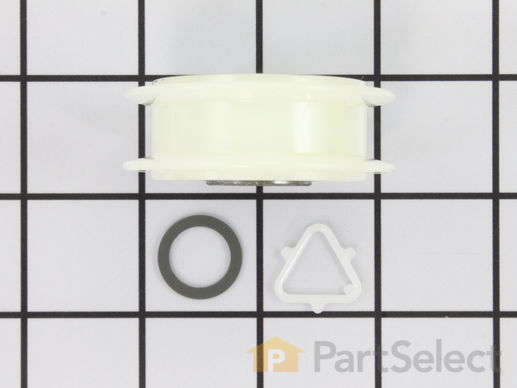
This Idler Pulley includes the tri-ring and gasket and everything included here is manufacturer-certified. This part maintains correct tension on the drive belt in order to spin the drum properly. If damaged or broken the dryer will not dry properly, will not tumble properly, or may not even start. Installation is rated as "Medium" difficulty. This part is located on the dryer drum, around the tension pulley. Refer to your user manual and model number for repair instructions and to ensure this part is right for you. For this repair project, the tools needed are a Phillips screwdriver, 1/4 inch nut driver, putty knife, small flat blade screw driver, and needle nose pliers.

$ 25.88
  In Stock
PartSelect Number PS334244
Manufacturer Part Number 279640

Replacing your Whirlpool Dryer Idler Pulley

Replacing your Idler Pulley

Customer Repair Stories

TOb stopped turning after a week or so of high pitched "squeals" coming from inside the dryer.
I recommend you order the idler pulley as soon as you start to hear the unusual noise indicating metal against metal. Replace the idler pulley before it fails and possibly causes more damage to the drive system. Simply removed the power cord at the back of the dryer and then the multiple screws holding the back panel in place as well as the clip holding the exhaust vent in place. You may need to remove the top panel to access a few of these screws. A diagram of the belt routing is in the paperwork I found behind the front lower panel of the dryer. This too is easily removed with just a few screws.
  • Robert from Princeton, WV
  • Difficulty Level:
    Really Easy
  • Total Repair Time:
    Less than 15 mins
  • Tools:
    Nutdriver, Screw drivers
42 of 47 people found this instruction helpful.
Was this instruction helpful to you?
Thank you for voting!
Very Loud Squeaking Noise
1) Disconnected power cord from wall. 2) Disconnected vent hose from back of dryer. 3)Removed dryer rear panel. 4)Disengaged tension spring on idle wheel arm. 5) Removed worn idle wheel. 6)Installed new Idler wheel assembly. 7) Vacuumed dust from rear of dryer (optional, recommended). 8) Reinstalled rear cover, vent hose and power cord. Easy repair 15-30
  • GREGORY from Wilsonville, OR
  • Difficulty Level:
    Easy
  • Total Repair Time:
    15 - 30 mins
  • Tools:
    Nutdriver, Pliers, Screw drivers
75 of 96 people found this instruction helpful.
Was this instruction helpful to you?
Thank you for voting!
Fixes Symptom 5% of time

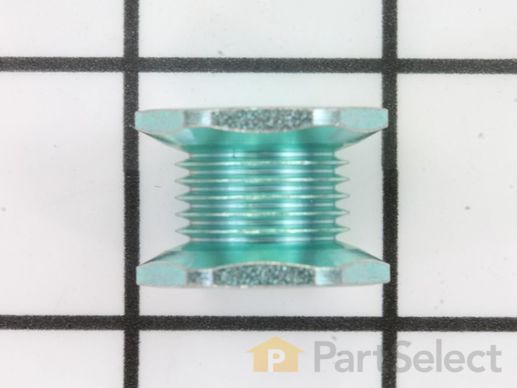
This part is the replacement motor pulley for your dryer. The motor pulley allows the dryer belt to run straight while the dryer is operating. If your motor pulley is damaged, your dryer may not tumble, and may not start altogether. A damaged motor pulley can also damage the dryer belt, and it may need to be replaced as well. Be sure to disconnect power from the dryer before you begin this repair. This motor pulley is a genuine OEM part sourced directly from the manufacturer.

$ 21.80
  In Stock
PartSelect Number PS11727942
Manufacturer Part Number W10837625

Replacing your Kenmore Dryer Motor Pulley

Replacing your Motor Pulley

Customer Repair Stories

Broken Motor Pulley
I am a retired applaince repairman not recommended for amature to repair this model.
  • Anthony from Lake Forest, CA
  • Difficulty Level:
    Very Difficult
  • Total Repair Time:
    30 - 60 mins
  • Tools:
    Pliers, Screw drivers
20 of 73 people found this instruction helpful.
Was this instruction helpful to you?
Thank you for voting!
Broken Motor Pulley
Removed back panel of the dryer-reached my hand to the back of the motor shaft, put 7/16 wrench on it to hold the shaft while I removed the broken pulley with pliers. Very easy fix-the tech on Utube took the entire dryer apart totally unnecessary. If that is what the factory tells its tech"s to do its no wonder why the labor charge would be thru the roof.
  • Mark from PELHAM, MA
  • Difficulty Level:
    Easy
  • Total Repair Time:
    1- 2 hours
  • Tools:
    Nutdriver, Pliers, Socket set
7 of 10 people found this instruction helpful.
Was this instruction helpful to you?
Thank you for voting!
Fixes Symptom 3% of time

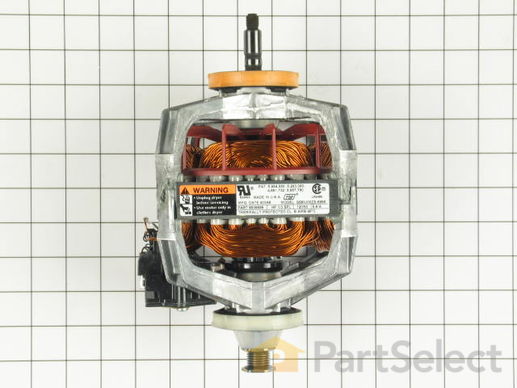
The blower shaft is 1-5/8 inches long, while the drive shaft is 1-1/4 inches long.

$ 157.53
  In Stock
PartSelect Number PS334287
Manufacturer Part Number 279787

Replacing your Kenmore Dryer Drive Motor with Threaded Shaft - 120V 60Hz

Replacing your Drive Motor with Threaded Shaft - 120V 60Hz

Customer Repair Stories

Dryer would start and then stop after a few minutes, eventually it completely stopped.
After determining that the dryer motor was the issue, I wrote down the part number and logged on to partselect.com website.

I input the number into the search box and there was the exact motor I needed.

The correct part showed up in a timely manner and the pricing was very fair.

I disassembled the dryer, removed the old motor and reinstalled the new motor within about 30 minutes.

Key point was to read the instructions first and then reconnect the wiring to the new motor. The new motor has the switch install in a different spot on the motor so be careful to follow the instructions but, the instructions were very clear and connections were very simple.

I also did some preventive maintenance while I was in the unit by cleaning out any remaining lint from the heater unit and surrounding areas, that took about 30 minutes. Reassembling was a snap and I turned on the gas, plugged it in and........SUCCESS! Total time of repair and cleaning was about an hour.

I had a load of laundry ready to go and put the new motor right to work. It has been non-stop drying and thanks to Part Select for getting everything right the first time. It has been a positive experience and I will tell others about the website if they have similar problems. Thanks again for a success story and dry clothing.
  • Keith L. from San Diego, CA
  • Difficulty Level:
    Really Easy
  • Total Repair Time:
    30 - 60 mins
  • Tools:
    Nutdriver, Pliers, Wrench (Adjustable)
11 of 21 people found this instruction helpful.
Was this instruction helpful to you?
Thank you for voting!
Our dryer started squealing and would then stop running.
After determining that the dryer motor was the issue I wrote down the part number and logged on to partselect.com.

I input the number into the search box and there was the exact motor I needed.

The price was fair and the delivery quick so I figured I would give yuo guys a shot and see how it goes.

The part showed up on time and as expected. It was well packed and most importantly - it was the CORRECT part.

I disassembled the dryer which involved removing the lint trap, pulling out the blower fan and removing the motor cover. The motor was held in with 2 metal screws and wiring harness.

I took the belt off of the tensioner and pulled out the old motor. The motor was mounted with 2 clips which snapped off with ease. Reassembly was a breeze since the motor fit perfectly- the entire transplant operation took all of about 35 minutes.

I crossed my fingers, turned on the gas, plugged it in and........SUCCESS!

Since the dryer was down for over a week the backlog of laundry was piled pretty high. This replacement motor would immediately be put to the test.

It has been 5 days of non-stop drying and no squeeks, no squeels and nothing but dry clothes!

Thanks to Part Select for getting everything right the first time. It made a potentially very bad experience turn out as good as I could have ever hoped.
  • Kelly from Aptos, CA
  • Difficulty Level:
    Easy
  • Total Repair Time:
    30 - 60 mins
  • Tools:
    Nutdriver, Pliers, Wrench (Adjustable)
54 of 68 people found this instruction helpful.
Was this instruction helpful to you?
Thank you for voting!
Fixes Symptom 3% of time

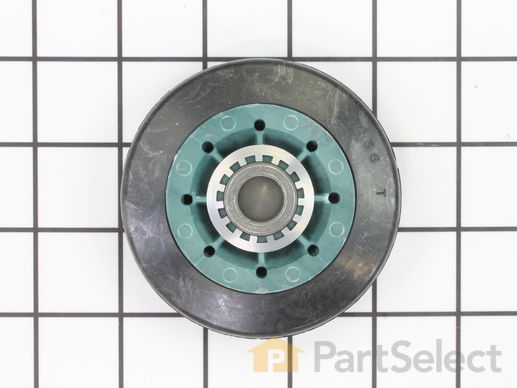
This drum support roller is sold individually. Most dryers require two. The tri-rings are included. This is a drum support roller for a dryer. It is a genuine replacement part. This part is sold separately. Most dryers require two drum rollers. It is recommended to check and replace both drum support rollers at the same time to ensure proper drum rotation and because they often wear at the same rate. The drum support roller holds the drum in the proper position while it spins on the support wheels. If rollers are worn out, they will cause the dryer to be noisy.

$ 18.83
  In Stock
PartSelect Number PS11752609
Manufacturer Part Number WPW10314173

Replacing your Whirlpool Dryer Dryer Drum Support Roller

Replacing your Dryer Drum Support Roller

Customer Repair Stories

A high pitched squeal when drum was rolling.
First my son and I moved the dryer to the garage as we believed there would be a lot of lint possible during disassembly. Used a flat head screwdriver to pop the top from dryer housing. Then removing 2 nuts to facilitate the removal of the front of the dryer. The drum was able to be removed to diagnose the offending drum roller wheel. The drum roller wheel has experienced a failure as it had melted off of the metal spacer. Removing it and replacing with the new one was pretty easy. We then used a shop vac and an air hose to clean out all the lint, coins, paper clips and lost jewelry. Surprisingly there was not a single sock in there. Put it all back together in reverse order and plugged it in and now spins like a dream.
  • Robert from GOODRICH, TX
  • Difficulty Level:
    Easy
  • Total Repair Time:
    30 - 60 mins
  • Tools:
    Nutdriver, Pliers, Screw drivers, Socket set
22 of 24 people found this instruction helpful.
Was this instruction helpful to you?
Thank you for voting!
noisy drum
the job would have gone faster if the right parts had been sent in the first place. I would have never paid for two day shipping. In the repair, I removed the rear panel, clipped the plastic triangle holding the bearing, installed the new bearing and new clip.
  • Jeff from Mesa, AZ
  • Difficulty Level:
    A Bit Difficult
  • Total Repair Time:
    30 - 60 mins
  • Tools:
    Nutdriver, Screw drivers, Wrench (Adjustable), Wrench set
27 of 37 people found this instruction helpful.
Was this instruction helpful to you?
Thank you for voting!