


MCAS724M4WW General Electric Range - Overview
Sections of the MCAS724M4WW
[Viewing 4 of 4]


Keep searches simple, eg. "belt" or "pump".

Range Drip Bowl 8
PartSelect #: PS244696
Manufacturer #: WB32X106
Drip bowls are located under the heating elements and catch grease and spills that come from cooking on your stove top. If your drip bowl is damaged or rusted, it could allow grease to drip inside you...
$23.95
In Stock

Range Element Support Clip
PartSelect #: PS243701
Manufacturer #: WB2X9719
The metallic clip, or also known as a broil element support, is for a oven element on a range. This part holds the broil element in place on top of the oven. If your support clip is broken then this r...
$16.95
In Stock
 – Part Number: WB2K15")
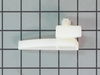
Range Door Bumper (Black)
PartSelect #: PS241365
Manufacturer #: WB2K15
Sold individually.
$13.95
In Stock

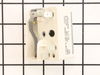
Range Surface Element Control Switch 6 Inch 1560 W
PartSelect #: PS236754
Manufacturer #: WB24T10029
This switch controls the small burner on a range/stove top.
$47.95
In Stock

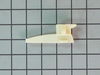
Range Door Handle End Cap
PartSelect #: PS256619
Manufacturer #: WB7X7189
This end cap can be used for either the left or right side.
$32.95
In Stock


Range Lens
PartSelect #: PS1020380
Manufacturer #: WB25T10041
This part is a replacement lens for your oven or range. The lens is red in color, and when the elements are turned on, the light behind the lens will turn on to inform the user that the element is, in...
$13.95
In Stock

Drawer Glider - Left Side
PartSelect #: PS751895
Manufacturer #: WB02K10062
Introducing the Genuine Replacement Drawer Glide specifically designed for General Electric Range/stove/ovens. This is a crucial element that supports your broil or storage drawer, effortlessly allowi...
$13.95
In Stock


Range Screw
PartSelect #: PS222157
Manufacturer #: WB01T10008
This part is a replacement screw for your oven. It is made of black metal and is sold individually. This screw is approximately 1/4 inch in diameter and about 1/2 inch in length. It is designed to con...
$13.95
In Stock

Indicator Light
PartSelect #: PS237433
Manufacturer #: WB25K10002
The GE brand is known for its high-quality appliance parts and this OEM Indicator Light for Ranges is no exception. This small yet significant piece lights up to signal when the oven or surface burner...
$23.95
In Stock

Questions And Answers for MCAS724M4WW
We're sorry, but our Q&A experts are temporarily unavailable.
Please check back later if you still haven't found the answer you need.
Common Symptoms of the MCAS724M4WW
[Viewing 3 of 3]Element will not heat
Fixed by
these parts
these parts


Show All
Door won’t close
Fixed by
these parts
these parts
Show All
Will Not Start
Fixed by
these parts
these parts
Show All


Keep searches simple. Use keywords, e.g. "leaking", "pump", "broken" or "fit".
Heating element dangling
-
Victor from Miami Beach, FL
-
Difficulty Level:Really Easy
-
Total Repair Time:Less than 15 mins
10 of 14 people
found this instruction helpful.
Was this instruction helpful to you?
Thank you for voting!
back burner not getting hot
unplug stove first...take back of stove off to get to burner switch remove wires colors coded.. get new switch put wires on the same way.plug stove in test burner...very simple to replace.and save $$$$$$$$
Parts Used:
-
William from Shenandoah, PA
-
Difficulty Level:Really Easy
-
Total Repair Time:15 - 30 mins
-
Tools:Screw drivers, Socket set
8 of 10 people
found this instruction helpful.
Was this instruction helpful to you?
Thank you for voting!
Replace stove top burners (3 total)
Unplug stove first. Raised the stove top and propped up useing wooden spoon and wife assistance holding up. Pay attention to spot brackets hand to top. Removed sheet metal screws from bracket clamp holding burner in place. Removed one extension bracket from old burner and transfeered to new burner. Removeing one bracket clamp allows the
... Read more
other one to act like a hinge and make for easy removal and replacement. Back of burner had corresponding numbers which made it easy to replace brackets in same place as old. I carefully take one electrical wire at a time from old burner and transfeered to the new burner. Replaced burner same way it came off.
Read less
Parts Used:
-
Thomas from Bonifay, FL
-
Difficulty Level:Easy
-
Total Repair Time:15 - 30 mins
-
Tools:Screw drivers, Wrench (Adjustable)
8 of 10 people
found this instruction helpful.
Was this instruction helpful to you?
Thank you for voting!