EasyApplianceParts is now PartSelect! We've merged our sites to provide a better shopping experience for you.   Full Details
Back
Back
Keep typing for more specific results...
Models > LRFDC2406S > Symptoms > Door Sweating

Parts That Fix LG Refrigerator LRFDC2406S Door Sweating

Door Sweating is a commonly reported symptom for the LRFDC2406S LG Refrigerator, and we have put together a full guide on how to fix this. This advice is based on feedback from people who own this exact appliance. We have listed the most common parts for your LRFDC2406S LG Refrigerator that will fix Door Sweating. We have included repair instructions, and helpful step-by-step video tutorials. If you are experiencing this issue, not to worry, DIYers just like you have fixed this, and shared their experience to help you!
Fixes Symptom 56% of time

This is a door seal, also known as a door gasket, for LG refrigerators. This door gasket is used to seal the warmer room temperature from the cooler fridge interior. If the gasket for your refrigerator is warped, moldy, or damaged in any way, it needs to be replaced immediately. To replace this gasket, simply pull off the old gasket to remove it, and carefully wrap the new gasket around the door perimeter. This gasket is sold individually and does not include any other parts.

$ 98.42
  In Stock
PartSelect Number PS11732674
Manufacturer Part Number ADX72930461

Customer Repair Stories

Bad door gasket
Very good removed old gasket and install new one in under 5 mins.
  • Ray from HOUMA, LA
  • Difficulty Level:
    Very Easy
  • Total Repair Time:
    Less than 15 mins
1 of 2 people found this instruction helpful.
Was this instruction helpful to you?
Thank you for voting!
Gasket on one of the side opening doors was torn and no longer a tight seal.
Fortunately, others had left comments about this installation, so proved very helpful. First thing was laying out the gasket flag on the counter to allow it to unbend, get out the kinks from shipping. While the new gasket was laying out on the counter, started removing the old gasket. As it had been there for 11 years, needed pliers to get a corner started. I was slow and careful removing the old gasket in case I needed to put it back in. A very helpful suggestion from others was to lightly rub dishwashing soap on the gasket edge that fits in the groove in the door. Again, slow and careful, got it installed, wiped off any excess dishwashing liquid, and the door closed with a better seal in a long time. Pleasantly surprised how easy this was to do!
  • Daniel from MCMURRAY, PA
  • Difficulty Level:
    Really Easy
  • Total Repair Time:
    30 - 60 mins
  • Tools:
    Pliers
3 of 3 people found this instruction helpful.
Was this instruction helpful to you?
Thank you for voting!
Fixes Symptom 44% of time

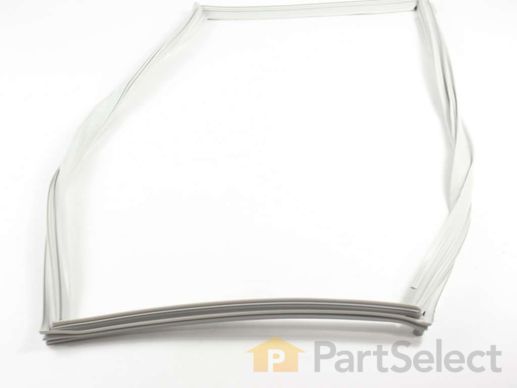
This fridge gasket, also known as a door seal, is an authentic OEM part supplied by LG for use with various models of LG refrigerators. It is a flexible strip of rubber that sits along the perimeter of the refrigerator. It creates an airtight seal between the door and fridge body to prevent cold air from escaping and warm air from entering. This helps to keep your fridge cool and energy efficient. If the gasket is worn out, torn, or can no longer maintain a tight seal, your fridge will have to work harder to maintain the correct temperature inside the fridge. You may also notice that the door may not be able to close properly.

$ 98.42
  In Stock
PartSelect Number PS11732673
Manufacturer Part Number ADX72930460

Customer Repair Stories

Left side gasket was torn and would seal properly
Took off the French door Mullen by unscrewing middle area. Unconnected the wires for the door sensor. Then detached old gasket and replaced with new gasket. Reattached the wiring and snapped Mullen flap in place and finally rescrewed to the door. Seal is very good now.
  • Thomas from CHULA VISTA, CA
  • Difficulty Level:
    Easy
  • Total Repair Time:
    Less than 15 mins
  • Tools:
    Screw drivers
3 of 3 people found this instruction helpful.
Was this instruction helpful to you?
Thank you for voting!