Your coupon for will be reflected when you check out!
✖
Your coupon for
✖
Hello!
You're visiting the PartSelect site in U.S.
Would you like to shop on the Canadian site?
Stay on this site
Go to Canadian site
✖
Model Number Locations
1Select Category Type
Select Category Type
2Select Product Type
Select Product Type
3Select {MODEL} Type
Select {MODEL} Type
Sample Model Number Tags
Model numbers can be made up of numbers (1005400, for example) or a combination of letters and numbers (LAT1000AAE). The model number will most likely appear on either a paper sticker or a metal plate. Your appliance's model number tag may look similar to the sample model number tags shown here (model number highlighted in yellow):
Model has been saved to My Models. If you're not signed in, your lists are available on this device and will expire within 30 days.
Model has been saved to My Models.
This is a single grease filter manufactured for a microwave. The microwave grease filter filters the exhaust air and traps any grease flowing out of the appliance. It is important to keep the filter c...
This is a light bulb and it is a part for your microwave. This bulb uses 30 watts, operates on 125 volts, and is an incandescent lamp. The function of this bulb is to illuminate the surface underneath...
$12.57
In Stock
Order within the next 3 hrs and your part ships today!
This micro-switch is designed for use in your microwave. The function of this part is to monitor the door latch position and communicate to the electronic control board whether the latch is open or cl...
The door switch, often referred to as a primary interlock switch, provides power to the various components in the microwave when the door is in a closed position, and interrupts power when the door is...
$19.49
In Stock
Order within the next 3 hrs and your part ships today!
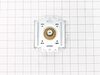
This bracket holds the metal or plastic flapper that closes off the exhaust duct when the fan is not running and opens when the fan turns on. If the exhaust fan on your microwave does not appear to be...
$15.95
In Stock
Order within the next 3 hrs and your part ships today!
This charcoal filter in manufactured to fit a microwave. It removes food odors from the air circulating through your appliance vent. Youi may need to replace this part if you notice odor when cooking ...
This metal vent damper door closes off the exhaust duct when the fan is not running to stop outside air from entering the microwave unit, and opens when the fan turns on to allow air to vent away from...
$13.77
In Stock
Order within the next 3 hrs and your part ships today!
The locker, or door latch assembly fits to the inside of the microwave door, and keeps the door closed. If the door on your microwave oven doesn’t appear to close properly, you may have a problem with...
$13.77
In Stock
Order within the next 3 hrs and your part ships today!
This part is the replacement door handle for your microwave. It is made of white plastic and is approximately 11 inches long and 1 inch wide. The door handle attaches to the microwave door and allows ...
$52.86
In Stock
Order within the next 3 hrs and your part ships today!
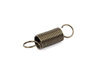
The turntable motor coupler connects the turntable motor to the tray. If the turntable on your microwave will not rotate, you may have a faulty motor coupler. The coupler commonly has a D shaped openi...
$15.95
In Stock
Order within the next 3 hrs and your part ships today!
Questions And Answers for LMH2016SW
Be the first to ask our experts a question about this model!
✖
Ask a Question
Ask our experts a question on this model and we'll respond as soon as we can.
After watching a few youtube videos, I used a phillips SD to take controll pannel off to access the switches that sense when microwave door is closed. Swapped out all 3 switched and mocrowave works like new. $20 fix (shipping included)
I replaced the whole component with all three switches in it even though only one switch was bad . Taking out one switch out of the holder unit would probably have damaged the unit that was holding the switches. Easy install and it works great again .
The countdown timer was working but no "cooking" happening. Did not hear the familiar sound of the heating part working.
Determined it might be some simple switches for under $15 dollars. Bought one of each. They allow the microwave to turn on/activate by signaling that the door is prop
... Read moreerly latched. My wife noticed that it was failing and then failed over the course of about a day. Several times where it worked, then did not work. The timer was counting down one time and then when she opened the door the microwave heating component turned on. Guess it had activated the switch as she was opening the door.
Procedure to repair - Unplug - Remove two screws on front top - allows you to remove the vent. Realized there was a charcoal filter there that I had never replaced so ordered that after the fix. - Remove two screws to pull off the front right panel (area where your microwave buttons are) One at the top under the before mentioned vent and one under the microwave on the far right corner. - Have someone hold the panel because wiring is to short to place it on a ledge while connected or take a picture and remove connections. I simply held it while my daughter undid the micro switches. - Carefully remove micro switches. There were two "orange" button ones so I chose the top one to replace along with the green button one that I had ordered, so I simply pulled an orange from the bottom and a green from the top latch area. You may have remove the part that holds the switches since it was a little tough with the wires in the way and not knowing how the switches stay put. - plug in new switches and place in the brackets that hold them in place - reverse everything you did. Viola - a working microwave vs purchasing a brand new for several hundred dollars or having to call in a technician.I love that my young kids did this project with me and we actually got it running. Don't like to have to throw away more items at the landfill.


 – Part Number: 6912W1Z004B")