Your coupon for will be reflected when you check out!
✖
Your coupon for
✖
Hello!
You're visiting the PartSelect site in U.S.
Would you like to shop on the Canadian site?
Stay on this site
Go to Canadian site
✖
Model Number Locations
1Select Category Type
Select Category Type
2Select Product Type
Select Product Type
3Select {MODEL} Type
Select {MODEL} Type
Sample Model Number Tags
Model numbers can be made up of numbers (1005400, for example) or a combination of letters and numbers (LAT1000AAE). The model number will most likely appear on either a paper sticker or a metal plate. Your appliance's model number tag may look similar to the sample model number tags shown here (model number highlighted in yellow):
Model has been saved to My Models. If you're not signed in, your lists are available on this device and will expire within 30 days.
Model has been saved to My Models.
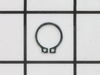
This part is a retaining ring, sometimes called a retaining clip, that holds the drum support roller onto the shaft of a dryer. It is made entirely of metal and measures less than an inch in diameter....
$7.00
In Stock
Order now and your part arrives in 2-3 business days!
This wire whip is for stand mixers.
Wire whip attaches to the beater shaft and incorporates air into cream, eggs and frostings.
Follow the instructions in the owner's manual for using and installing this part.
$36.20
In Stock
Order now and your part arrives in 2-3 business days!
This cap hub is a genuine OEM replacement part for your KitchenAid mixer. The cap hub is a small part at the top of your mixer which you remove when adding an attachment such as the pastamaker. To rep...
$15.69
In Stock
Order now and your part arrives in 2-3 business days!
This speed governor, or clutch, can typically be found in your tilt-head or bowl-lift mixers beside the control plate. It is one of the three parts that work together to regulate and control the mixin...
$20.95
In Stock
Order now and your part arrives in 2-3 business days!
Questions And Answers for KSM192XDMC5
Be the first to ask our experts a question about this model!
✖
Ask a Question
Ask our experts a question on this model and we'll respond as soon as we can.
My girlfriends' stand mixer failed when the accessory drive cap fell into the mixing bowl and jambed the beater, spliting the worm gear. The teeth on this gear are made of nylon and are molded to an aluminum center. This part is designed to fail in situations like this, saving the more expensive transmission parts. Following a repair manu
... Read moreal I found online, I first removed the rear cover and pulled out the cord strain relief out from the base. Next I removed the drip cup from around the base of the planetary drive. I then used a pin punch to drive out the pin holding the planetary to the center shaft and removed the planetary. The unit was then inverted and I removed 4 screws holding the bottom cover to the gear case, and the 5 screws from around the planetary drive. The bottom cover was then lifted off. Three screws holding the worm gear bracket in place were then removed and the worm gear assembly lifted out. A small pin holds the worm gear to the shaft. I drove this out with a small pin punch and the shaft and worm gear were then removed. There is also a thrust washer on this shaft, and it's location is important. Make a note for re-assembly. The new gear was installed and the entire process reversed for re-assembly. A successful repair completed! My girlfriend would have replaced this $200 appliance, but I was able to repair it for less than $30 including shipping.
Remove one screw on rear cover. Note wire colors coming from pcb at top of assy. Replace electronic speed control pcb. You will probably have to loosen the two screws holding the brass end plate assy to install new pcb. Note the number of turns you loosen, so you get it back in the same position. Tighten locking nuts on screws.