Your coupon for will be reflected when you check out!
✖
Your coupon for
✖
Hello!
You're visiting the PartSelect site in U.S.
Would you like to shop on the Canadian site?
Stay on this site
Go to Canadian site
✖
Model Number Locations
1Select Category Type
Select Category Type
2Select Product Type
Select Product Type
3Select {MODEL} Type
Select {MODEL} Type
Sample Model Number Tags
Model numbers can be made up of numbers (1005400, for example) or a combination of letters and numbers (LAT1000AAE). The model number will most likely appear on either a paper sticker or a metal plate. Your appliance's model number tag may look similar to the sample model number tags shown here (model number highlighted in yellow):
Model has been saved to My Models. If you're not signed in, your lists are available on this device and will expire within 30 days.
Model has been saved to My Models.
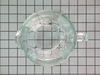
This drive coupling for your blender has reverse threads, and is used to spin the blender blades. The coupling connects the blender jar to the base. To replace this part, use a flat blade screwdriver ...
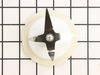
This is a replacement dome and blade assembly for your blender. This part connects to the bottom of the blender, and contains the blade. When the blender is running, the blade will rotate to chop any ...
We're sorry, but our Q&A experts are temporarily unavailable.
Please check back later if you still haven't found the answer you need.
3 questions answered by our experts.
Sort by:
< Prev
1
Next >
Search filter:
Clear Filter
Your search term must have 3 or more characters.
Keep searches simple. Use keywords, e.g. "leaking", "pump", "broken" or "fit".
Sorry, we couldn't find any existing answers that matched.Try using some different or simpler keywords, or submit your new question by using the "Ask a Question" button above!
Theresa
December 10, 2019
How do i change the coupling on top of the motor base.
For model number KSB5OB4
Hello Theresa and thanks for writing.
Turn the base upside down and take a thin small strait screwdriver or knife to gently get the coupling-out PS11746921, you might have to soak it a bit with warm soapy water. Once out the new one slide just in. We hope this helps. Please contact us anytime.
For your convenience, we have attached the link to our repair video. We hope this helps. Good luck with your repair
https://www.youtube.com/watch?time_continue=10&v=AwAkY4s70kE&feature=emb_title
Hello and thank you for writing.
The seal part number: PS11746920 is in the list of compatible items for your model. We hope this helps. Please contact us anytime.
I need a part for this kitchen aid blender but you have model ksb5ob4. I need the equivalent part for the ob3. The part number for the ob4 is ps11746921, according to your picture. Will this part fit my model ob3?
For model number KSB5OB4
Hello Bettina, thank you for your inquiry. Looking at the Owners manual, it depicts that the 5 speeds are the same. If you need help placing an order, customer service is open 7 days a week. Please feel free to give us a call. We look forward to hearing from you.
First I inserted a small diameter rod in the motor fins to keep the motor from turning. Then I simply loosened the coupling. (Please know this is a left-hand thread). The coupling was not that tight. New coupling only requires a snug hand -tightening. You are are good to go!
My first step in repairing the broken KitchenAid blender, was to politely inform my wife HOW & WHY the blender broke in the first place. She thanked me for that, so she would know for the future. (whew...) Replacing the drive tooth wheel was a cinch. We who are reading this are all fortunate to have others, before us, fill us in on t
... Read morehe details. I'm glad I read previous testimonials instead of banking on KitchenAid's instructions. Although the motor shaft is a left-hand threaded mount, the mfg's instructions said to remove the defective coupler by prying the wheel off in various positions with a 1/2" screwdriver!! Reading previous repair stories here, proved to be more reliable. It took more time for me to find a tool to aid in the removal of the old part, than it was to replace the part itself. I needed to find something that was thin enough to fit around the motor shaft and hold it from turning while I unscrewed the defective coupler in a "clockwise" direction. I eventually found a small, old pair of adjustable wire strippers. I was able to wiggle them in and barely grab the motor shaft. I turned the coupling clockwise and it came right off. No problem at all. Turns out that all that was probably needed was to insert a small punch between the motor fan blades through the bottom of the unit just to keep the motor from turning. The new fitting doesn't have to be on any more than hand tight, as the blender runs in a clockwise rotation, and will keep the fitting snug all the time. Good luck, home mechanics.