


KSB3 KitchenAid Blender - Overview
Models starting with KSB3
Click on the best match to narrow your results.
Keep searches simple, eg. "belt" or "pump".

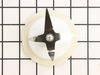
Blender Blender Coupling
PartSelect #: PS11746921
Manufacturer #: WP9704230
This drive coupling for your blender has reverse threads, and is used to spin the blender blades. The coupling connects the blender jar to the base. To replace this part, use a flat blade screwdriver ...
$13.92
In Stock


Blender Blade Assembly
PartSelect #: PS11746926
Manufacturer #: WP9704291
This is a replacement dome and blade assembly for your blender. This part connects to the bottom of the blender, and contains the blade. When the blender is running, the blade will rotate to chop any ...
$79.32
In Stock

Blender Blade Seal
PartSelect #: PS11746920
Manufacturer #: WP9704204
Used in Blenders.
$15.95
In Stock

Mixer Coupling
PartSelect #: PS11751771
Manufacturer #: WPW10279256
This part sits on top of the motor.
$11.46
In Stock

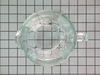
Blender Seal
PartSelect #: PS11757120
Manufacturer #: WPW10686132
This is a replacement seal for your blender. The seal prevents leaking when you have contents in the blender. If your blender is leaking or is not properly connecting to the stand, you may have a dama...
$9.00
On Order


Collar
PartSelect #: PS11755708
Manufacturer #: WPW10500387
Introducing the Whirlpool Collar with Cutting Blade, a genuine OEM part specifically designed for some models of Whirlpool blenders and mixers. This high-quality piece is integral for the functionalit...
$62.67
In Stock

Refrigerator Screw
PartSelect #: PS11742733
Manufacturer #: WP489128
This screw is sold individually.
$11.95
In Stock


Range Screw
PartSelect #: PS11742548
Manufacturer #: WP4449746
Sold individually.
No Longer Available

Common Symptoms of models starting with KSB3
[Viewing 2 of 2]Touchpad does not respond
Fixed by
these parts
these parts

Show All
Door won’t open or close
Fixed by
these parts
these parts
Show All

Keep searches simple. Use keywords, e.g. "leaking", "pump", "broken" or "fit".
Coupling teeth gone.
First I inserted a small diameter rod in the motor fins to keep the motor from turning. Then I simply loosened the coupling. (Please know this is a left-hand thread). The coupling was not that tight. New coupling only requires a snug hand -tightening. You are are good to go!
Parts Used:
-
STEPHEN from PITTSBORO, IN
-
Difficulty Level:Really Easy
-
Total Repair Time:Less than 15 mins
697 of 741 people
found this instruction helpful.
Was this instruction helpful to you?
Thank you for voting!
1/2 of the teeth broke off of the blender drive coupling
My first step in repairing the broken KitchenAid blender, was to politely inform my wife HOW & WHY the blender broke in the first place. She thanked me for that, so she would know for the future. (whew...)
Replacing the drive tooth wheel was a cinch. We who are reading this are all fortunate to have others, before us, fill us in on t ... Read more he details. I'm glad I read previous testimonials instead of banking on KitchenAid's instructions. Although the motor shaft is a left-hand threaded mount, the mfg's instructions said to remove the defective coupler by prying the wheel off in various positions with a 1/2" screwdriver!! Reading previous repair stories here, proved to be more reliable.
It took more time for me to find a tool to aid in the removal of the old part, than it was to replace the part itself. I needed to find something that was thin enough to fit around the motor shaft and hold it from turning while I unscrewed the defective coupler in a "clockwise" direction. I eventually found a small, old pair of adjustable wire strippers. I was able to wiggle them in and barely grab the motor shaft. I turned the coupling clockwise and it came right off. No problem at all. Turns out that all that was probably needed was to insert a small punch between the motor fan blades through the bottom of the unit just to keep the motor from turning. The new fitting doesn't have to be on any more than hand tight, as the blender runs in a clockwise rotation, and will keep the fitting snug all the time.
Good luck, home mechanics.
Read less
Parts Used:
-
Richard from Naperville, IL
-
Difficulty Level:Really Easy
-
Total Repair Time:15 - 30 mins
345 of 383 people
found this instruction helpful.
Was this instruction helpful to you?
Thank you for voting!
broken jar
-
John from Lynn, MA
-
Difficulty Level:Really Easy
-
Total Repair Time:Less than 15 mins
142 of 174 people
found this instruction helpful.
Was this instruction helpful to you?
Thank you for voting!