Back
Back
Keep typing for more specific results...
Models > KFXS25RYMS1 > Symptoms > Ice maker not making ice

Parts That Fix KitchenAid Refrigerator KFXS25RYMS1 Ice maker not making ice

Ice maker not making ice is a commonly reported symptom for the KFXS25RYMS1 KitchenAid Refrigerator, and we have put together a full guide on how to fix this. This advice is based on feedback from people who own this exact appliance. We have listed the most common parts for your KFXS25RYMS1 KitchenAid Refrigerator that will fix Ice maker not making ice. We have included repair instructions, and helpful step-by-step video tutorials. If you are experiencing this issue, not to worry, DIYers just like you have fixed this, and shared their experience to help you!
Fixes Symptom 33% of time

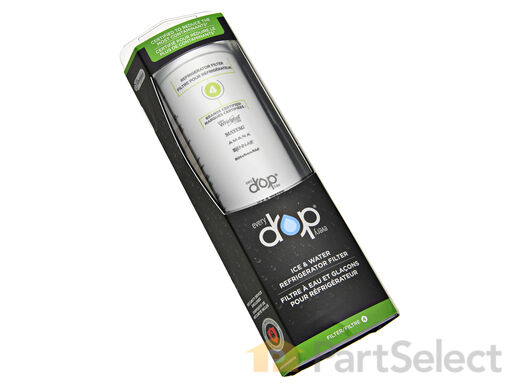
This water filter (Whirlpool EveryDrop Refrigerator Water Filter, Single Turn Filter) purifies water going to the water dispenser and sometimes the icemaker as well. This part should be replaced if it is causing reduced water flow or just replaced periodically per the owner manual. Replacing this water filter may fix a noisy or leaking fridge, a fridge that is not dispensing water (or reduced flow rate), and an ice maker that is not making ice at all, or not making enough ice. This filter is white, sold individually and measures 8 inches by 3 inches in diameter. This water filter has been updated by the manufacturer. It may appear different but will still function the same. It is sold individually.

$ 75.79
  In Stock
PartSelect Number PS11722130
Manufacturer Part Number EDR4RXD1

Replacing your Maytag Refrigerator Refrigerator Water Filter

Replacing your Refrigerator Water Filter

Customer Repair Stories

Removing the existing filter by rotating as directed and then dislodging from 'docking' station proved difficult. Turns out, the old filter is under a bit of vacuum pressure and getting the unit to separate or release was a challenge.
I removed the drop-down outer housing by gently prying the sides of the two pivot pins at the rear. This gave me move 'room' to grip and slightly rotate then pull the old filter forward and away from the tight suction connection. I was concerned that I would be too forceful for the plastic assemblies and would break something; deliberate motions and a steady thought process on the problem helped disengage the darned old filter!
  • Jake from Novato, CA
  • Difficulty Level:
    Easy
  • Total Repair Time:
    Less than 15 mins
212 of 329 people found this instruction helpful.
Was this instruction helpful to you?
Thank you for voting!
light on to order water filter
Pressed in the end of the filter cover, lowered it down part way. Twisted the old filter 1/4 turn and removed it. Set in the sink to drain. Inserted new filter and twisted it to lock. closed cover. Done. Total time @ 1 Minute.
  • Douglas from Byron, NY
  • Difficulty Level:
    Really Easy
  • Total Repair Time:
    Less than 15 mins
910 of 1036 people found this instruction helpful.
Was this instruction helpful to you?
Thank you for voting!
Fixes Symptom 20% of time

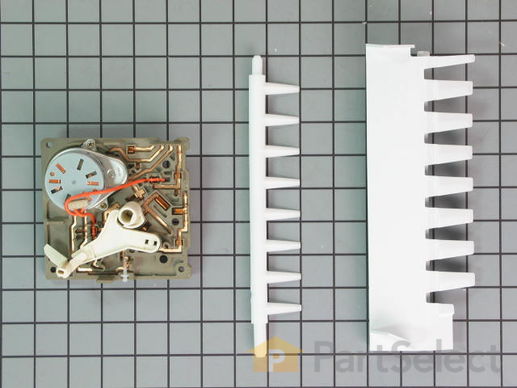
This kit includes the module motor, ejector arm, and ice stripper arm. The complete icemaker is sold separately.

$ 88.15
  In Stock
PartSelect Number PS733947
Manufacturer Part Number 8201515

Replacing your Whirlpool Refrigerator Icemaker Motor Kit

Replacing your Icemaker Motor Kit

Customer Repair Stories

Ice Magic Plus stopped making ice
First I removed the icemaker from the freezer by removing two horizontal screws holding it to the side wall, and one vertical screw holding the front to a bracket coming off the side wall. Then I used a flat screwdriver to unlock the electrical plug. (After doing this, I realized that this wasn't necessary at all, and this part could have been changed just as easily without removing the icemaker.) On the front, there is a white cover with Ice Maker Plus. Use a flat screwdriver to unlock the tangs and remove the cover. There are three screws in the corners that once removed, will allow the motor assy. to be gently pulled straight out. On the back of the part, you will see many gold lands that the timer touches. I don't think there was anything wrong with my motor. I had two spots where the gold plating was worn off, so I suspect it was not making contact, and the whole process would stop. Slide the new part in place making sure the teeth on the gears line up (not a big deal), and secure with the screws. Install cover and you're done. Mine has been making ice like it was brand new.
  • George from Hammond, LA
  • Difficulty Level:
    Really Easy
  • Total Repair Time:
    Less than 15 mins
  • Tools:
    Screw drivers
25 of 35 people found this instruction helpful.
Was this instruction helpful to you?
Thank you for voting!
KITCHEN AID SIDE-BY-SIDE REFRIGERATOR ICE-MAKER stopped working due to a broken motor assembly.
Changing the KITCHENAID MOTOR ASSEMBLY TO THE ICE-MAKER was fairly straightforward. The hardest part was figuring out WHAT was broken and how to fix it. I was determined to save myself hundreds of dollars by doing it myself and avoiding a visit by the 'repairman'.

1.) Went to KitchenAid website to look at Parts List for my side-by-side refrigerator and ice maker assembly (a PDF file, easily downloadable) . The illustrations helped me visualize the assembly and various parts involved.
2.) Removed cover on front of ice maker.
3.) Removed hex-head screw on undersurface of icemaker on the right, which stablilizes a plastic cover for the electrical connector to the ice maker. Once this is off, it's then possible to slide the ice maker out.
4.) Slide the ice maker out from it's 'shelf' in the freezer. You won't be able to completely remove it until you disconnect the power supply.
5.) Disconnect the multi-pin power connector. (It's probably safest to unplug the refrigerator altogether before doing this, but I did not. No exposed metal wiring or connectors. No problems when I did it this way.)
6.) Once the ice-maker was out, remove the white cover from the motor assembly (on the left side of the unit).
7.) Remove the three screws from the black housing of the motor assembly. (This is where I discovered that the connector between the motor and drive-train was broken and needed to be replaced.)
8.) Remove and replace the drive system for the ice cube ejector.
9.) Then reverse the steps to reassemble.

This may seem a bit vague, but it's really quite straightforward once the ice maker is out of the freezer. The replacement motor assembly includes the motor, the motor housing, the drive-train, and the ice-cube ejector. Very easy to re-asemble.

Shopping for and ordering the part took some time since there are so many different after-market parts dealers. In all honesty, I'm glad I decided on PartSelect.com. They had a decent price, safe checkout, and timely delivery. All the essentials of a good online store.

Thanks, and good luck to the next guy who has to deal with a KitchenAid snafu.
  • ANDREW from DURANGO, CO
  • Difficulty Level:
    A Bit Difficult
  • Total Repair Time:
    30 - 60 mins
  • Tools:
    Nutdriver, Screw drivers
56 of 76 people found this instruction helpful.
Was this instruction helpful to you?
Thank you for voting!
Fixes Symptom 16% of time

The ice maker thermostat, also known as the cycling thermostat, controls and regulates the ice maker ejection cycle by monitoring the temperature inside the freezer to determine when to release the ice into the bin and start the ice making cycle again. If your ice maker is making unusual noises, or if the ice maker is not making or dispensing ice, there could be an issue with the thermostat. Before you begin this repair, make sure the power is disconnected from your refrigerator, and that any food that may spoil is safely stored. This is an OEM part and is sourced directly from the manufacturer. This thermostat is sold individually, and comes with two attachment clips.

$ 53.95
  In Stock
PartSelect Number PS11743313
Manufacturer Part Number WP627985

Replacing your Kenmore Refrigerator Refrigerator Cycling Thermostat

Replacing your Refrigerator Cycling Thermostat

Customer Repair Stories

ice maker did not make ice
The ice maker was not getting water. I hotwired the water valve by switching the connectors for the water dispenser and ice maker water valves and water flowed into the icemaker when the water dispenser lever was pushed. I wronly assumed the water valve was good. I removed the icemaker and determined that the gear motor was not getting power in the position the icemaker had stopped.In this position, the thermostat determines when the motor gets power so I replaced the thermostat. The icemaker still would not get water! As it turns out, the water solenoid was sticking due to a deteriorated rubber washer which let the solenoid plunger get too far out of the magnetic field. I replaced the water solenoid assy and all is well. Don't get fooled by hotwiring the valve. If it isn't getting water, the solenoid probably is the culprit.
  • DAVID from TINLEY PARK, IL
  • Difficulty Level:
    A Bit Difficult
  • Total Repair Time:
    30 - 60 mins
  • Tools:
    Nutdriver
49 of 64 people found this instruction helpful.
Was this instruction helpful to you?
Thank you for voting!
No ice in ice trey
The easiest thing to do was pull the ice make off. After taking the 3 screws out of the wall of the freezer, take a screwdriver (flathead) and push on the tab for the electrical plug and wiggle the cord out. Then you can take 3 screws out for the main cover and another 2 screws on the next cover. There's the part, pop it out and replace holding pins and start the process of putting back together the opposite way you took it apart.
  • Wayne from Leesburg, FL
  • Difficulty Level:
    Really Easy
  • Total Repair Time:
    15 - 30 mins
  • Tools:
    Screw drivers, Socket set
79 of 104 people found this instruction helpful.
Was this instruction helpful to you?
Thank you for voting!
Fixes Symptom 9% of time

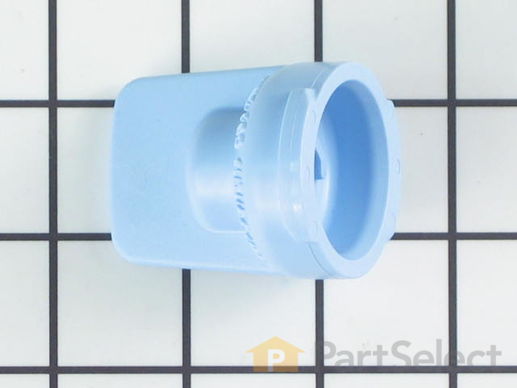
This water filter bypass cap, also known as a water filter bypass plug, is an authentic OEM part that replaces the regular water filter cartridge in refrigerators. It allows water to flow freely through the dispensing system when the filter is not present. The bypass can fail if it becomes clogged, cracked, or falls out of alignment. A faulty filter bypass will result in leaking, poor ice production, and difficulties dispensing water. You can find the filter bypass inside the refrigerator, near the water filter housing. Disconnect the water supply lines and remove the faulty bypass. Insert the new bypass in its place and reconnect the water supply lines.

$ 44.04
  In Stock
PartSelect Number PS12731165
Manufacturer Part Number W11395888

Replacing your Maytag Refrigerator Refrigerator Water Filter Bypass

Replacing your Refrigerator Water Filter Bypass

Customer Repair Stories

no water when under sink water filter installed
I called the installer of my filter unit and he told me that often, thhe fridge filter is the problem. Like magic it worked
  • Emi from Arlington, VA
  • Difficulty Level:
    Easy
  • Total Repair Time:
    Less than 15 mins
11 of 19 people found this instruction helpful.
Was this instruction helpful to you?
Thank you for voting!
Remove the water filter to install the bypass cap
Lower the filter bottom housing to gain access to the filter. Unscrew the filter and install the bypass cap. Secure the lower filter housing to the top assembly.
  • Phil from GREENFIELD, IN
  • Difficulty Level:
    Very Easy
  • Total Repair Time:
    Less than 15 mins
  • Tools:
    Pliers
11 of 14 people found this instruction helpful.
Was this instruction helpful to you?
Thank you for voting!
Fixes Symptom 7% of time

This part releases water from the supply line when it's activated.

$ 95.59
  In Stock
PartSelect Number PS11755669
Manufacturer Part Number WPW10498990

Customer Repair Stories

Water Inlet Valve leaking
Turn off water supply and unplug the refrigerator. Take off bottom panel with Inlet valve attached using Nutdriver. unplug electrical connection and take off water tube and compression fitting using an adjustable wrench. Lift off the old Inlet valve and reverse the process to replace the new one. Use Teflon tape on the threads of the new valve when attaching the water tube.
  • David from Walland, TN
  • Difficulty Level:
    Very Easy
  • Total Repair Time:
    Less than 15 mins
  • Tools:
    Nutdriver, Wrench (Adjustable)
4 of 6 people found this instruction helpful.
Was this instruction helpful to you?
Thank you for voting!
Water inlet valve not working
Followed instructions for testing and replacement on You Tube video.
  • Theo from Layton, UT
  • Difficulty Level:
    Easy
  • Total Repair Time:
    30 - 60 mins
  • Tools:
    Socket set, Wrench (Adjustable)
6 of 7 people found this instruction helpful.
Was this instruction helpful to you?
Thank you for voting!
Fixes Symptom 4% of time

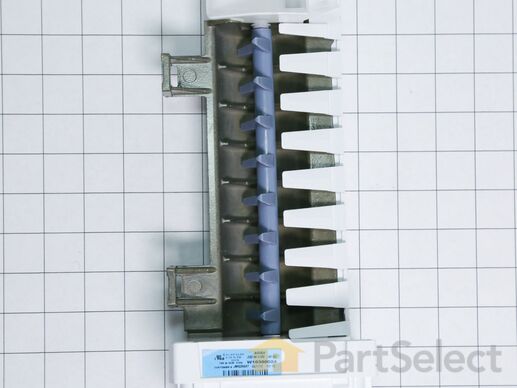
This is an icemaker assembly, which is responsible for the creation of ice in the freezer compartment of your refrigerator. If you notice a lack of ice being made or falling into the icemaker bin despite the icemaker being turned on, this part is likely bad or faulty and in need of a replacement. Replacing this icemaker is easy and only requires a screwdriver as it simply connects with its one wire harness. This icemaker is an OEM part and is sold individually, so any other parts for your freezer compartment will be sold separately.

$ 149.95
  In Stock
PartSelect Number PS11752391
Manufacturer Part Number WPW10300024

Customer Repair Stories

Would not make ice.
Removed the whole ice maker unplug one wire harness replaced ice tray with new one.
Very simple.
  • William from OTSEGO, MI
  • Difficulty Level:
    Very Easy
  • Total Repair Time:
    30 - 60 mins
  • Tools:
    Nutdriver
3 of 4 people found this instruction helpful.
Was this instruction helpful to you?
Thank you for voting!
original ice maker would make ice and then water would over flow into ice bin and freeze
first of all,i just want to thank parts select for sending me a second ice maker at no charge.after installing the first one and it didn't work,i talked with Heather and she sent me a new one.installation went the same as before.hardest part is getting the quick connect wire harness apart and the ice fill arm .it is working great and my home is happy.thank you!
  • Michael from WALLA WALLA, WA
  • Difficulty Level:
    A Bit Difficult
  • Total Repair Time:
    30 - 60 mins
  • Tools:
    Nutdriver, Screw drivers
3 of 3 people found this instruction helpful.
Was this instruction helpful to you?
Thank you for voting!
Fixes Symptom 4% of time

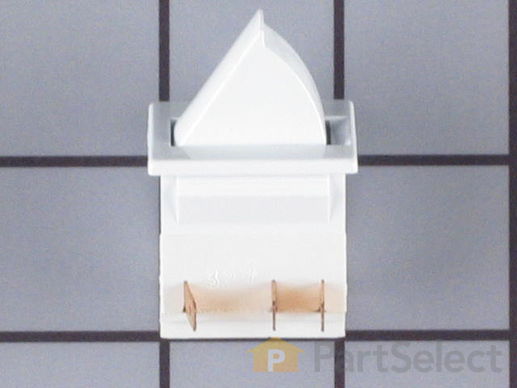
This light switch may also be known as a refrigerator door switch or a light switch kit, and is compatible with your refrigerator. The function of the refrigerator door switch is to turn on the light when your fridge door is open, and to make sure it is off when your refrigerator door is closed. The reason you would need to replace this part is if your light is not turning on when your door is open. For this repair, you will need a putty knife, and a small flat-blade screwdriver.

$ 29.37
  In Stock
PartSelect Number PS12731166
Manufacturer Part Number W11396033

Replacing your Whirlpool Refrigerator Door Switch

Replacing your Door Switch

Customer Repair Stories

broken light switch
followed the instructions provided and that's it!
  • Richard from West Warwick, RI
  • Difficulty Level:
    Really Easy
  • Total Repair Time:
    Less than 15 mins
  • Tools:
    Screw drivers
12 of 19 people found this instruction helpful.
Was this instruction helpful to you?
Thank you for voting!
while closing the door, the light switch fouled, resulting in the switch breaking
I used a flat screwdriver and released the lock tab on the bottom of the light switch, and pried the switch out, being careful to not damage the plastic around the mounting place of the switch, unplugged wiring from old switch, plugged in the new one and pushed the new switch into place. Job finished light switch now working.
  • Kevin from Beckley, WV
  • Difficulty Level:
    Really Easy
  • Total Repair Time:
    Less than 15 mins
  • Tools:
    Screw drivers
63 of 109 people found this instruction helpful.
Was this instruction helpful to you?
Thank you for voting!
Fixes Symptom 4% of time

This water fill tube is a genuine OEM part that is compatible with various models of refrigerator. It is a small plastic tube that supplies water to the ice maker tray. It is typically located at the back of the refrigerator, where it runs from the water inlet valve to the ice maker assembly. When the ice maker needs to produce ice, water flows through this tube and fills the ice maker tray, where it freezes into ice cubes. The fill tube is an essential component of the ice maker system, ensuring a steady supply of water for ice production. If the fill tube becomes clogged or damaged, it can water leaks inside the refrigerator and also lead to difficulties producing ice when needed.

$ 50.44
  In Stock
PartSelect Number PS12745424
Manufacturer Part Number W11415785

Customer Repair Stories

Ice maker water line broke
I punched in the part number on the site and followed the instructions which was relatively easy.
  • Glenval from Apopka, FL
  • Difficulty Level:
    Very Easy
  • Total Repair Time:
    15 - 30 mins
  • Tools:
    Screw drivers
4 of 7 people found this instruction helpful.
Was this instruction helpful to you?
Thank you for voting!
spraying water from the connection on top of fridge
just like the video showed, removed the cover parts inside the fridge, disconnected the water tube inside and pulled out from the top of fridge, then inserted new water tube.
  • Jenny from PHOENIX, AZ
  • Difficulty Level:
    Really Easy
  • Total Repair Time:
    15 - 30 mins
  • Tools:
    Screw drivers
15 of 22 people found this instruction helpful.
Was this instruction helpful to you?
Thank you for voting!
9 Valve
Fixes Symptom 2% of time

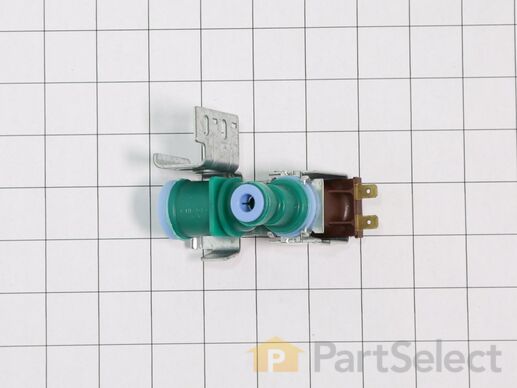
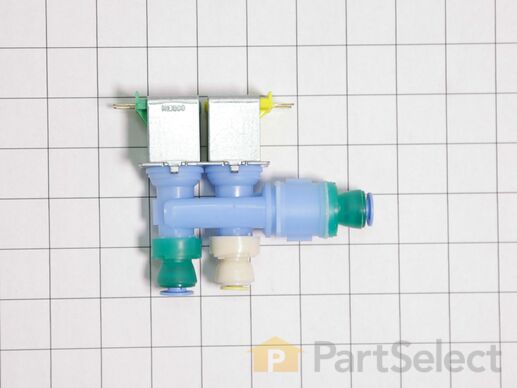
Introducing the Secondary Dual Water Inlet Valve, a genuine OEM part from top-tier home appliance brand, Whirlpool. This vital component is designed specifically for use with select models of Whirlpool, KitchenAid, Maytag, Jenn-Air, Amana, Inglis, and Magic Chef. This valve assembly supplies water to your refrigerator's ice maker and dispenser, ensuring a regular, seamless supply. Before installing this part, remember to unplug your refrigerator and store any perishable food elsewhere. Always use work gloves to maintain safety during installation. Please ensure you've got the correct part for your specific model prior to purchase.

$ 123.18
  In Stock
PartSelect Number PS11753408
Manufacturer Part Number WPW10349187
Fixes Symptom 1% of time

Also known as Alumilastic Cement.

  No Longer Available
PartSelect Number PS11742366
Manufacturer Part Number WP4317852