Parts That Fix KitchenAid Wall Oven KEBS207SSS04 Little to no heat when baking
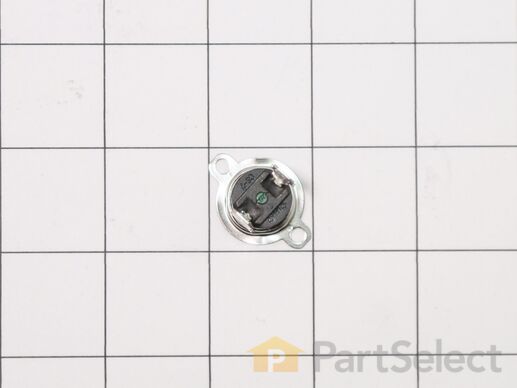
The temperature sensor measures the temperature inside the oven. If your oven is too hot, not heating evenly, is not heating enough when baking, or simply will not start, you could have a faulty temperature sensor. A faulty temperature sensor can be a fire risk. If your sensor is not working properly, you should look to replace it straight away. A failed oven sensor is most often responsible for F3 or F4 error messages on electronically-controlled ovens. Make sure you disconnect the power to your range before you start your repair.
Replacing your KitchenAid Wall Oven Range Temperature Sensor

Customer Repair Stories
-
Sam from TINLEY PARK, IL
-
Difficulty Level:Easy
-
Total Repair Time:30 - 60 mins
-
Tools:Screw drivers
-
Kenneth from BUFFALO, NY
-
Difficulty Level:Very Easy
-
Total Repair Time:15 - 30 mins
-
Tools:Screw drivers
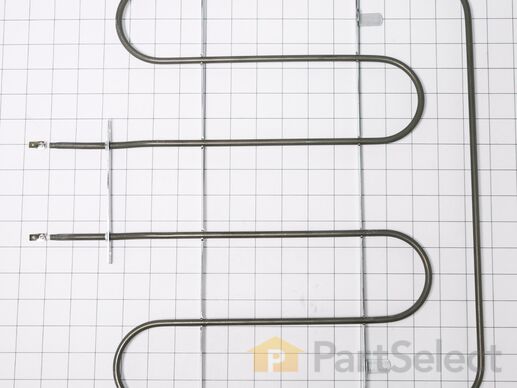
This bake element is found on the bottom of the oven.
Customer Repair Stories
-
Gary from NELLYSFORD, VA
-
Difficulty Level:Very Difficult
-
Total Repair Time:More than 2 hours
-
Tools:Nutdriver, Pliers, Screw drivers, Socket set, Wrench (Adjustable), Wrench set
-
Tim from Langley, WA
-
Difficulty Level:Difficult
-
Total Repair Time:30 - 60 mins
-
Tools:Pliers, Screw drivers
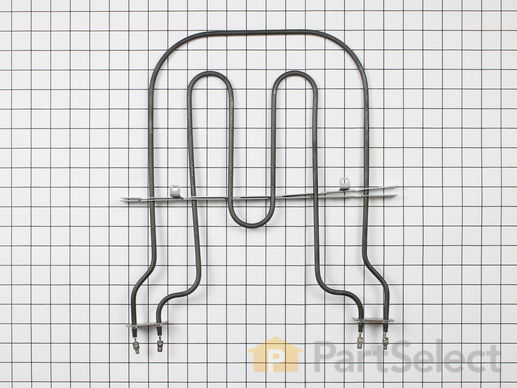
This broil element is found on the roof of the oven. The broil element is at the top of the oven and supplies the heat to broiling. 14" x 15" with 1-3/8" inserts. This part works with the following brands: Whirlpool, Roper, Admiral, Maytag, Hardwick, Jenn-Air, Estate, Magic Chef, Crosley, Inglis, Norge, Modern Maid, Amana, Kenmore, KitchenAid, Caloric.
Replacing your KitchenAid Range Element, Broil

Customer Repair Stories
Because I was doing this as a one-man job, and didn't have anything to place the oven on while work ... Read more ing, I turned off the circuit breaker, and performed the entire element replacement from the front.
1. I was very careful after unscrewing the 4 mounting screws (two in the back, two on the top) to gently pull the attaching wires while still attached to the old element.
2. I had 4 mini vice-grips that I clamped (gently) on the insulation of the 4 wires before detaching them from old element. The vice grips prevented the wires from disappearing to whence they came.
3. After completing the old element removal, I replaced it with the new element, attaching each wire where they had been attached to old element, only then removing the corresponding vice grip.
4. With all 4 wires reattached, I carefully pushed the element ends back into the back of the oven... also avoiding the protruding temperature sensor. The element needed to be held in place by hand until the first overhead screw could be re-screwed.
5. The most difficult part of the procedure was actually getting the screws to line up with their holes in the oven body. .. Returning the screws in fact took about half the 30 minutes the whole job took, because their alignment wasn't "keyed" such that the holes easily just lined up. My order was "Top right" - "Back Left", "Top Left", "Back Right".
Once the 4 screws were all satisfactorily tightened back in place, I turned the breaker back on, and hit the pre-heat function on the oven... It smoked a very little (my hands may have been a bit oily) but that quickly dissipated, and the job was complete. I am very thankful that I didn't have a professional come out. My baker wife has used the oven 10-20 times since then, and it seems as good as new.
-
Brian from SEATTLE, WA
-
Difficulty Level:Easy
-
Total Repair Time:30 - 60 mins
-
Tools:Screw drivers
Aft ... Read more er turning off the circuit to the wall oven and confirming that the power was off, I had to remove the oven from the wall in order to access the wires and connections in the back. Normally, this wouldn't have been necessary because usually the broiler element can be disconnected from the clasps that connect it to the electric source by simply unscrewing the defective element from the roof of the oven, pulling gently on the connection ends from inside the oven cavity in order to "pull out" an inch or two of the electric source wires and the metal clasps that accept the "male" connecting ends of the broiler element. Once the a bit of the wire and the metal connecting clasps are exposed and able to be held with pliers, the element can be disconnected from the connector clasps by simply pulling on the prongs of the element (hard).
But in my case, one of the metal connecting clasp for one of the wires had melted, presumably when the element burned out, and that clasp could only be accessed and replaced from the back of the oven. Also, I would imagine that the wires and clasps could "slip" back behind the unit when they're disconnected if that's not done carefully. However, removing the wall oven was pretty easy for me -- even as a one-person job. I just put a tall table in front of it and slid it out so that it rested on the table.
If you have to replace a metal connector clasp, they're inexpensive and available in the electrical departments of hardware/home stores.
In my case, there's a metal panel at the back of the oven that had to be unscrewed and removed so that I could access the areas where the electrical source wires connect through the back wall of the oven to the broiler element. This was just a matter of removing a few screws and then removing the metal panel.
Once the metal panel at the back of the oven was removed, I was able to replace the melted connection clasp by using a wire cutter/stripper and then pliers to secure the clasp on the end of the exposed wired by deforming the clamp with the pliers. Once that was done, I simply removed the screws that held the broiler element to the top of the oven cavity, disconnected the remaining three clasps that connect the element to the source wires (the fourth clasp was the one that had melted and that I'd replaced), removed the defective element, inserted the four "male" prongs of the broiler into the four clasps that connect them to the source wires, replaced the metal panel at the back of the oven, screwed the new element back into the top of the oven, slid the oven back into the wall cavity, turned the circuit back on, crossed my fingers, and everything worked like a charm.
I saved a money, but more importantly (for me) I saved a lot of time that I would have had to have spent waiting around for a repair person.
-
David from Catonsville, MD
-
Difficulty Level:Easy
-
Total Repair Time:15 - 30 mins
-
Tools:Pliers, Screw drivers, Wrench set
This is a multi-use and multi-appliance screw. It can be used on a microwave, refrigerator, range/oven, air conditioner, dehumidifier, washer, or dryer. The measurements of this screw are 8 x 1/2 inch. It has 6 threads. Refer to the manual provided by the manufacturer for further information on repair and accurate guidance. Remember to wear work gloves as a safety precaution.
The Whirlpool Thermal Fuse 105C is an essential component for your appliance's smooth functioning. This genuine OEM part is compatible with a variety of Whirlpool models, including certain KitchenAid, Maytag, Jenn-Air, Amana, Inglis, and Magic Chef stoves, ovens, and ranges. The function of this thermal fuse is to safeguard your oven from potential damage caused by electrical shorts or overheating. It is paramount to disconnect electrical power to the wall oven prior to installation. Always remember to wear work gloves to protect your hands during the replacement process. Make sure to confirm this thermal fuse is the correct component for your model before proceeding with purchase.
Customer Repair Stories
-
David from New Lenox, IL
-
Difficulty Level:Really Easy
-
Total Repair Time:30 - 60 mins
-
Tools:Screw drivers
Get your oven back to its best with this genuine Whirlpool Convection Heating Element. Ideal for various Whirlpool, KitchenAid, Maytag, Jenn-Air, Amana, Inglis, and Magic Chef stove, oven, and range models, this high-quality convection element attaches to the back of the oven wall and provides heat in the convection mode. Before installation, ensure to unplug the oven and wear work gloves for protection. Accurately check your model to confirm the part is a precise fit, as parts may subtly vary in size and shape. Revive your appliance's performance with this Whirlpool Convection Heating Element and experience superior, reliable heating once again. Please ensure to verify your model compatibility before ordering for an optimal outcome.
Replacing your KitchenAid Wall Oven Element

Customer Repair Stories
-
Harmon from MONTICELLO, GA
-
Difficulty Level:Really Easy
-
Total Repair Time:30 - 60 mins
-
Tools:Pliers, Screw drivers


