Your coupon for will be reflected when you check out!
✖
Your coupon for
✖
Hello!
You're visiting the PartSelect site in U.S.
Would you like to shop on the Canadian site?
Stay on this site
Go to Canadian site
✖
Model Number Locations
1Select Category Type
Select Category Type
2Select Product Type
Select Product Type
3Select {MODEL} Type
Select {MODEL} Type
Sample Model Number Tags
Model numbers can be made up of numbers (1005400, for example) or a combination of letters and numbers (LAT1000AAE). The model number will most likely appear on either a paper sticker or a metal plate. Your appliance's model number tag may look similar to the sample model number tags shown here (model number highlighted in yellow):
Model has been saved to My Models. If you're not signed in, your lists are available on this device and will expire within 30 days.
Model has been saved to My Models.
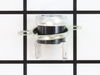
The GE Gas Sensor is a crucial safety feature designed for your microwave. It intelligently detects even the slightest presence of gas fumes within your appliance, ensuring your safety while in operat...
Upon taking the faceplate off (unplugged power source first) I found one of the wires going to the THERMO SW-TCO SENSE TEMP was completely burned away. I cut back the wire and spliced a new section with heat shrink connectors and I replaced the THERMO SW-TCO SENSE TEMP. I plugged the power back in and it works great.
Removal of this "over the counter" appliance was required. After wrestling the appliance from the wall ( the most difficult part of the job) the cover was removed for a visual inspection. The circuit board revealed burned resistors and a capacitor was fried. The 15 amp fuse was not blown. I was able to loosen the circuit board from the fr
... Read moreamework by removing a few screws and unplugging the leads that were connected to the board. There are two screws inside the oven door jam that secures the circuit board. Once these are removed the circuit board can be pulled out to a point where the screws that hold the circuit board and wire connectors can be accessed and removed. A new circuit board can then be installed simply by reversing the prosses. The board was slightly over $200.00 but my oven was a combo microwave/convection. A new microwave/convection oven would have at least $500.00.