Back
Back
Keep typing for more specific results...
Models > JS42PPDUDE01 > Symptoms > Ice maker won’t dispense ice

Parts That Fix Jenn-Air Refrigerator JS42PPDUDE01 Ice maker won’t dispense ice

Ice maker won’t dispense ice is a commonly reported symptom for the JS42PPDUDE01 Jenn-Air Refrigerator, and we have put together a full guide on how to fix this. This advice is based on feedback from people who own this exact appliance. We have listed the most common parts for your JS42PPDUDE01 Jenn-Air Refrigerator that will fix Ice maker won’t dispense ice. We have included repair instructions, and helpful step-by-step video tutorials. If you are experiencing this issue, not to worry, DIYers just like you have fixed this, and shared their experience to help you!
Fixes Symptom 29% of time

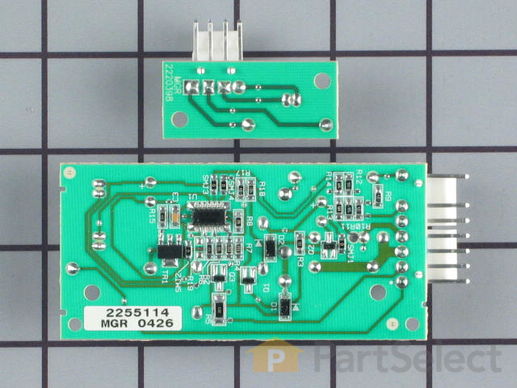
This set of two electronic control boards contains both the emitter and the receiver. These boards tells the icemaker when it's full and that it has to dump the ice, and it also tells the icemaker when to refill with water.

$ 239.99
  In Stock
PartSelect Number PS16875489
Manufacturer Part Number W11629974

Replacing your Kenmore Refrigerator Electronic Control Board

Replacing your Electronic Control Board

Customer Repair Stories

Ice maker stopped making ice.
I first removed the power cord of the refrigerator from the receptacle. I then removed the screws (3 each) from both the emitter and receiver face plates with a phillips screw driver. I than carefully removed the connector to the each of the circuit boards. A simple pull maneuver. I removed the circuit boards from the face plates. I took the new parts and put them back in reverse order. I put the power cord back in the receptacle.
  • Thomas from Riverside, CA
  • Difficulty Level:
    Really Easy
  • Total Repair Time:
    Less than 15 mins
  • Tools:
    Screw drivers
65 of 70 people found this instruction helpful.
Was this instruction helpful to you?
Thank you for voting!
Ice Maker would not stop making ice.
First, I tested the ice maker "switch" that actually just covers the beam that regulates the ice maker. In the "off" position, it still made ice. Then, I removed the three screws on the cover over the transmitter and disconnected the circuit board at the wire connector. It stopped. After ordering and receiving the new transmitter and receiver boards, I replaced both boards. They are located on either side of the freezer compartment under panels held in place by three screws. Probably saved 150 to 200 bucks.
  • Vince from El Cajon, CA
  • Difficulty Level:
    Really Easy
  • Total Repair Time:
    Less than 15 mins
  • Tools:
    Screw drivers
192 of 216 people found this instruction helpful.
Was this instruction helpful to you?
Thank you for voting!
Fixes Symptom 24% of time

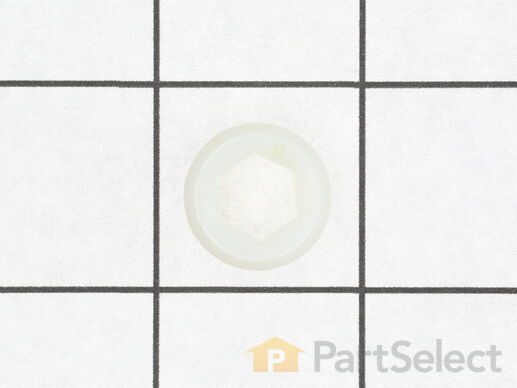
This part is a replacement refrigerator drive shaft seal for your refrigerator. The drive shaft seal protects the auger motor from water and condensation that may leak down the drive shaft from the ice bucket. If the seal is broken, water and condensation can get in, causing the ice maker to fail. To replace the seal, first remove the ice bucket from your freezer. Then remove the two screws on the drive shaft holder, and use a pair of pliers to remove the drive shaft. At this point you can remove the seal from the drive shaft. Be sure to clean the area that the seal sits in before you reinstall the drive shaft. This part is white in color and is about an inch in diameter. The seal is sold individually.

$ 12.95
  In Stock
PartSelect Number PS11739241
Manufacturer Part Number WP2198628

Customer Repair Stories

Ice maker grinder motor was not running.
Remove the ice bucket and check that the auger that turns in the ice bucket is free to turn. Cover the open freezer with cardboard or whatever to retain most of the freezer temperature. Remove the holder that supports the top of the motor shaft. Check the splines on the upper part of the motor shaft and also check the seal under the holder. Open the access the door to the motor, remove wiring connector and unbolt the motor. Check the lower splines on motor shaft for condition, clean the shaft and apply new grease to the splines. Before installing, connect the wiring to the new motor, push the door switch in, press the ice dispenser arm outside the door to make sure the motor runs. If all ok, check the motor shaft for fit in the new motor. Be careful not to install the motor shaft too deep in the motor splines, otherwise there may not be enough spline showing on the top end to engage the auger. Bolt the motor in place, close access door and install the holder and ice bucket and make sure everything works. If there is not enough spline showing thru the holder to engage the auger, take pliers and pull the shaft up a bit. This seems to be a hit or miss fit on the shaft but you can adjust the height of the shaft without taking every thing apart again. That's all, not difficult at all. But do check parts and pieces for anything else you might need, parts wise, before ordering the motor by itself like I did. Shipping is high, so try to order any associated parts needed when you order the motor. By the way, This site are great to work with!
  • John from DUNNELLON, FL
  • Difficulty Level:
    Really Easy
  • Total Repair Time:
    30 - 60 mins
  • Tools:
    Pliers, Socket set
1 person found this instruction helpful.
Was this instruction helpful to you?
Thank you for voting!
Fixes Symptom 12% of time

Sold individually.

$ 48.26
  In Stock
PartSelect Number PS11740363
Manufacturer Part Number WP2315559
Fixes Symptom 11% of time

Sold individually.

$ 11.95
  In Stock
PartSelect Number PS11745619
Manufacturer Part Number WP8281164
Fixes Symptom 10% of time

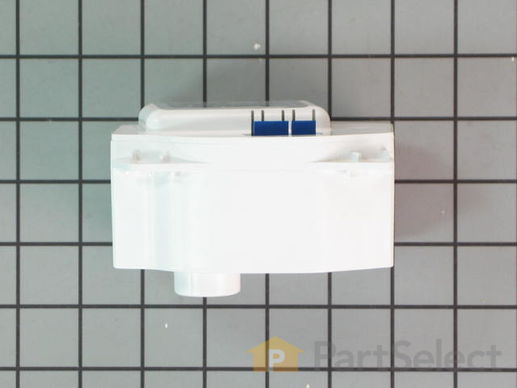
This motor is used to activate the blades to crush the ice for dispensing.

$ 136.42
  In Stock
PartSelect Number PS2367268
Manufacturer Part Number W10271509

Customer Repair Stories

Dispenser motor wore out
Unplugged power from unit. Removed tray bracket, removed 2 screws from drive motor cover, removed 4 screws from motor assembly, disconnected power from assembly, Replaced rubber seal at the lower end of the recently installed new shaft. Re-connected the power plug, placed the new dispenser assembly into position making sure the shaft was properly seated in the motor. Replace the four screws, plugged in main power and tested the dispenser prior to replacing the ice container. Tightened the screws, replace the cover and the tray bracket.
  • Larry from AIKEN, SC
  • Difficulty Level:
    Really Easy
  • Total Repair Time:
    15 - 30 mins
  • Tools:
    Nutdriver
3 of 4 people found this instruction helpful.
Was this instruction helpful to you?
Thank you for voting!
motor would not turn
removed cover the four screws that mounted the motor,unplugged and replaced motor
  • Arnian / from San Diego, CA
  • Difficulty Level:
    Really Easy
  • Total Repair Time:
    Less than 15 mins
  • Tools:
    Nutdriver
27 of 47 people found this instruction helpful.
Was this instruction helpful to you?
Thank you for voting!
Fixes Symptom 8% of time

This EveryDrop Filter3 is certified to reduce the most contaminants with Triple Filtration Technology. Now, you and your family can enjoy the enriching benefits of cleaner, freshly filtered ice & water. Not just in beverages, but for preparing meals, too. This advanced generation of ice and water refrigerator filters from EveryDrop Filters are certified to reduce more contaminants with Triple Filtration Technology. Filter 5 reduces 16 contaminants, so you can feel reassured that you and your family are getting the most out of your water. Remember to replace your refrigerator filter every 6 months to maximize contaminant reduction.

$ 75.79
  In Stock
PartSelect Number PS11722128
Manufacturer Part Number EDR3RXD1

Replacing your Whirlpool Refrigerator Refrigerator Single Water Filter

Replacing your Refrigerator Single Water Filter

Customer Repair Stories

six months the light turns red. time to replace filter
First I shut the water off to the refrigerator.then i pushed the big button in the middle of the grille below the refrigerator door. pulled out the old filter, took the front cap off the old filter put it on the new filter. took the two red caps off the new filter. pushed the filter in till it locked in place. all done! Turned the back on.
  • Leroy from Perkiomenville, PA
  • Difficulty Level:
    Really Easy
  • Total Repair Time:
    Less than 15 mins
309 of 389 people found this instruction helpful.
Was this instruction helpful to you?
Thank you for voting!
there were directions
We didn't know where the product went and it was very difficult to install.
  • Kate from Jacksonville, FL
  • Difficulty Level:
    Very Difficult
  • Total Repair Time:
    30 - 60 mins
754 of 1277 people found this instruction helpful.
Was this instruction helpful to you?
Thank you for voting!
Fixes Symptom 7% of time

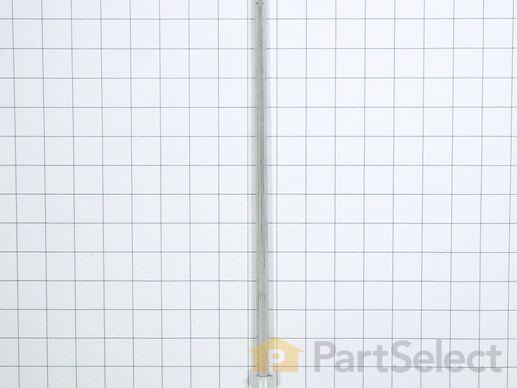
Also known as a shaft.

$ 77.35
  In Stock
PartSelect Number PS11740390
Manufacturer Part Number WP2318082

Customer Repair Stories

Ice dispenser did not work
The motor turned but the shaft had worn and was smooth rather than hexagon in cross-section. Part Select had the exploded view of the mechanism, which I could not find on Kitchenaid's site and I was able to order a replacement shaft, which I did and got within 3 days. I replaced the shaft without any difficulty and now I can enjoy my cocktails with ice from the in-door dispenser without sticking my hand in the ice bin. I am very pleased with Part Select, their website, their stock of parts and their efficiency.
  • Daniel from Bronx, NY
  • Difficulty Level:
    Easy
  • Total Repair Time:
    Less than 15 mins
  • Tools:
    Nutdriver
Was this instruction helpful to you?
Thank you for voting!
Ice maker Shaft stopped rotating. The motor was running but no ice.
Removed the screws on inside of freezer door, lifted out damaged shaft, dropped in new shaft, replaced screws. Job completed in 3 minutes.
  • Karen from Milton, GA
  • Difficulty Level:
    Very Easy
  • Total Repair Time:
    Less than 15 mins
  • Tools:
    Screw drivers
0 of 1 people found this instruction helpful.
Was this instruction helpful to you?
Thank you for voting!