JGC1536ADW15 Jenn-Air Cooktop - Overview
Sections of the JGC1536ADW15
[Viewing 3 of 3]Keep searches simple, eg. "belt" or "pump".

Refrigerator Screw
PartSelect #: PS11742240
Manufacturer #: WP400021-1
Sold individually.
$11.95
In Stock

Dryer Screw
PartSelect #: PS11746840
Manufacturer #: WP90767
This screw is sold individually.
$7.95
In Stock

Burner Cap
PartSelect #: PS11745641
Manufacturer #: WP8284669
Burner Cap - 6000 BTU
Sold individually.
$54.00
In Stock

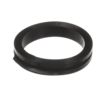
Range Grommet
PartSelect #: PS11744194
Manufacturer #: WP74007705
This part is the replacement grommet for your cooktop or range. It is made of black plastic and is approximately 1 ¼ inches in diameter. This part may also be known as the cooktop burner knob gasket, ...
$8.95
In Stock

Range Burner Head 16k
PartSelect #: PS11754347
Manufacturer #: WPW10406878
This part distributes flame evenly to your cookware.
$50.36
In Stock

Range Burner Head 12k
PartSelect #: PS11754345
Manufacturer #: WPW10406797
This part distributes flame evenly to your cookware.
$52.47
In Stock

REGULATOR
PartSelect #: PS12070643
Manufacturer #: W11087445
Introduce the remarkable REGULATOR from Whirlpool, specially designed for enhancing the performance of your cooktop. This authentic OEM part is crafted to regulate the flow of either Natural or LP gas...
$118.29
In Stock

Orifice Holder w/ Spark Igniter
PartSelect #: PS11744613
Manufacturer #: WP7527P028-60
Discover the Orifice Holder with Spark Igniter, a genuine OEM product that enhances the functionality of your Whirlpool appliances. This is specifically designed as a Right Front Orifice holder with a...
$54.01
On Order

Range Burner Head 6k
PartSelect #: PS11754341
Manufacturer #: WPW10406243
This is the Right Rear Burner Head.
$27.95
In Stock

Holder, Surface Burner Orifice
PartSelect #: PS11744612
Manufacturer #: WP7527P026-60
$51.39
In Stock
Questions And Answers for JGC1536ADW15
Be the first to ask our experts a question about this model!
✖
Ask a Question
Ask our experts a question on this model and we'll respond as soon as we can.
Sorry, we couldn't find a match for "".
Here's a guide for finding your model number.
Something went wrong. Please try again later.
Your Question Has Been Submitted!
Our experts will send you an email as soon as your question has been answered.
Common Symptoms of the JGC1536ADW15
[Viewing 1 of 1]Keep searches simple. Use keywords, e.g. "leaking", "pump", "broken" or "fit".
Head burner had something spilled on it which stained it and left a large dark brown spot
Simply remove two screws take old one off and line up and put new one on and replace the two screws. Couldn't have been easier.
Parts Used:
-
Donald from Hudsonville, MI
-
Difficulty Level:Really Easy
-
Total Repair Time:Less than 15 mins
-
Tools:Screw drivers
6 of 12 people
found this instruction helpful.
Was this instruction helpful to you?
Thank you for voting!
No ignition
First I drilled out the screws on the burner as they were fused. I opened the stove top cover to access the underside of the burner. Removed the orifice holder, by disconnecting the gas line with a line Wrench and the electric cord.
The trick is to be careful with the gas line. Also when you go to replace the orifice holder ... Read more you will notice that the holes are not threaded. The metal is soft and you're supposed to just screw the screws into the holes and let them bite into the metal. Then you reattach the gas on the electric and put the stove top back together.
The trick is to be careful with the gas line. Also when you go to replace the orifice holder ... Read more you will notice that the holes are not threaded. The metal is soft and you're supposed to just screw the screws into the holes and let them bite into the metal. Then you reattach the gas on the electric and put the stove top back together.
Read less
Parts Used:
-
RAM from SAN DIEGO, CA
-
Difficulty Level:A Bit Difficult
-
Total Repair Time:30 - 60 mins
-
Tools:Screw drivers
1 person
found this instruction helpful.
Was this instruction helpful to you?
Thank you for voting!
I lost the cap
after I received the cap in the mail, I removed the grillwork and set the cap in place. then replaced the grill and my wife fixed my supper.
Parts Used:
-
Bill from Rochester, NY
-
Difficulty Level:Really Easy
-
Total Repair Time:Less than 15 mins
1 of 3 people
found this instruction helpful.
Was this instruction helpful to you?
Thank you for voting!


