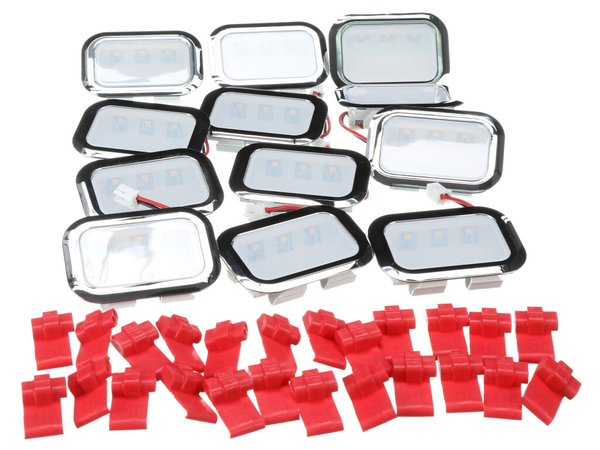
Parts That Fix Jenn-Air Refrigerator JF36NXFXDE01 Light not working
Light not working is a commonly reported symptom for the JF36NXFXDE01 Jenn-Air Refrigerator, and we have put together a full guide
... Read more
on how to fix this. This advice is based on feedback from people who own this exact appliance. We have listed the most common parts for your JF36NXFXDE01 Jenn-Air Refrigerator that will fix Light not working.
We have included repair instructions, and helpful step-by-step video tutorials. If you are experiencing this issue, not to worry, DIYers just like you have fixed this, and shared their experience to help you!
Read less
Light not working is a commonly reported symptom for the JF36NXFXDE01 Jenn-Air Refrigerator, and we have put together a full guide on how to fix this.
This advice is based on feedback from people who own this exact appliance. We have listed the most common parts for your JF36NXFXDE01 Jenn-Air Refrigerator that will fix Light not working.
We have included repair instructions, and helpful step-by-step video tutorials. If you are experiencing this issue, not to worry, DIYers just like you have fixed this, and shared their experience to help you!
Fixes Symptom 99% of time
The LED light attaches inside the cabinet and illuminates the inside of the refrigerator or freezer
$
162.80
In Stock
PartSelect Number PS17216452
Manufacturer Part Number W11683242
Customer Repair Stories
Light out inside fridg.
Put painters tape next to light, so I wouldn't scratch surface. Worked edge of light down and out of hole with small screwdriver. Chechen wireing , light might work ? Unplugged light assembly . Plugged in new light , and reinserted light into opening . Removed tape ,, done. You can use putty knife in place of screwdriver. Be patient. Go
... Read more
ogle helps also.
Read less
-
William from N MYRTLE BCH, SC
-
Difficulty Level:Really Easy
-
Total Repair Time:Less than 15 mins
-
Tools:Screw drivers
10 of 11 people
found this instruction helpful.
Was this instruction helpful to you?
Thank you for voting!
LED behind upper compartment of freezer failed
The hard part was getting the OLD fixture out. They tell you to protect the surface around it with tape, but try sticking tape to a freezing cold surface with water condensing on it! And it's so firmly snapped in place that it takes a putty knife and screw driver to push the prongs back to get it loose. Finally, the fixture is on the ceil
... Read more
ing behind the icemaker so very awkward working conditions, plus and you can't see well because ALL of the lights are out (remember, they're in series). To see I had to prop my phone up at just the right angle to shine its little light on the area.
But getting it in was literally a snap. Just snap the couplings together, carefully push the wires into the empty space and slide the rear prongs in, then snap the front ones in simply by pushing the whole fixture firmly. Then pat yourself on the back!
But getting it in was literally a snap. Just snap the couplings together, carefully push the wires into the empty space and slide the rear prongs in, then snap the front ones in simply by pushing the whole fixture firmly. Then pat yourself on the back!
Read less
-
Matthew from ALTOONA, PA
-
Difficulty Level:Easy
-
Total Repair Time:Less than 15 mins
11 of 11 people
found this instruction helpful.
Was this instruction helpful to you?
Thank you for voting!


