JES1344SK01 General Electric Microwave - Overview
Sections of the JES1344SK01
[Viewing 2 of 2]Keep searches simple, eg. "belt" or "pump".

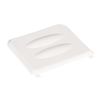
Microwave Wave Guide Cover
PartSelect #: PS1020520
Manufacturer #: WB48X10047
This is the replacement wave guide cover for your microwave. It is white in color and is approximately 3 ½ inches long and 4 inches wide. It has two small tabs at the top that allow it to lock into pl...
No Longer Available

Turntable Guide with Rollers
PartSelect #: PS224055
Manufacturer #: WB02X10806
This microwave turntable guide is located under the glass turntable. It is made of plastic, and comes with rollers.
No Longer Available

DOOR Assembly Stainless Steel
PartSelect #: PS754769
Manufacturer #: WB56X10337
$171.79
Special Order
Manuals & Care Guides for JES1344SK01
Click to downloadQuestions And Answers for JES1344SK01
We're sorry, but our Q&A experts are temporarily unavailable.
Please check back later if you still haven't found the answer you need.
Common Symptoms of the JES1344SK01
[Viewing 1 of 1]Keep searches simple. Use keywords, e.g. "leaking", "pump", "broken" or "fit".
Trip breaker when opening door
Door microswith was stuck on. This is caused, I discovered, by frequently stopping the oven, while running, by opening the door rather than using the stop button. Causes the switch to arc and eventually fail. This causes the safety microswitch to trip the breaker when door is opened. There are little nubs sticking up on the spade connecto
... Read more
rs. You must squeeze them down before you can remove them from the switch. The main door switch is the upper one, mounted at an angle. You have to remove the latch assembly to remove the switch. The problem was obvious once I got the switch out. This problem could also blow the fuse, but in my case the breaker tripped first. Use an ohmmeter to check switch and fuse. The door switch is normally open. The safety switch is normally CLOSED. Instructions inside were helpful and described this problem. So, avoid this repair by always stopping oven with stop button!
Read less
Parts Used:
-
William from KETTLE FALLS, WA
-
Difficulty Level:A Bit Difficult
-
Total Repair Time:30 - 60 mins
-
Tools:Nutdriver, Pliers, Screw drivers
8 of 9 people
found this instruction helpful.
Was this instruction helpful to you?
Thank you for voting!
blown fuse
Removed the three screws holding the cover on. then rmoved the two wires from the capacitor. Removed the screw holding the end of the zener diode to the chassis. Removed the diode from the capacitor. installed the new capacitor and replaced the blown fuse then reversed the removal process.
Parts Used:
-
reval from ely, NV
-
Difficulty Level:Really Easy
-
Total Repair Time:Less than 15 mins
-
Tools:Screw drivers
2 of 2 people
found this instruction helpful.
Was this instruction helpful to you?
Thank you for voting!
Wave guide cover one of the pins holding it in place was missing / cover loose
I simply removed the other push pin holding in the old cover and put the bottom in first and snaped into place at the top. The whol job took less than 5 minutes.
Parts Used:
-
Jim from FORT COLLINS, CO
-
Difficulty Level:Really Easy
-
Total Repair Time:Less than 15 mins
1 person
found this instruction helpful.
Was this instruction helpful to you?
Thank you for voting!


