


JE2160WF02 General Electric Microwave - Overview
Sections of the JE2160WF02
[Viewing 1 of 1]
Keep searches simple, eg. "belt" or "pump".

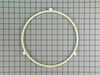
Roller Guide
PartSelect #: PS951887
Manufacturer #: WB02X10895
The roller glide in your microwave rests under the microwave plate, and allows it to rotate when the microwave is running. It is a round plastic ring with 3 wheels spaced out around the perimeter. If ...
No Longer Available

Cooking Tray
PartSelect #: PS956195
Manufacturer #: WB49X10108
This tray rotates in your microwave ensuring more even temperatures
No Longer Available


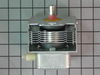
Magnetron
PartSelect #: PS953838
Manufacturer #: WB27X10682
This part is used to generate microwave energy/heat.
No Longer Available


Manuals & Care Guides for JE2160WF02
Click to downloadQuestions And Answers for JE2160WF02
We're sorry, but our Q&A experts are temporarily unavailable.
Please check back later if you still haven't found the answer you need.
Common Symptoms of the JE2160WF02
[Viewing 3 of 3]Tray won’t turn
Fixed by
these parts
these parts
Show All
No heat
Fixed by
these parts
these parts

Show All
Won’t turn on
Fixed by
these parts
these parts


Show All
Keep searches simple. Use keywords, e.g. "leaking", "pump", "broken" or "fit".
The microwave would no longer heat
First I ordered and replaced the diode. That did not help. Then I ordered both the magnetron and the thermostat magnetron because I didn't know what I was doing. After I replaced those, it still wouldn't heat. So I called an electrician. He noticed I had knocked a wire loose. I connected it and the microwave worked. I reconnected t
... Read more
he old magnetron, just to test it. It didn't work. Then I put the new one back in. It's working just fine now! It took quite a while to put everything back in place because it was a built-in. But it was a lot cheaper than getting a new microwave, even with the cost of a repair man to show me I had a loose wire!
Read less
Parts Used:
-
Linda from Warsaw, IN
-
Difficulty Level:A Bit Difficult
-
Total Repair Time:More than 2 hours
-
Tools:Screw drivers
21 of 33 people
found this instruction helpful.
Was this instruction helpful to you?
Thank you for voting!
Both Intermittent- and No-Heating
First, I read the PartsSelect DIY report by Linda, Warsaw, IN. With confidence, I purchased the magnetron. Upon receipt, I took the built-in microwave out of the cabinet, set the unit on the kitchen floor, and was stopped cold by the Safety Torx nuts on the reverse of the unit. Borrowing the right wrench allowed the 20 minute start-to-
... Read more
finish part changeout and reinstallation of the unit in the cabinet to proceed. The old magnetron was the defective part. Discovery of the 10-year Parts-Only warranty on the less than 10-year old unit was insufficinet to guide me to take the unit in for their Labor bill to repair. New part in hand, it just was that easy - and assumed to be no less expensive.
Read less
Parts Used:
-
Richard from Merritt Island, FL
-
Difficulty Level:Easy
-
Total Repair Time:15 - 30 mins
-
Tools:Screw drivers
18 of 24 people
found this instruction helpful.
Was this instruction helpful to you?
Thank you for voting!
The Microwave won't heat at normal heat settings; eg: from seconds to hours time settings.
First step was to discharge the transformer's capacitor (very important to do), before attempting any microwave repair. I opened the diagram/schematic found inside the microwave oven and followed the technician's troubleshooting steps; checked the capacitor; it checked OK, I checked the diode for a short, it checked OK. I checked the wind
... Read more
ings of the transformer that supply the power to the Magnetron; it checked Ok. I proceeded to order the parts; the Magnetron and the sensor located on the top part of the Magnetron. When the parts arrived; I went straight to the location of the Magnetron, I attached the new sensor on the new Magnetron and removed the old one. I connected the harness from the transformer to the new Magnetron and tested the microwave oven and it worked perfectly like a new one. This site has a great deal of information about repairs for the do it-yourself like myself, unlike other appliance's parts websites. Thumbs up to this site, I am very pleased with my order, I received it in a timely fashion as promised. I recommend it to everyone; this site is the best place to shop for appliances parts.
Read less
Parts Used:
-
JOSEPH S. from BRONX, NY
-
Difficulty Level:Very Easy
-
Total Repair Time:15 - 30 mins
-
Tools:Screw drivers, Socket set
10 of 12 people
found this instruction helpful.
Was this instruction helpful to you?
Thank you for voting!