EasyApplianceParts is now PartSelect! We've merged our sites to provide a better shopping experience for you.   Full Details
Back
Back
Keep typing for more specific results...
Models > JB255DJ4WW > Symptoms > Element will not heat

Parts That Fix General Electric Range JB255DJ4WW Element will not heat

Element will not heat is a commonly reported symptom for the JB255DJ4WW General Electric Range, and we have put together a full guide on how to fix this. This advice is based on feedback from people who own this exact appliance. We have listed the most common parts for your JB255DJ4WW General Electric Range that will fix Element will not heat. We have included repair instructions, and helpful step-by-step video tutorials. If you are experiencing this issue, not to worry, DIYers just like you have fixed this, and shared their experience to help you!
Fixes Symptom 32% of time

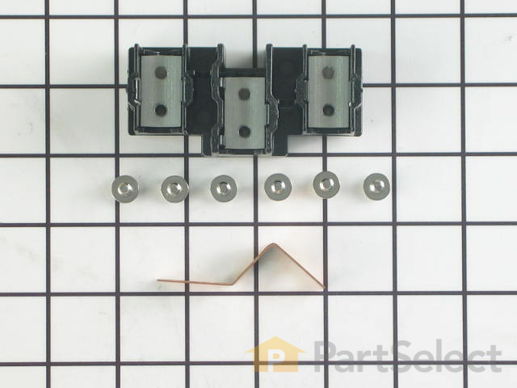
This kit includes the female contact with wires, terminal block and mounting clip.

$ 33.95
  In Stock
PartSelect Number PS783534
Manufacturer Part Number WB17T10006

Replacing your General Electric Range Range Surface Burner Terminal Block Kit

Replacing your Range Surface Burner Terminal Block Kit

Customer Repair Stories

The electric burner on the stove top would no longer heat up, when we removed it we noticed that the element was completely burned. I mean fryed!
First, I got my husband and let him know that the part was in (really easy), then I sat back and watched as he pulled the oven from the wall, unplugged it and lifted the stove top (so far, I haven't broken a sweat)! I then peeped up under the top as he removed a scew from the element and then several screws from the back panel, trace the wire to the needed element, and reconnect the new element (haven't broken a nail yet)! He then secured the element back on its mount, let down the top and plugged the oven back in, checked for accuracy...mission accomplished! This was the easiest repair I've ever done!
  • Monica from Point Blank, TX
  • Difficulty Level:
    Really Easy
  • Total Repair Time:
    Less than 15 mins
  • Tools:
    Screw drivers
14 of 15 people found this instruction helpful.
Was this instruction helpful to you?
Thank you for voting!
burner was shorting out
unplugged unit pulled it away from wall took off the backplates traced wire to plug replaced with part ordered very smooth operation. the most impressive thing to me was i ordered part on computer and it was at my door in 30 hours awesome.
  • douglas from louisville, KY
  • Difficulty Level:
    Really Easy
  • Total Repair Time:
    30 - 60 mins
  • Tools:
    Nutdriver
47 of 49 people found this instruction helpful.
Was this instruction helpful to you?
Thank you for voting!
Fixes Symptom 31% of time

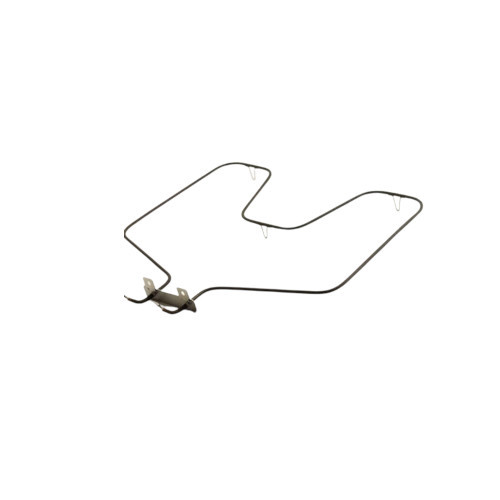
The bake element is located on the bottom of the oven. If your oven will not heat properly it may be due to a faulty or damaged baking element. If you can see that the element has been separated or blistered, you should replace the part immediately. If there is no visible damage, turn the oven on and check to see if the element heats evenly. If the element is not heating evenly, or if it is not heating at all, it will need to be replaced. This element is 19 inches wide x 19 inches long, and has male spade push on terminals.

$ 87.95
  In Stock
PartSelect Number PS17626202
Manufacturer Part Number WB30X46987

Replacing your General Electric Range Bake Element

Replacing your Bake Element

Customer Repair Stories

Broken heating element
1)Turn off power to stove
2)remove 2 bolts holding heating element
3)pull element out of the back of the oven about 8" so that the wire connects is visable
4)pull wire clips off of heating element and remove element from the oven
5)put wire clips on the new heating element
6)push new heating element back into the holes in the back of the oven
7)screw botls back into the oven holding the heating element in place
8)Turn power back on
  • Paul from anna, TX
  • Difficulty Level:
    Really Easy
  • Total Repair Time:
    15 - 30 mins
  • Tools:
    Nutdriver, Pliers
74 of 87 people found this instruction helpful.
Was this instruction helpful to you?
Thank you for voting!
Lower bake Element would not heat.
First I slid the stove out and unpluged it, then removed two screws,slid out element, disconected two wires, slid new element in to place, pluged two wires in ,put into place and installed two screws, pluged stove back in, and turned on to try. Works perfect.
  • Ronald from Nassau, NY
  • Difficulty Level:
    Really Easy
  • Total Repair Time:
    Less than 15 mins
  • Tools:
    Nutdriver, Pliers
227 of 255 people found this instruction helpful.
Was this instruction helpful to you?
Thank you for voting!
Fixes Symptom 19% of time

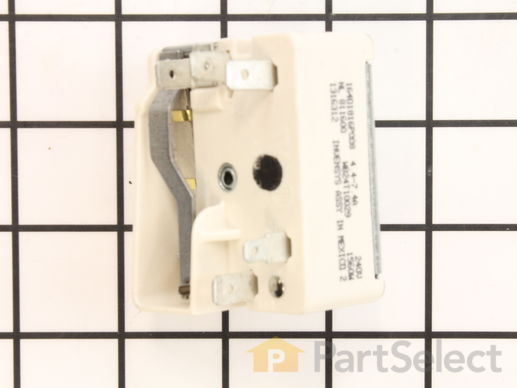
The 8-inch surface element switch is also known as an infinite heat switch, and is a part for your range. It controls the large surface element. It will turn the element on and off, and allow you to change the heat intensity. The knob to adjust the heat setting mounts on the shaft of this swtich. The burner knob is sold separately. If your large surface element will not turn on, or you cannot adjust the heat intensity, you may have a broken or damaged surface burner switch. Be sure you disconnect your range from the power source before you begin this repair.

$ 41.95
  In Stock
PartSelect Number PS236750
Manufacturer Part Number WB24T10025

Replacing your General Electric Range Range Burner Switch For 8 Inch Burner

Replacing your Range Burner Switch For 8 Inch Burner

Customer Repair Stories

when cooking on the 8" burner it would randomly go high heat.
first slide out range from wall and unplug it. then remove the rear panel, it is about 6 or 8 1/4" screws. remove the selector knob on the front of range and then remove the two philips head screws. this is how you remove the burner controller. hold the new controller next to the od one and one by one take the wires off the old one and put them on the new one. re-assemble and you are good to go.
  • kevin from crossroads, TX
  • Difficulty Level:
    Really Easy
  • Total Repair Time:
    15 - 30 mins
  • Tools:
    Nutdriver, Screw drivers
30 of 33 people found this instruction helpful.
Was this instruction helpful to you?
Thank you for voting!
Burner was constantly at high heat
I removed the rear cover from the stove then removed the knob and two screws on the front panel that hold the control in place. I then took the wires off the old control one at a time and placed them on the new control. Then I placed the control in position and tightened the two screws on the front panel, replaced the knob and screwed the back panel in place.
  • Rick from Avon Park, FL
  • Difficulty Level:
    Really Easy
  • Total Repair Time:
    Less than 15 mins
  • Tools:
    Pliers, Screw drivers
45 of 49 people found this instruction helpful.
Was this instruction helpful to you?
Thank you for voting!

This switch controls the small burner on a range/stove top.

$ 47.95
  In Stock
PartSelect Number PS236754
Manufacturer Part Number WB24T10029

Replacing your General Electric Range Range Surface Element Control Switch 6 Inch 1560 W

Replacing your Range Surface Element Control Switch 6 Inch 1560 W

Customer Repair Stories

back burner not getting hot
unplug stove first...take back of stove off to get to burner switch remove wires colors coded.. get new switch put wires on the same way.plug stove in test burner...very simple to replace.and save $$$$$$$$
  • William from Shenandoah, PA
  • Difficulty Level:
    Really Easy
  • Total Repair Time:
    15 - 30 mins
  • Tools:
    Screw drivers, Socket set
8 of 10 people found this instruction helpful.
Was this instruction helpful to you?
Thank you for voting!
Replace stove top burners (3 total)
Unplug stove first. Raised the stove top and propped up useing wooden spoon and wife assistance holding up. Pay attention to spot brackets hand to top. Removed sheet metal screws from bracket clamp holding burner in place. Removed one extension bracket from old burner and transfeered to new burner. Removeing one bracket clamp allows the other one to act like a hinge and make for easy removal and replacement. Back of burner had corresponding numbers which made it easy to replace brackets in same place as old. I carefully take one electrical wire at a time from old burner and transfeered to the new burner. Replaced burner same way it came off.
  • Thomas from Bonifay, FL
  • Difficulty Level:
    Easy
  • Total Repair Time:
    15 - 30 mins
  • Tools:
    Screw drivers, Wrench (Adjustable)
8 of 10 people found this instruction helpful.
Was this instruction helpful to you?
Thank you for voting!
Fixes Symptom 7% of time

This broil element is found on the roof of the oven.

$ 73.21
  In Stock
PartSelect Number PS17626201
Manufacturer Part Number WB30X46986

Replacing your General Electric Range BROIL ELEMENT

Replacing your BROIL ELEMENT

Customer Repair Stories

Broiler element was burned out
After turning the power off to the range, it was as simple as removing the screws for the broiler itself and the bracket and plugging in the new element. Yes, it was that easy.
  • Ursula from Suffolk, VA
  • Difficulty Level:
    Really Easy
  • Total Repair Time:
    Less than 15 mins
  • Tools:
    Nutdriver
11 of 11 people found this instruction helpful.
Was this instruction helpful to you?
Thank you for voting!
Broiler burnt out.
Removed screws using nut driver. Pulled element way forward until wires came through. Pondered how to detach burned out element from wires. Chickened out, call neighbor who grasped things firmly with two hands and pulled. Old element came loose. Popped in new element. Cursed the screws that wouldn't align with holes to support element; finally did it. Screwed element plate in place. Put oven door back on, plugged it in and turned it on hoping that we hadn't reversed the wires. Job accomplished.
  • ellen from centennial, CO
  • Difficulty Level:
    Easy
  • Total Repair Time:
    15 - 30 mins
  • Tools:
    Nutdriver
20 of 24 people found this instruction helpful.
Was this instruction helpful to you?
Thank you for voting!
Fixes Symptom 2% of time

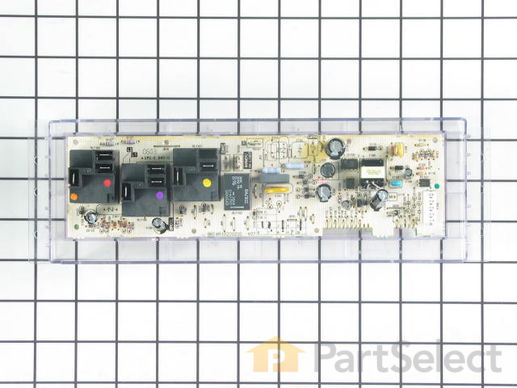
This electronic control board is the central component of your wall oven, managing functions such as temperature regulation and heating elements. The manufacturer has modified the wiring on this part, so professional installation may be necessary for proper setup. Before installation, shut off the circuit breaker or unplug the oven for safety. This genuine OEM part ensures optimal oven performance and compatibility with select models.

$ 133.61
  In Stock
PartSelect Number PS16873547
Manufacturer Part Number WB27X45466

Customer Repair Stories

after lightning cooktop worked oven did not
called service co. and described problem while i was looking at parts diagram and he agreed with my feeling what part got fried. he told me the part would be 183.00 plus labor and drive time. when i told him i was looking at the part on line for 65 dollars he hung up on me. i recieved the part and was slightly dissapointed to know there was a sepperate adhesive overlay. i saw that it was a sepperate part but if i knew it was adhesive i would have spent the extra 20 dollars for a new one. but, to my surprise the old one peeled off easily and gently re-apllied it to the new conrol board alighning it well seemed to be the trickiest part of the job. took the five wires with connectors out of the old one and inserted them into the same place on the new one. removed the old one from the frame (4 pan phillp sheet metal screws) and then screwed the new wired control board in. plugged in the unit and pressed the bake button and then mixed the brownie batter. replaced the back panel cover. 65 dollars and 15 minutes.

thanks

bob
  • robert from OXFORD, CT
  • Difficulty Level:
    Really Easy
  • Total Repair Time:
    15 - 30 mins
  • Tools:
    Screw drivers
47 of 57 people found this instruction helpful.
Was this instruction helpful to you?
Thank you for voting!
Blown Oven Control Board
After removing the back of the range the oven control board was visible and accessible by removing four nuts. There was some resistance removing the leads from the oven coils and light-bulb mechanisms but with some leverage and pliers they came loose. The only challenge was the face plate of the unit is attached using adhesive and needed to be carefully peeled off and added to the new oven control board. Getting this right was just a matter of taking time and lining up the components correctly. After applying the face, the new control board went right in. I reattached the back, plugged the unit back in, and the over has worked great for the past week. Part select being able to identify the part numbers listed from the component likely saved me at least $100 of having a GE certified repair technician come in.
  • Julien from Barnhart, MO
  • Difficulty Level:
    A Bit Difficult
  • Total Repair Time:
    15 - 30 mins
  • Tools:
    Nutdriver, Screw drivers
53 of 59 people found this instruction helpful.
Was this instruction helpful to you?
Thank you for voting!
Fixes Symptom 1% of time

This GE Range Surface Element, 8-inch in size, is a perfect fix to supply heat to a cooking area on top of your range. Built with durability and efficiency in mind, it is an effective 5-turn plug-in electric surface element. Its 8" diameter ensures ample coverage and smooth heat distribution for your cooking needs. Prior to installation, be sure to unplug the range or shut off the house circuit breaker for safety. It is also highly recommended to wear work gloves during this procedure to ensure hand safety. Choose this GE range surface element for a reliable heat source improvement for your appliance.

$ 79.33
  In Stock
PartSelect Number PS2364764
Manufacturer Part Number WB30K10018
Fixes Symptom less than 1% of time

$ 13.95
  In Stock
PartSelect Number PS242888
Manufacturer Part Number WB2X8115
Fixes Symptom less than 1% of time

This part provides a way of connecting individual electrical wires and offers protection of the device from electrical surges (voltages and/or currents).

$ 56.38
  In Stock
PartSelect Number PS953027
Manufacturer Part Number WB17T10011

Customer Repair Stories

Original terminal block plastic shielding melted, protecting appliance when the wires overheated.
Safety first * Unplugged 220 VAC from outlet. Removed shield cover screws with 1/4" hex nut driver (5 screws). Removed all 6 silver screws from terminal block with 1/4" nut driver, freeing all wires. Removed the green ground screw and ground bracket from center terminal. Cut away (using the drill) melted original terminal block plastic to access the 2 black 1/4" nuts holding original terminal block onto appliance. Discarded the original damaged terminal block. Attached the new terminal block, aligning the mounting holes and the terminal block the same way the original terminal block was lined up and re-used the black 1/4" nuts (original used because the replacement package did not include new black screws). I bought a new appliance cord, since the original cord overheated. Reattached all wires using the 6 new silver screws. Start with the middle terminal by attaching the appliance wires and the ground bracket. The ground must be attached to the bracket and the bracket bridges between the terminal block and the range body. Reattached shield cover. Plugged in appliance. Note: it doesn't matter which outside wire attaches to the outside terminals (both are hot), but the middle wire (neutral) must attach to the middle terminal. However, the ring terminal should be flush on the terminal block so you don't bend the ring.
  • Brian from DOVER, PA
  • Difficulty Level:
    Really Easy
  • Total Repair Time:
    30 - 60 mins
  • Tools:
    Nutdriver
6 of 8 people found this instruction helpful.
Was this instruction helpful to you?
Thank you for voting!
terminal block melted
The existing terminal block on my Ge oven/Range had melted due to a loose wire causing sparking and starting the plastic casing of the terminal block on fire and melting it, Part select made the part easy to find and had it at my house in 2 days. All I had to do was remove six screws to take the back sheet metal cover off of the oven. Unscrew the terminal connections remove two mounting screws that held the terminal on to the oven body. This was a little trickier than it should have been because the melted plastic had reformed making it very hard to access the mounting screws. i then mounted the new piece and plugged the oven in, it took 15 minutes and was very easy. definitely saved me at-least a $100 for the service call i would have made if finding the part wasn't so convenient
  • jonathan from willow springs, IL
  • Difficulty Level:
    Easy
  • Total Repair Time:
    Less than 15 mins
  • Tools:
    Nutdriver, Screw drivers
54 of 73 people found this instruction helpful.
Was this instruction helpful to you?
Thank you for voting!