Your coupon for will be reflected when you check out!
✖
Your coupon for
✖
Hello!
You're visiting the PartSelect site in U.S.
Would you like to shop on the Canadian site?
Stay on this site
Go to Canadian site
✖
Model Number Locations
1Select Category Type
Select Category Type
2Select Product Type
Select Product Type
3Select {MODEL} Type
Select {MODEL} Type
Sample Model Number Tags
Model numbers can be made up of numbers (1005400, for example) or a combination of letters and numbers (LAT1000AAE). The model number will most likely appear on either a paper sticker or a metal plate. Your appliance's model number tag may look similar to the sample model number tags shown here (model number highlighted in yellow):
Model has been saved to My Models. If you're not signed in, your lists are available on this device and will expire within 30 days.
Model has been saved to My Models.
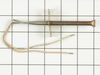
Introduce an easy fix to your kitchen with this GE genuine replacement gasket. Designed specifically for GE range/stove/oven, it ensures a reliable door seal, minimizing heat loss and fostering energy...
$99.86
In Stock
Order now and your part arrives in 2-3 business days!
After ordering the proper part with the help of the phone customer service tech, I moved the stove from the wall, unclipped the connector, removed the two screws holding the sensor in place, and removed it. Reversed the above to put it back, and the oven holds perfect temperature.
We took out the philips screws on the right and left side of inside of the oven and two hex head screws on the clip on the top of the oven in the front. Then using a slot screw driver pryed the oven liner out enough to remove old gasket and replace the new gasket. We did see in some online directions that we were suppose to remove enti
... Read morere oven from cabinet and loosen bolts in the back. But, we were able to get enough space to get the old gasket out and new one installed. We did use a 1/4" thick piece of wood on face of oven to prevent any denting of oven when prying out the liner of the oven.
Removed sensor from back wall of oven by removing 2 screws from flange. I could not pull the wire-nut connections out through the small hole and thought I would have to pull the whole oven out of the wall to acess the connections from the back so instead I clipped the wires close to the old sensor and connected the new sensor with the sma
... Read morell wire nuts provided, then enlarged the hole in the oven wall, being careful not to pinch the wires then pushed the wire nuts and extra wire back through the hole and put the screws back in the flange.