Back
Back
Keep typing for more specific results...
Models > GTW220ACK4WW > Symptoms > Will not drain

Parts That Fix General Electric Washer GTW220ACK4WW Will not drain

Will not drain is a commonly reported symptom for the GTW220ACK4WW General Electric Washer, and we have put together a full guide on how to fix this. This advice is based on feedback from people who own this exact appliance. We have listed the most common parts for your GTW220ACK4WW General Electric Washer that will fix Will not drain. We have included repair instructions, and helpful step-by-step video tutorials. If you are experiencing this issue, not to worry, DIYers just like you have fixed this, and shared their experience to help you!
Fixes Symptom 79% of time

This drain pump assembly is for washers. Drain pump assembly removes water from the washer during the drain portion of the cycle. The assembly may include multiple parts; refer to your parts diagram for a complete list of parts included.

$ 44.95
  In Stock
PartSelect Number PS12723115
Manufacturer Part Number WH23X28418

Customer Repair Stories

Would not drain the water from the tub.
Very simple to repair. Be sure to drain the tub outside or into the sump pump then lay the washer on its side. The pump is right there on the bottom of the basket with 3 bolts. You will also need to remove the belt cover to get to the plug. So simple and saves you hundreds off repair man prices.
  • Micheal from South Bend, IN
  • Difficulty Level:
    Very Easy
  • Total Repair Time:
    Less than 15 mins
  • Tools:
    Socket set
33 of 50 people found this instruction helpful.
Was this instruction helpful to you?
Thank you for voting!
Washer ran fine but woudl not drain water - low humming noise
Drain all the water out of the tub with a shop vac
Remove rear drain hose and drained rest of water into a bucket
Remove small rear panel (bottom left hand corner) where the drain hose connects
Tipped washer up about 45 degrees to get underneath it - Supported it with a few paint cans
Remove internal drain hose/clamps from pump - w/ pliers
Remove belt cover (gray plastic) with socket - 3 bolts
Remove wire assembly plug from socket
Remove old drain pump with socket - 3 bolts
Install new drain pump - 3 bolts - plug wire assembly into socket
Reinstall belt cover - 3 bolts
Reinstall hose to drain pump (note panel will be inside washer)
Feed drain hose panel through hole and reinstall - 1 nut
Re attached drain hose to exterior drain plug
You are done !
  • Mike from NAPLES, FL
  • Difficulty Level:
    Really Easy
  • Total Repair Time:
    30 - 60 mins
  • Tools:
    Nutdriver, Pliers, Screw drivers, Socket set
56 of 79 people found this instruction helpful.
Was this instruction helpful to you?
Thank you for voting!
Fixes Symptom 14% of time

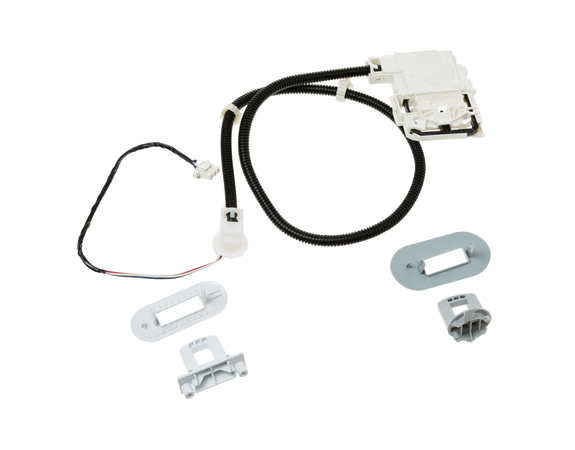
This lid lock, also known as a door lock, is a genuine OEM replacement part for your washing machine. The lid lock keeps your washer lid closed during the washing cycle. If this part is broken, your washer may not run because it thinks the door is open, or it will not keep the door locked during the wash cycle. To replace this part, make sure you disconnect power to the appliance and wear work gloves.

$ 73.45
  In Stock
PartSelect Number PS17626546
Manufacturer Part Number WH08X37938

Customer Repair Stories

Washer wouldn't fill, wash, spin
Use putty knife to unlock top panel from base. Remove 2 bolts from back of washer holding control section. Don't take completely off. 2 bolts needs to be removed to unsecure top from base. Lastly 2 screws hold lid in place. Remove lid. Slide top panel to left just to access lid lock. Unplug sensor. 1 screw and tabs hold lock in place. Watch position coming out so you don't get confused putting new lock in. Squeeze tabs, replace screw. plug in sensor. Reverse procedure to put top section back together.
  • Susan from OXFORD, FL
  • Difficulty Level:
    Really Easy
  • Total Repair Time:
    30 - 60 mins
  • Tools:
    Screw drivers, Socket set
15 of 18 people found this instruction helpful.
Was this instruction helpful to you?
Thank you for voting!
The lid switch which signals that the washer door is closed malfunctioned. Even with the lid closed the washer would not spin because the washer was detecting the lid as open because of the faulty switch
The replacement part looked absolutely nothing like the defective part. The old part was easily accessible and was easily unplugged from the wiring harness. I assume when the new part came, I would just plug it into the wiring harness, snap some of the trim pieces in place and be done. 5 minutes. But no. The replacement part was completely different and came with its own wiring harness and length
of wire which had to be installed. The installation of the wiring harness was extremely complicated which involved popping off the control panel of the washer, prying up the top and disconnecting some other pieces to complete the install. There should have been a clear warning on the replacement part, that it was completely different and likely too difficult for a non-professional repair man.
  • Timmothy from EAGLEVILLE, PA
  • Difficulty Level:
    Very Difficult
  • Total Repair Time:
    More than 2 hours
  • Tools:
    Pliers, Screw drivers, Wrench (Adjustable)
18 of 22 people found this instruction helpful.
Was this instruction helpful to you?
Thank you for voting!
Fixes Symptom 3% of time

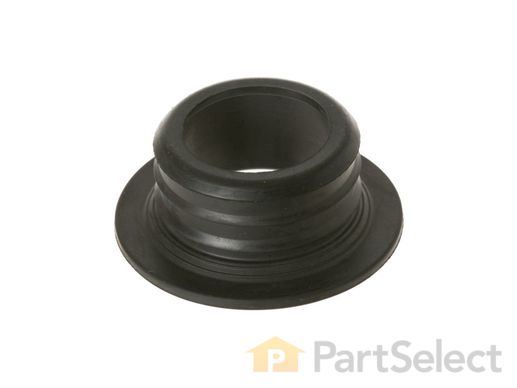
This GE DRAIN PUMP SEAL is an essential component for your washer, ensuring a leak-free connection between the drain hose and the washer drain pump. For the assurance of a dry, well-functioning laundry setup, this reliable seal is a must-have repair item. Prior to installation, remember to disconnect power from your washer for safety. It's recommended that you wear working gloves during the installation process to guard your hands. Trust the dependable quality of GE to keep your appliance performing at its best.

$ 13.95
  In Stock
PartSelect Number PS11763265
Manufacturer Part Number WH08X24179
Fixes Symptom 2% of time

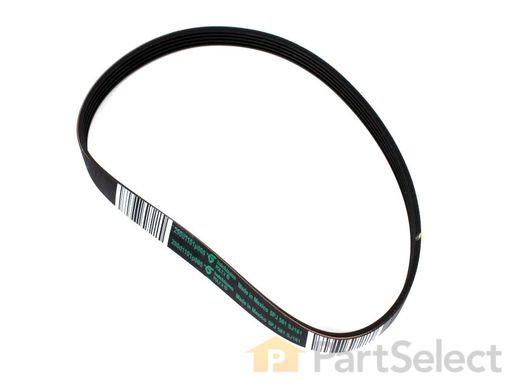
This is a drive belt for various models of dryer. This belt is responsible for allowing the drive motor to rotate the dryer drum. Over time and with use, this belt will wear out and if it becomes damaged, it will no longer be useable and must be replaced. This belt is made of durable rubber and measures approximately 23 inches long. Please note that your existing belt may measure longer than this replacement belt; this is normal and is due to stretch the belt undergoes over time and use. Replacing this belt will require some disassembly of your dryer and will require a screwdriver and wrench to remove and install. This dryer drive belt is sold individually and does not come with any other parts or accessories.

$ 20.95
  In Stock
PartSelect Number PS12299369
Manufacturer Part Number WH01X27538

Customer Repair Stories

WASER DID NOT ALWAYS SPIN OUT.
Leaned washer back to get to motor. Loosen screws to remove belt cover. Slipped old belt off, cleaned both spinals off, slipped new belt on. Have a good day!
  • Lloyd from SUMTER, SC
  • Difficulty Level:
    Easy
  • Total Repair Time:
    30 - 60 mins
  • Tools:
    Socket set
2 of 2 people found this instruction helpful.
Was this instruction helpful to you?
Thank you for voting!
Noisy spin, no agitation.
Cleaned pulleys. Replaced worn belt.
  • Henry from OKANOGAN, WA
  • Difficulty Level:
    Very Easy
  • Total Repair Time:
    15 - 30 mins
  • Tools:
    Pliers, Screw drivers, Socket set
9 of 13 people found this instruction helpful.
Was this instruction helpful to you?
Thank you for voting!
Fixes Symptom 1% of time

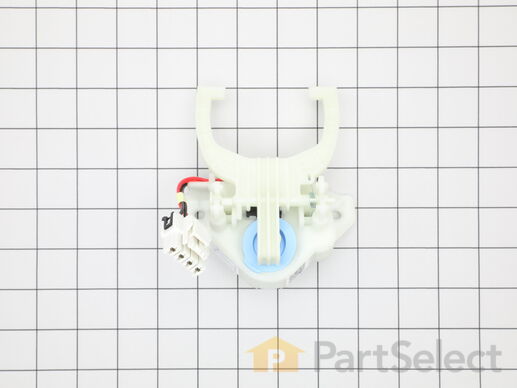
This is a mode shifter or shift actuator for models of washing machine. Mode shifters are designed to change the function of the washing machine motor, between spinning cycles and agitation, and is usually installed at the bottom of the washer. If your washing machine is not spinning or agitating during its washing cycle, or if it simply does not start, this shift actuator is likely bad and in need of replacing. This shift actuator is made mostly of plastic, and features two holes to secure it with screws, as well as a single wire harness that connects within your washing machine. This shifter is an OEM part and is sold individually.

$ 49.93
  In Stock
PartSelect Number PS16554752
Manufacturer Part Number WH03X30517

Customer Repair Stories

washed well but would not shift out of spin cycle
easiest repair I have ever made. No problems and was surprised as to how fast and easy it was to repair. I did not need two of steps the instructions stated I had to do. best purchase I have ever made.
  • terry from MILLINGTON, TN
  • Difficulty Level:
    Very Easy
  • Total Repair Time:
    30 - 60 mins
  • Tools:
    Socket set
2 of 4 people found this instruction helpful.
Was this instruction helpful to you?
Thank you for voting!