EasyApplianceParts is now PartSelect! We've merged our sites to provide a better shopping experience for you.   Full Details
Back
Back
Keep typing for more specific results...
Models > GTS18GBEJRWW > Symptoms > Fridge too warm

Parts That Fix General Electric Refrigerator GTS18GBEJRWW Fridge too warm

Fridge too warm is a commonly reported symptom for the GTS18GBEJRWW General Electric Refrigerator, and we have put together a full guide on how to fix this. This advice is based on feedback from people who own this exact appliance. We have listed the most common parts for your GTS18GBEJRWW General Electric Refrigerator that will fix Fridge too warm. We have included repair instructions, and helpful step-by-step video tutorials. If you are experiencing this issue, not to worry, DIYers just like you have fixed this, and shared their experience to help you!
Fixes Symptom 44% of time

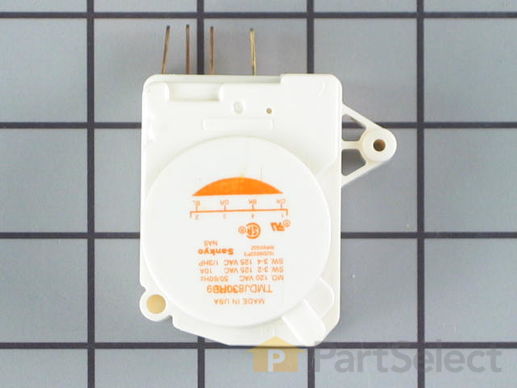
This defrost timer will cycle for 25 minutes after every six hours of run time. The timer itself is made of plastic, and its terminals are bent, the leads are internal, and the label is orange. If you notice that your fridge is too warm, the fridge is running for a long time or is leaking, it could be due to the defrost timer becoming inactive. The defrost timer is found underneath the light cover (may need to remove lightbulb) and will need to be removed along with the air inlet assembly and housing.

$ 70.24
  In Stock
PartSelect Number PS310869
Manufacturer Part Number WR9X502

Replacing your General Electric Refrigerator Defrost Timer - 120V 60Hz

Replacing your Defrost Timer - 120V 60Hz

Customer Repair Stories

display showed dE
popped off front grille, removed 2 screws for bracket, then had to remove one screw for timer. unplugged old timer, reversed procedure, all works.
  • Nancy from Hamburg, NY
  • Difficulty Level:
    Easy
  • Total Repair Time:
    Less than 15 mins
  • Tools:
    Nutdriver
75 of 119 people found this instruction helpful.
Was this instruction helpful to you?
Thank you for voting!
refrigerator was not cooling but the freezer worked fine.
My husband put on the defrost timer. At first I thought the part was not going to fix the problem. After about 5 hours my refrigerator was still warm. I went to work and when I got home that evening my refrigerator was cooling and down to 28 degrees. So if you replace this part wait at least 12-24 hours. Give it time to stablize. My husband says it has to go through its cycle. It works on a 24 hour timer. My refrigerator is working fine and this has saved me alot of money. My husband says, once you put on the timer you may have to use a flat screwdriver and turn the small dial clockwise one click to start it. He removed the kick grill and replaced the part. Dont forget to shut breaker off to replace this part. Turn power back on and start the timer. We are so happy that we now have a working refrigerator.
  • Wanda from Cabins, WV
  • Difficulty Level:
    Really Easy
  • Total Repair Time:
    15 - 30 mins
  • Tools:
    Nutdriver, Screw drivers
92 of 109 people found this instruction helpful.
Was this instruction helpful to you?
Thank you for voting!
Fixes Symptom 14% of time

Also known as Heater Conduction.

$ 68.26
  In Stock
PartSelect Number PS303768
Manufacturer Part Number WR51X10038

Replacing your General Electric Refrigerator Refrigerator Defrost Heater

Replacing your Refrigerator Defrost Heater

Customer Repair Stories

Freezer stopped working
I noticed that if I unplugged the refrigerator and plugged it back in a while later it would start working but eventually would stop. I deduced the problem was likely the defrost thermostat. I ordered the thermostat but it was in a difficult place behind the evaporator coil which I could not remove. While I was trying to work it into position my hand pressed against the defrost coil and shattered the glass sheath. I ordered the coil and finally managed to get it and the thermostat installed. The refrigerator seems to work fine now.
  • Clifford from Melbourne, FL
  • Difficulty Level:
    A Bit Difficult
  • Total Repair Time:
    More than 2 hours
  • Tools:
    Nutdriver, Pliers, Screw drivers
9 of 13 people found this instruction helpful.
Was this instruction helpful to you?
Thank you for voting!
Fixes Symptom 11% of time

This part establishes and maintains the internal temperature of the refrigerator.

$ 47.95
  In Stock
PartSelect Number PS9493106
Manufacturer Part Number WR09X20002

Replacing your General Electric Refrigerator Refrigerator Temperature Control

Replacing your Refrigerator Temperature Control

Customer Repair Stories

malfunction of the cold control (wearing out after 15 years)
1. Disconnected 120 VAC power supply from refrigerator. 2. Removed 2 philip screws from horizonal panel containing the thermostat. (Panel is in refrigerator section). 3. Removed plug module from panel which freed the panel which allowed me to remove panel to do repair. 4. Removed wires from thermostat (cold control), and mechanically removed thermostat from panel and installed new cold control (thermostat). Replaced wires on control. 5. Replaced panel and reinstalled 2 philips screws. 6. time to repair about 15 minutes.
  • john from Philadelphia, PA
  • Difficulty Level:
    Really Easy
  • Total Repair Time:
    Less than 15 mins
  • Tools:
    Screw drivers
12 of 14 people found this instruction helpful.
Was this instruction helpful to you?
Thank you for voting!
Everything was freezing in the bottom and top
Pulled out the control sensor on the ceiling of the fridge. (2 screws) Took a picture with phone on how everything was installed. Unplugged all wires and pulled out Control Temp sensor. Installed new one and attached all wires. Installed back in fridge and plugged it back in. Everything works like new.
  • Thomas from Germantown, TN
  • Difficulty Level:
    Very Easy
  • Total Repair Time:
    Less than 15 mins
  • Tools:
    Screw drivers
23 of 26 people found this instruction helpful.
Was this instruction helpful to you?
Thank you for voting!
Fixes Symptom 7% of time

This compression ring is meant to hold the evaporator fan motor in place in the freezer compartment of your refrigerator. This is is a genuine OEM part. The tools needed to complete this repair are a Phillips screw driver and small flat blade screw driver. Be sure to turn off your refrigerator before removing the evaporator fan cover so the fan does not turn on during repair. It is recommended to check the grommets, evaporator fan, and fan blades during repair in case they also need replacning. The compression ring may need replacing if the fan is noisy, or the refrigerator compartments are too warm. This part is sold individually.

$ 13.95
  In Stock
PartSelect Number PS1015726
Manufacturer Part Number WR02X12149

Replacing your General Electric Refrigerator Refrigerator Ring

Replacing your Refrigerator Ring
Fixes Symptom 6% of time

The air duct insulation fits between the air duct and air duct cover, and prevents warmer air from entering the air duct.

$ 13.95
  In Stock
PartSelect Number PS8688247
Manufacturer Part Number WR02X20092
Fixes Symptom 6% of time

This white fresh food door gasket is used to seal the refrigerator door when closed to keep the cool air inside and the room air out.

$ 74.43
  In Stock
PartSelect Number PS2371087
Manufacturer Part Number WR24X10236

Customer Repair Stories

The food door gasket was not doing its función properly.
Well, when I opened the package the gasket was bended in half so I opened it and put it first on the floor and after some minutes I put it on the refrigerator side.
Then I took a screwdriver and easily removed the old gasket, cleaned the the channel where the new gasket had to seat or be inserted. Then I took the new gasket and put it on place and begining on the top right corner I began to insert the gasket into the channel from the right to the left. Double check to see if was ok
I continued on both sides from top to the bottom, one by one.
When I reached the bottom I began from the left to the right inserting the gasket into the channel. To complete the installation at the bottom I had to pull the gasket a little to properly reach the corner and I finished
To make sure the gasket was on place I hit the gasket with my bare hand all around and I was done.
It was very easy, I just followed the instructions given by the manufacturer
  • ROBERTO SOLIS PTY from MIAMI, FL
  • Difficulty Level:
    Very Easy
  • Total Repair Time:
    Less than 15 mins
  • Tools:
    Screw drivers
4 of 5 people found this instruction helpful.
Was this instruction helpful to you?
Thank you for voting!
Old door gasket torn/problematic; moisture in fridge
Referenced a couple of videos first, held up the new gasket to ensure fit, then carefully pulled the old gasket off by hand. Wiped down the ridges/edges of the door, then installed new gasket first on opposite corners then along all sides. Simply pressed in to the door ridges/bracket. Used a putty knife to ensure the edge of gasket was not folded under itself, and the blunt edge of the handle to ensure it was snugly installed all the way around. Didn’t have to remove the door as I had expected to. Very easy and took maybe 30 mins.
  • Joe from BROOKLINE, MA
  • Difficulty Level:
    Really Easy
  • Total Repair Time:
    15 - 30 mins
14 of 15 people found this instruction helpful.
Was this instruction helpful to you?
Thank you for voting!
Fixes Symptom 4% of time

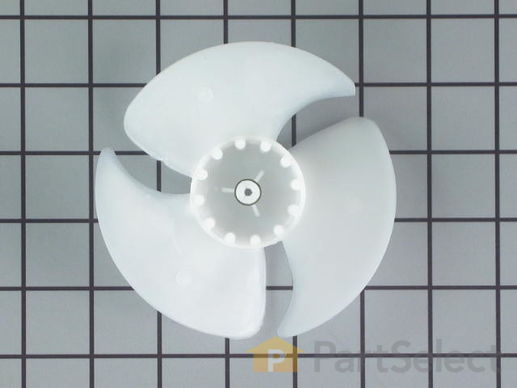
Upgrade your refrigerator's cooling efficiency with the GE Evaporator Fan Blade. This essential component circulates air through the evaporator fins and interior compartment, greatly improving your refrigerator's ability to stay cool. Before installing this crucial part, ensure that all perishable food is safely stored and that the refrigerator is unplugged. For personal safety we recommend wearing work gloves during the installation process. This product is exclusively designed for GE refrigerators. Keep your refrigerator running in optimal condition with this expertly crafted evaporator fan blade.

$ 24.95
  In Stock
PartSelect Number PS1020949
Manufacturer Part Number WR60X10205

Customer Repair Stories

The original fan had its blades sheared by ice build-up
The original design is poor. The evaporator fan is mounted in an upright position just below the ice-maker. A plastic grate mounts over the fan assembly to allow for air circulation. Unfortunately, random chips of ice from the ice maker can fall into the fan, causing the fan to shear its blades. Replacement of the fan blade is relatively simple (accept for having to completely unload the freezer and remove all back covers, the ice-maker auger motor assembly, and the metal evaporator cover). In order to mimimze this from reoccuring, I installed a 1/4'' mesh metal screen over the exhaust ports on the cover. Thus far, this has worked well to keep ice chips out of the evaporator fan.
  • Jeffrey from Broomfield, CO
  • Difficulty Level:
    Easy
  • Total Repair Time:
    30 - 60 mins
  • Tools:
    Nutdriver, Screw drivers, Wrench set
3 of 3 people found this instruction helpful.
Was this instruction helpful to you?
Thank you for voting!
Fixes Symptom 3% of time

The lid bumper or evaporator fan motor bumper in your refrigerator prevents the fan motor from scraping against the side bracket. If your refrigerator/freezer is noisy, the bumper could be worn down or missing, and the sound could be a result of the motor scraping the side bracket. You will find it between the fan motor and the side bracket on the evaporator fan motor assembly. To access the bumper, you will need to remove the evaporator fan motor assembly from the freezer. This part is made of orange rubber and is less than half an inch in diameter. It has a rounded top and a slightly pointed bottom, and is sold individually.

$ 13.95
  In Stock
PartSelect Number PS284979
Manufacturer Part Number WR02X10540

Replacing your General Electric Refrigerator Refrigerator Lid Bumper

Replacing your Refrigerator Lid Bumper

Customer Repair Stories

noisy refrigerator
I followed your video and completely dismantled the refrigerator evaporator motor, fan, brackets, and grommet, I completely cleaned the refrigerator including the cooling coils. I then ordered the evaporator motor ,fan, grommets, lid bumper, and brackets. The order would take a week to arrive. In the meantime I cleaned and reassembled all the old parts, waiting for the new ones to come. Guess what! The refrigerator was quiet as a mouse. I really did not need the new parts, but I kept them anyway just for good luck. Not bad for a refrigerator that's twenty four years old.
  • James from NEW YORK, NY
  • Difficulty Level:
    Easy
  • Total Repair Time:
    1- 2 hours
  • Tools:
    Nutdriver, Pliers, Screw drivers, Socket set
1 person found this instruction helpful.
Was this instruction helpful to you?
Thank you for voting!
Defroster fan burned up
First I removed the ice tray rack lifting it out of the way to reach the back cover of the fan. Then, the whole back inside panel had to be removed. Two screws removed the fan and bracket from the freezer unit. The missing bumper lid just snapped into place. Replaced everything in reverse order. Pretty easy job.
  • Peter M. from Lincoln Park, NJ
  • Difficulty Level:
    Easy
  • Total Repair Time:
    30 - 60 mins
  • Tools:
    Nutdriver, Pliers, Screw drivers, Socket set
3 of 6 people found this instruction helpful.
Was this instruction helpful to you?
Thank you for voting!
Fixes Symptom 3% of time

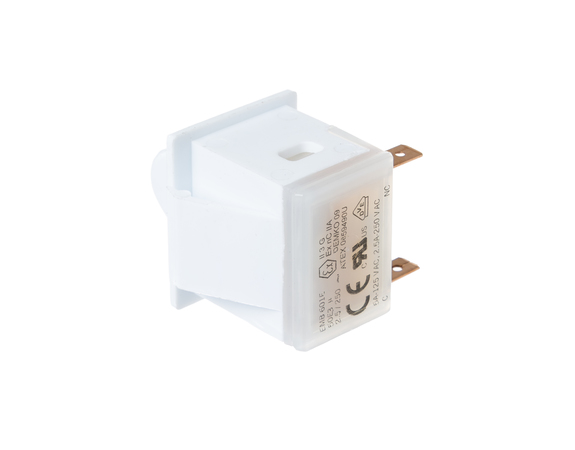
$ 33.95
  In Stock
PartSelect Number PS16554876
Manufacturer Part Number WR23X37285

Customer Repair Stories

The refrigirator light would not come on.
Poped out with screwdriver the old swithch and unplugged the two wires. Plugged in the wires to the new swithch and pushed it back in the hole where the old switch was before.
  • Jania from Novato, CA
  • Difficulty Level:
    Really Easy
  • Total Repair Time:
    Less than 15 mins
  • Tools:
    Screw drivers
25 of 40 people found this instruction helpful.
Was this instruction helpful to you?
Thank you for voting!
Sticking Light Switch
I applied some tips learned by reading other reviews. So before I started I grabbed my trusty vise grip pliers and a small screw driver. I locked onto the switch actuator, the part that the refrigerator door pushes in, with the vise grips and pulled on it just hard enough to get the screw driver inserted in the right side to push in the catch clip so the switch could be pulled out further each time the catch clip was depressed to the next detent. Then I used the screw driver on the left site to encourage the switch past the detents on the left and very quickly the switch was out of the mount. The wires from the refrigerator pulled out with the old switch. I unplugged the old switch from the wires and plugged in the new switch and shoved the new switch back into the mount, wiggled it a couple of times to make sure it was secure and the job was done. Once I applied the vise gripes at first, the whole job took less than a minute.
  • Jonathan from Lilburn, GA
  • Difficulty Level:
    Really Easy
  • Total Repair Time:
    Less than 15 mins
  • Tools:
    Pliers, Screw drivers
120 of 166 people found this instruction helpful.
Was this instruction helpful to you?
Thank you for voting!
Fixes Symptom 2% of time

The condenser fan blade assembly helps to regulate the temperature in your refrigerator or freezer. This fan assembly has 4 blades, but other fans may have 3 blades, so be sure to check the number of blades on your fan. The fan blade is made of white plastic and is approximately 6 inches in diameter. If your freezer section is too warm, or you notice a strange noise coming from your refrigerator when it is running, you may need to replace the condenser fan blade assembly. This part is sold individually.

$ 18.95
  In Stock
PartSelect Number PS1022410
Manufacturer Part Number WR60X10207

Replacing your General Electric Refrigerator Refrigerator Fan Blade Assembly

Replacing your Refrigerator Fan Blade Assembly

Customer Repair Stories

Noise in the back of freezer
I must thank yo for sending the fan so fast. If I ever have to deal with any appliance again, you are first on my list.
  • MaryLou from Levittown, NY
  • Difficulty Level:
    A Bit Difficult
  • Total Repair Time:
    Less than 15 mins
3 of 6 people found this instruction helpful.
Was this instruction helpful to you?
Thank you for voting!