Your coupon for will be reflected when you check out!
✖
Your coupon for
✖
Hello!
You're visiting the PartSelect site in U.S.
Would you like to shop on the Canadian site?
Stay on this site
Go to Canadian site
✖
Model Number Locations
1Select Category Type
Select Category Type
2Select Product Type
Select Product Type
3Select {MODEL} Type
Select {MODEL} Type
Sample Model Number Tags
Model numbers can be made up of numbers (1005400, for example) or a combination of letters and numbers (LAT1000AAE). The model number will most likely appear on either a paper sticker or a metal plate. Your appliance's model number tag may look similar to the sample model number tags shown here (model number highlighted in yellow):
Model has been saved to My Models. If you're not signed in, your lists are available on this device and will expire within 30 days.
Model has been saved to My Models.
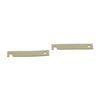
This is a duct felt seal for a dryer. The duct felt seal allows the front-load dryer drum to glide smoothly on the front panel. Your dryer will not function properly if the drum felt seal is compromis...
This drum glide bearing is an authentic OEM replacement part that is compatible with dryers. It is white in color and made of highly durable plastic. The bearing allows the drum to rotate smoothly and...
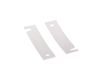
This OEM replacement dryer slide bearing is white in color, and approximately 3 inches long. The slide bearings are supportive linings for your dryer. If they have eroded, or are damaged, the drums wi...
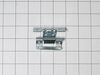
This is the door switch for your dryer. Door switches are used to communicate with the control board when the door is fully closed, so the drying cycle can safely begin, and if it is opened so it can ...
This authentic OEM rear bearing O-ring is designed for use with GE dryers. It helps secure the drum rear bearing onto the drum shaft, playing a key role in maintaining smooth and quiet dryer operation...
Experience the seamless functionality of your dryer with the GE Door Hinge. This dryer component plays a crucial role in the operation of your machine, supporting the dryer door on its front panel. It...
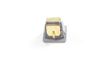
This part is connected to the rear bulkhead of the dryer with screws. It provides a way of connecting individual electrical wires and offers protection of the device from electrical surges (voltages and/or currents).
$36.95
In Stock
Questions And Answers for GTD84ECSN0WS
We're sorry, but our Q&A experts are temporarily unavailable.
Please check back later if you still haven't found the answer you need.
2 questions answered by our experts.
Sort by:
< Prev
1
Next >
Search filter:
Clear Filter
Your search term must have 3 or more characters.
Keep searches simple. Use keywords, e.g. "leaking", "pump", "broken" or "fit".
Sorry, we couldn't find any existing answers that matched.Try using some different or simpler keywords, or submit your new question by using the "Ask a Question" button above!
Sarah
July 3, 2022
Dryer no longer produces heat how do I fix it?
For model number GTD84ECSN0WS
Hello Sarah, Thank you for the question. There will be a few parts that can be tested with a Multimeter. We suggest testing the Inlet Control Thermostat, High Limit Thermostat, Thermostat, Cycling Thermostat, Outlet Control Thermostat and the Heater. If you need help placing an order, customer service is open 7 days a week. Please feel free to give us a call. We look forward to hearing from you!
Dryer is only 2 years old and while plugged in to the electrical circuit. It does not turn on. When you move the handle to select dryer option it doesn’t turn on. Opened the door and same no lights.
For model number GTD84ECSN0WS
Hello Jose, thank you for asking. Before everything else please check the power supply and make sure the dryer is receiving sufficient voltage which you can confirm using a voltmeter. Given that the power supply is accurate, the most highly likely cause of this problem is a faulty door switch (part number PS12722948). In some cases, the culprit is a faulty terminal block and grounding strap (part number PS1015628). Sometimes a damaged inlet control thermostat can also cause this issue (part number PS1766014). Possible but very rarely it can be a burned out control board. Please feel free to contact us if you need further assistance. Customer service is available 7 days a week if you need help placing an order. Glad to be of assistance!
Deflector has 3 bolts attaching it. They require a star wrench. Had to purchase same to do the repair. Removed the bolts(they are sheet metal type screws(bolts). Installed the deflector and started dryer. Loud rubbing sound noted. Shut off and checked the drum and noted it was not running concentrically. Removed deflector and the found th
... Read moree 3 screws actually retained the drum to drive. Had to make alignment pins to allow proper alignment of the drive, drum, and deflector. Once the pins were used during installation of the deflector everything worked correctly. Turned on dryer and it operated normally. Had I had the proper tools the repair would probably have taken 30 minutes or less.
Someone I'm related to by marriage accidentally dried a plastic-coated tablecloth on high heat, and our heat deflector was hosed. I was very happy to find this part here for such a reasonable price; Sears wanted about $65 for it. Installation required a Torx bit, and removing the old one was easy, but the dryer's design made it difficult
... Read moreto reinstall the heat deflector while keeping the dryer running concentrically. I ended up cutting the heads off three screws, threading those into the plate behind the drum, sliding the new heat deflector on over those, and then one by one replacing them with the original Torx head screws. Once I figured it out it didn't take long but it took me a while to figure it out. That's probably more a reflection on me than the dryer!


 – Part Number: WE03X37319")
 – Part Number: WE03X37320")


")
")


