Back
Back
Keep typing for more specific results...
Models > GTD72EBPN0DG > Symptoms > Drum Not Spinning

Parts That Fix General Electric Dryer GTD72EBPN0DG Drum Not Spinning

Drum Not Spinning is a commonly reported symptom for the GTD72EBPN0DG General Electric Dryer, and we have put together a full guide on how to fix this. This advice is based on feedback from people who own this exact appliance. We have listed the most common parts for your GTD72EBPN0DG General Electric Dryer that will fix Drum Not Spinning. We have included repair instructions, and helpful step-by-step video tutorials. If you are experiencing this issue, not to worry, DIYers just like you have fixed this, and shared their experience to help you!
Fixes Symptom 97% of time

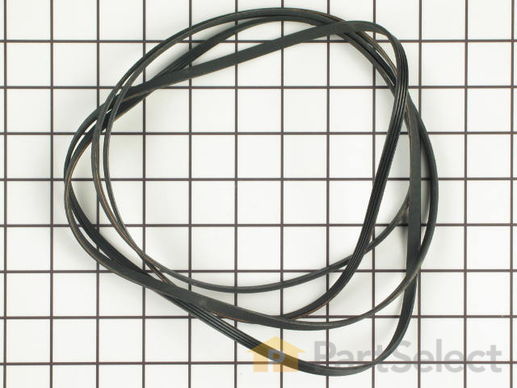
This Drive Belt is 89.5" long and comes in black, featuring four ribs on the inside for a better grip. This is a long belt that wraps all the way around the dryer drum, around a tension pulley, and then around the drive motor pulley, allowing all the parts to work together, spinning the drum as the motor rotates. If the drum will not turn when the dryer is turned on the belt is likely broken. It is common for belts to stretch or become brittle over time, which is what leads to the breakage. If broken, it should be replaced; the drum simply cannot spin without this belt. Refer to your model number and user manual to check if this part is right for you. Ensure you use work gloves to protect your hands from sharp internal parts during this repair. Please note: When comparing the length of your old belt to the length of the belt as stated here, remember that a small amount of stretching and contortion may occur with belts over time for a range of different reasons. Unless your belt is drastically different in length, this belt is what you are looking for despite any small inaccuracies. You will need to remove power to your appliance, remove the main panel, and access the motor drive to slip your new belt back into place.

$ 49.95
  In Stock
PartSelect Number PS16542496
Manufacturer Part Number WE03X29897

Replacing your General Electric Dryer Drive Belt

Replacing your Drive Belt

Customer Repair Stories

Broken Dryer Belt
I had to take most of the dryer apart because there is no rear access to the motor. It turned out to be easy to dissasembel the dryer. The only problem that I had was that I could not figure out how to route the belt around the motor and the idol pullies. I could not find anywhere that gave instructions on how to properly tension the belt. I finally figured out that the idoler pulley needs to be locked in place on the right side of the engie mount. Then the belt needs to be routed over idoler pulley and under the motor pulley. Finally release the idoler pully from the locked postion to put tension on the belt. It really turned out to be pretty easy.
  • Richard from Ashton, MD
  • Difficulty Level:
    Easy
  • Total Repair Time:
    1- 2 hours
  • Tools:
    Nutdriver, Screw drivers
70 of 107 people found this instruction helpful.
Was this instruction helpful to you?
Thank you for voting!
Drum belt broke
Removed the front Dryer panel. Left drum in place and lifted it up slightly to get access to motor drive. Slipped belt in place and put panel back on.
This was a first attempt ever at fixing an appliance and it was no big deal.
  • Adrian from Middletown, MD
  • Difficulty Level:
    A Bit Difficult
  • Total Repair Time:
    30 - 60 mins
  • Tools:
    Screw drivers
199 of 291 people found this instruction helpful.
Was this instruction helpful to you?
Thank you for voting!
Fixes Symptom 2% of time

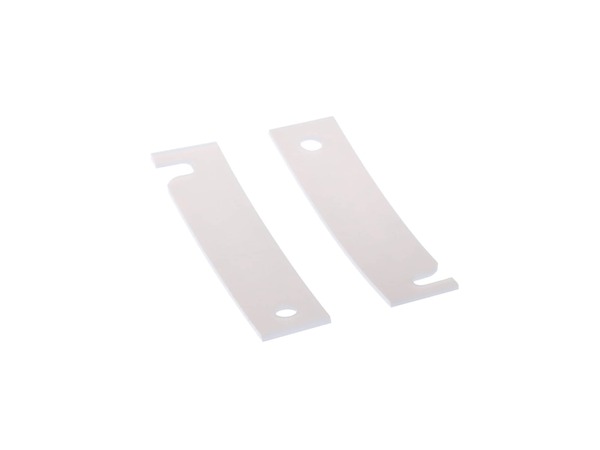
This OEM replacement dryer slide bearing is white in color, and approximately 3 inches long. The slide bearings are supportive linings for your dryer. If they have eroded, or are damaged, the drums will scrape against metal during the drying cycle which will produce a squealing, or scraping sound.

$ 23.95
  In Stock
PartSelect Number PS17626249
Manufacturer Part Number WE03X37320

Replacing your General Electric Dryer Dryer Bearing Slide (2 Pack)

Replacing your Dryer Bearing Slide (2 Pack)
Fixes Symptom 2% of time

This drum glide bearing is an authentic OEM replacement part that is compatible with dryers. It is white in color and made of highly durable plastic. The bearing allows the drum to rotate smoothly and dry your clothes thoroughly and evenly. It keeps the drum stable and protects it from excessive friction damage. Over time, the bearing may wear down or break due to normal aging or wear from repeated use. If the bearing is no longer able to support the drum, you will likely notice unusually loud grinding or squeaking noises from the dryer. You may also notice increased drying times due to poor drum rotation. Inspect all the bearings on your dryer, as they tend to wear down at the same time. Each drum glide bearing is sold individually.

$ 15.95
  In Stock
PartSelect Number PS17137207
Manufacturer Part Number WE03X37319

Replacing your General Electric Dryer Dryer Bearing Slide (2 Pack)

Replacing your Dryer Bearing Slide (2 Pack)

Customer Repair Stories

Dryer was making noise
Took the top and front end of the dryer off. Took the old slider spacers off and installed the new ones. I replaced all four of them even though only two was bad. While I had the dryer open I decided to use my shop vac to clean up the lint that had accumulated there. Replaced the front and the lid plugged it up, hit the start no noise just like new.
  • Maurice from MINERAL SPGS, AR
  • Difficulty Level:
    Really Easy
  • Total Repair Time:
    15 - 30 mins
  • Tools:
    Screw drivers
10 of 12 people found this instruction helpful.
Was this instruction helpful to you?
Thank you for voting!