Parts That Fix General Electric Refrigerator GSE22ETHCWW Fridge too warm
This sensor (Temperature Sensor, Thermistor, Refrigerator Temperature Sensor) sends the temperature reading of the compartment to the control board. If you notice your refrigerator is too warm, too cold, or not defrosting properly, then there may be a problem with your sensor. The temperature sensor can break from material fatigue or through normal use, and should be replaced. It is attached to the evaporator and control housing in your appliance. It measures approximately 1.25 inches long with 18 inch wire leads, and is constructed out of plastic. This part comes in white, beige. It includes the sensor, with wire leads.
Replacing your General Electric Refrigerator Refrigerator Temperature Sensor

Customer Repair Stories
-
Larry from Menomonie, WI
-
Difficulty Level:A Bit Difficult
-
Total Repair Time:15 - 30 mins
I went on line to see if there were others having this same problem and found that there were many with the same problem.
I tried the most common component and the less expensive one first , the thermostat switch I installed it very easily snipping two wires and attaching the news using wire nuts I used the diagram on this website to pinpoint the component and there has not been a problem since.
-
michele from North Smithfield, RI
-
Difficulty Level:Really Easy
-
Total Repair Time:15 - 30 mins
-
Tools:Pliers
This dual heater kit replaces the single heater. It's redesigned to use two heating elements for a better defrost cycle.
Replacing your General Electric Refrigerator Refrigerator Heater Harness Kit

Customer Repair Stories
2. Unplug refrigerator
3. Remove (4) screws (2) w/screwdriver and (2) w/nut driver. You can remove the light cover to get it out ... Read more of the way but you don't have to.
4. Remove the evaporator cover (The rear wall)
5. Melt and remove any ice build up. Remember those rags?
6. Remove (2) screws from the heater bracket
7. Remove the failed heater. My old heater was a single element. The new heater was a dual element. This made no difference.
8. Disconnect (2) wires.
9. Re-route and reconnect (2) wires. The wires were re-routed because the new heater has both wires on the same side. Not a problem.
10. Install new heater on the bracket (2) screws
11. Replace cover (4) screws
12. Power up the refrigerator
-
Brian from Cary, NC
-
Difficulty Level:Really Easy
-
Total Repair Time:15 - 30 mins
-
Tools:Nutdriver, Screw drivers
1st, take out your frozen food (which, if you need to do this repair may not be frozen) and put it in a cooler or the refrigerator.
2nd, remove the ice cube bucket and dump the ice cubes in the cooler to help keep the frozen food cool. Turn the ice cube maker off.
3rd, remove the freezer shelves.
4th, locate the panel covering the freezer coils. It's a panel at the back of the freezer. It hides the freezer coils and protects them from damage. It's held in place by two screws located at the top left and right corners of the panel.
5th, unscrew the screws holding the panel to the refrigerator.
6th, detach the clip at the top of the panel.
7th, remove the panel. You should see the coils now. The coils will be covered in frost if the defroster heater has failed. If the coils are not covered in frost, there may be another reason for the refrigerator failing to cool.
8th, even if the coils are covered in frost, you should also inspect the defroster heater at the bottom, underneath the coils. The business end of it is a long tube running horizontally between two wires. If it's black like a badly burned out light bulb, then it's failed. If the bulb appears fine, you may have a different reason for your refrigerator and freezer frosting up. We'll assume that the defroster heater has blown out, and proceed.
9th, place a towel at the bottom of the panel space, to soak up any water that melts and runs down. There is a drain under the coils. It collects water that melts during the defrost cycle, but I'd rather mop up the water instead of relying on the drain.
10th, use hot air blowing from the hair dryer to defrost the coils. Just play the air from the hair dryer over the coils, starting at the top, and working down. The frost will quickly melt and the water will be soaked up by the towels. If you want things to go faster, you can throw hot water on the coils to melt them faster, but that produces more water to mop up, and makes a big mess. It's also dangerous to have water lying around if you then decide to use the hair dryer to continue defrosting the coils.
11th. MOST IMPORTANT. Don't use your screwdriver or any other sharp object to pick away at the frost on the coils. If you damage the coils the refrigerant could leak out. I'm told that it's dangerous stuff. Furthermore, I expect that you'd have to buy a new refrigerator if you damaged the coils.
12th, once you've defrosted the coils, locate the defroster heater and bracket assembly again. It's held in place by two screws, and has two insulated wires running into it on either side. Unscrew the screws, disconnect the wires and remove the assembly. Throw it away - there are no useful parts in it.
13th, install the new defroster heater and bracket assembly by connecting the wires to it, mounting it back into its place, and rescrewing the screws.
14th, put the panel back in place, replace the clip, and screw the panel back in place.
15th, turn the ice cube maker back on and replace the ice cube bucket and shelves. Put your food back into the freezer.
16th, use the freezer and refrigerator as normal. If the defroster heater fails again (I'm on my third one in less than six years), you'll notice frost building up on the panel at the back of the freezer before your freezer and refrigerator stops cooling. The frost build up is your signal to defrost the freezer and buy another defroster heater and bracket assembly. I don't know why this part is so weak, and don't know any fix except to keep replacing it.
-
Stuart from Lynchburg, VA
-
Difficulty Level:Easy
-
Total Repair Time:15 - 30 mins
-
Tools:Screw drivers
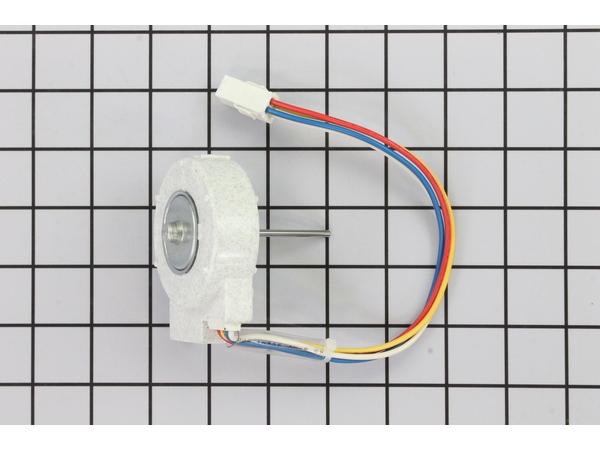
This evaporator fan motor circulates air to the fresh food compartments for efficient cooling. It powers the evaporator fan that draws air from the refrigerator and circulates it over the evaporator coils. Your fan motor has a long life cycle, but can burn out quickly if there is an obstruction preventing the fan from rotating. If the fan does not operate, the freezer will not cool properly. This will affect the performance of the compressor. This evaporator fan motor is located in the back of the freezer section of your refrigerator, behind the auger motor assembly. It is attached to the back wall. If you notice problems with your freezer then check to see if there is anything blocking a fan blade. If there is no obstruction, test the evaporator fan motor using a multimeter. Test the 2 wires that travel from the coil on the motor for resistance. If these tests indicate that the evaporator fan motor is at fault, it must be replaced. This part features 1 evaporator fan motor, which is metal and plastic, and comes in white/silver
Replacing your General Electric Refrigerator Refrigerator Evaporator Fan Motor

Customer Repair Stories
Finally replaced all the covers, panels, and shelf etc. and everything is once again nice and cold.
-
David from Romeo, MI
-
Difficulty Level:Really Easy
-
Total Repair Time:15 - 30 mins
-
Tools:Nutdriver, Pliers
-
DOUG from MARYSVILLE, OH
-
Difficulty Level:A Bit Difficult
-
Total Repair Time:30 - 60 mins
-
Tools:Nutdriver, Screw drivers
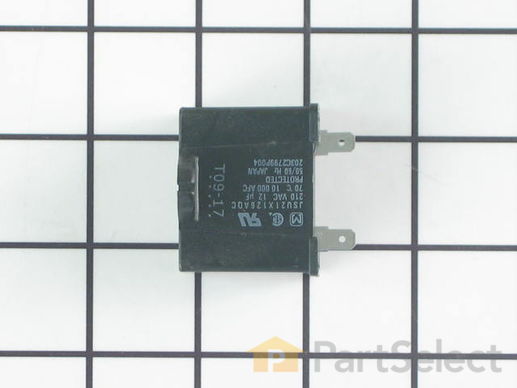
This part helps the compressor kick on and off while maintaining a constant temperature to keep things frozen in your freezer. This part has been updated by the manufacturer and may appear different than the original, but should function the same.
Replacing your General Electric Refrigerator Refrigerator Run Capacitor

Customer Repair Stories
the problem is change the run capacitor. I felt assured that I would
have a working refrigerator freezer after making this change. I was
pretty disheartened when it didn`t solve anything. I was not going to
take the new part back out after the sma ... Read more ll challenge of putting it in.
The next day I found out how to test the old capacitor and it was still
good. I will just have to eat the $49. I did learn not to take advice from
a website even if it seems like a sure thing
-
Gary from ROSETO, PA
-
Difficulty Level:A Bit Difficult
-
Total Repair Time:30 - 60 mins
-
Tools:Screw drivers
Everything I read and on this web site says that based on these symptoms, that the problem is the run capacitor. I search ... Read more ed and search for a part called a start relay which plugs in to the compressor. This run capacitor plugs in to this other part which I take as the start relay.
Installing this run capacitor did not solve the problem. The fridge compressor keeps cycling on and off. Freezer doesn't keep as cold as it should.
-
Kirk E from GRASS VALLEY, CA
-
Difficulty Level:Easy
-
Total Repair Time:Less than 15 mins
-
Tools:Screw drivers
This fan motor circulates the air through the refrigerator grille and cools the compressor and condenser coils. It also helps to evaporate extra water in the drain pan.
Replacing your General Electric Refrigerator Refrigerator Fan Motor

Customer Repair Stories
-
Ray from Bensalem, PA
-
Difficulty Level:A Bit Difficult
-
Total Repair Time:15 - 30 mins
-
Tools:Nutdriver, Socket set
.The fan is marked as 11.2 DC so I checked for voltage at the fan and found some. With three wires and no wiring diagram I wasn’t sure this answered all the questions, but hooking the fan to a 12 volt power supply didn’t get it to spin.
I priced parts at a couple websites before using partselect.com . They also have a good diagram to look at (Sears diagrams are really poor). I ordered the part with 2-day shipping; it arrived on time, was correct and fixed the problem.
-
Paul from Suwanee, GA
-
Difficulty Level:Easy
-
Total Repair Time:30 - 60 mins
-
Tools:Nutdriver
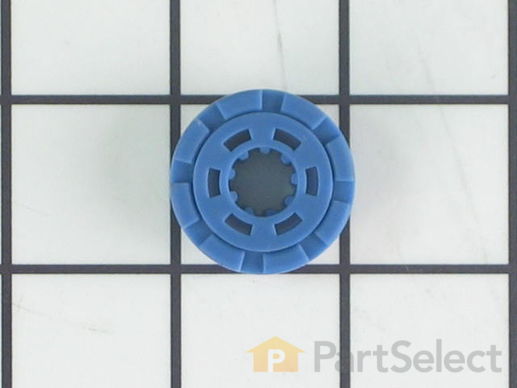
This compression ring is meant to hold the evaporator fan motor in place in the freezer compartment of your refrigerator. This is is a genuine OEM part. The tools needed to complete this repair are a Phillips screw driver and small flat blade screw driver. Be sure to turn off your refrigerator before removing the evaporator fan cover so the fan does not turn on during repair. It is recommended to check the grommets, evaporator fan, and fan blades during repair in case they also need replacning. The compression ring may need replacing if the fan is noisy, or the refrigerator compartments are too warm. This part is sold individually.
Replacing your General Electric Refrigerator Refrigerator Ring

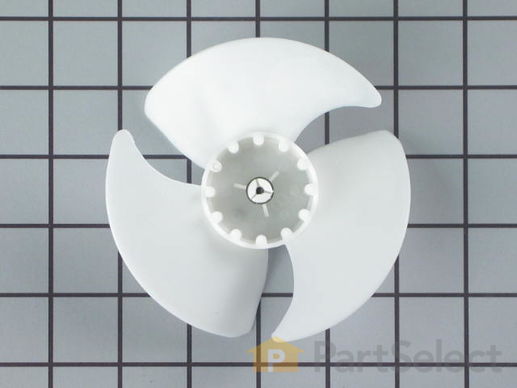
This evaporator fan blade is for your refrigerator, and it circulates air so that the temperature of the fridge is regulated. This model has 3 blades, and is a little more than 4 inches in diameter. It is made of white plastic and is sold individually. If your refrigerator is noisy and you hear a clicking sound, it is a good indication that the evaporator fan blade is warped or damaged. If the fridge or freezer sections become too warm, the fan could be to blame as well.
Replacing your General Electric Refrigerator EVAPORATOR FAN BLADE

Customer Repair Stories
-
David from KNOXVILLE, TN
-
Difficulty Level:Really Easy
-
Total Repair Time:15 - 30 mins
-
Tools:Nutdriver
-
Bert from SAN JOSE, CA
-
Difficulty Level:A Bit Difficult
-
Total Repair Time:30 - 60 mins
-
Tools:Nutdriver, Screw drivers
The lid bumper or evaporator fan motor bumper in your refrigerator prevents the fan motor from scraping against the side bracket. If your refrigerator/freezer is noisy, the bumper could be worn down or missing, and the sound could be a result of the motor scraping the side bracket. You will find it between the fan motor and the side bracket on the evaporator fan motor assembly. To access the bumper, you will need to remove the evaporator fan motor assembly from the freezer. This part is made of orange rubber and is less than half an inch in diameter. It has a rounded top and a slightly pointed bottom, and is sold individually.
Replacing your General Electric Refrigerator Refrigerator Lid Bumper

Customer Repair Stories
-
James from NEW YORK, NY
-
Difficulty Level:Easy
-
Total Repair Time:1- 2 hours
-
Tools:Nutdriver, Pliers, Screw drivers, Socket set
-
Peter M. from Lincoln Park, NJ
-
Difficulty Level:Easy
-
Total Repair Time:30 - 60 mins
-
Tools:Nutdriver, Pliers, Screw drivers, Socket set
This is a replacement evaporator fan grommet for your refrigerator. The fan grommet absorbs the vibration from the evaporator fan motor for quiet operation while it runs. If your evaporator fan is unusually noisy, it could be because the grommet is damaged. This grommet is made of grey plastic and is approximately one inch in diameter. To access the fan grommet and complete this repair, you will need to remove the evaporator fan motor assembly. This part is sold individually.
Customer Repair Stories
-
Daniel from BURNEY, CA
-
Difficulty Level:Easy
-
Total Repair Time:30 - 60 mins
-
Tools:Nutdriver, Socket set
-
Douglas from LAFAYETTE, LA
-
Difficulty Level:Really Easy
-
Total Repair Time:30 - 60 mins
-
Tools:Screw drivers
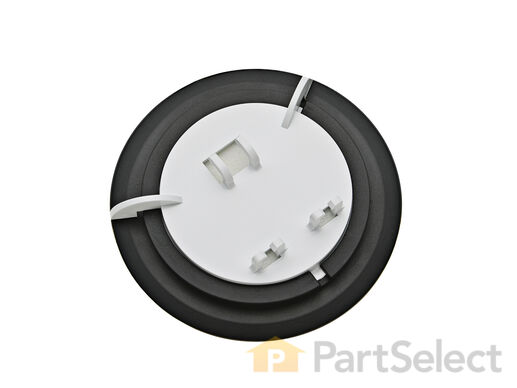
This “Dispenser Door Assembly” (Door Recess Assembly, Ice Door Assembly, Dispenser Door, Refrigerator Dispenser Ice Chute Door Kit, Dispenser Door Flap, Ice Chute Door, Flapper) keeps the room air from infiltrating the freezer. Once the lever is pressed, the door flap opens and allows the ice to dispense into your container. If your door flapper is broken, it could allow outside air to enter the freezer and alter the inside temperature. You may notice frost buildup surrounding the dispenser area. The door flap can disconnect from the dispenser lever, or the tabs that hold it in place may break. Frequent use may distort the sealing face and cause air leaks and frost buildup. This part mounts in the ice dispenser, and measures approximately 3.25 inches in diameter. It is constructed of plastic and rubber, and comes in white/black. This part is sold individually.
Replacing your General Electric Refrigerator Refrigerator Dispenser Door Assembly Or Flapper

Customer Repair Stories
-
D from ZELLWOOD, FL
-
Difficulty Level:Easy
-
Total Repair Time:15 - 30 mins
-
Tools:Screw drivers
-
Jeff from Columbia City, IN
-
Difficulty Level:Really Easy
-
Total Repair Time:Less than 15 mins
-
Tools:Screw drivers
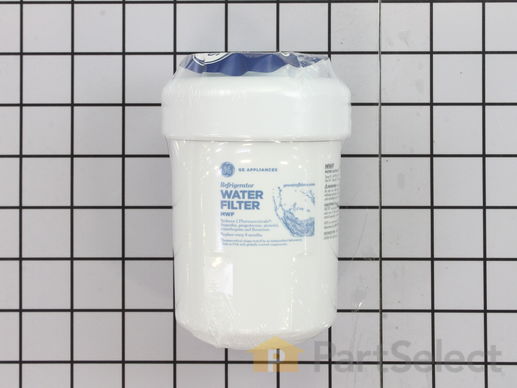
This OEM ice and water filter fits side-by-side and bottom-freezer GE models. The most common reason you would need to change this part is if you have never updated your model and it is no longer filtering your water. This also may lead to your refrigerator not dispensing water or ice properly. Manufacturers recommend you change your filter every six months to ensure it properly filters impurities. Depending on the model, a red light might also indicate that the filter is due for a replacement. Note: As per the manufacturer, this is an updated water filter. If you have never installed the updated part or your old model was made by Culligan, you may need the adapter to install the filter. See related parts. This filter is located inside the refrigerators upper right corner. It is common for water to drip from the dispenser when being changed so place a cloth underneath before you begin this repair. To remove the filter, turn it to the left until it releases without pulling down. Fill the new filter with tap water to prepare it. Position the new filter into the holder taking note of the arrows. The arrow on the front should be facing out. Gently push up on the filter and turn it to the right to secure it. Do not over-tighten. To release air in the system run 1-1/2 gallons of water through it. If your model has a reset button, press and hold this for a few seconds to reset it.
Replacing your General Electric Refrigerator Refrigerator Ice and Water Filter

Customer Repair Stories
-
David from Tacoma, WA
-
Difficulty Level:Really Easy
-
Total Repair Time:Less than 15 mins
-
Alfred from Novato, CA
-
Difficulty Level:Really Easy
-
Total Repair Time:Less than 15 mins


