Parts That Fix General Electric Dishwasher GDF640HMM0ES Will Not Start
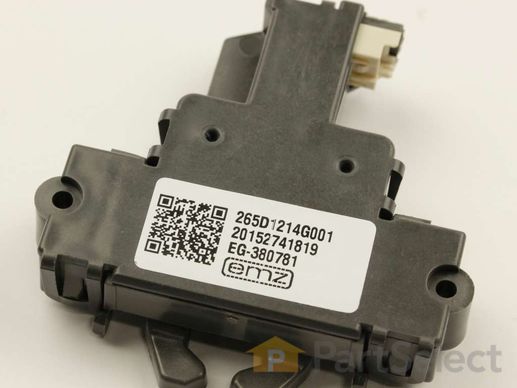
This is replacement door latch for your dishwasher. The door latch is attached to the tub frame, and connects to the door strike to keep your dishwasher door closed during operation. If you have a broken or faulty door latch, your dishwasher door may not stay closed, and this can prevent the dishwasher from running. This item is sold individually, and if your door strike is also damaged, you will need to replace that part separately. This is an OEM part sourced directly from the manufacturer.
Replacing your General Electric Dishwasher Door Latch

Customer Repair Stories
-
Edward from BEAUFORT, SC
-
Difficulty Level:Really Easy
-
Total Repair Time:Less than 15 mins
-
Tools:Screw drivers
2. Open dishwasher door
3. Unscrew the screws that secure the dishwasher to the counter.
4. Tip dishwasher forward. Identify the non-functioning door latch. It looks exactly like the replacement. Unclip the wire harness from the door latch.
5. ... Read more On the inside of the dishwasher, there are 2 screws directly under the door latch. Unscrew them and carefully set aside.
6. Remove old door latch.
7. Set new door latch in place. Holding securely, replace screws removed in step 5. Toward the end they get a little tougher to screw in.
8. Plug wire harness into new door latch.
9. Re-align dishwasher and re-secure to counter in previous position.
10. Test latch to make sure it closes properly.
11. Turn on breaker in electrical panel.
The dishwasher should now function properly.
-
James from ALBRIGHTSVLLE, PA
-
Difficulty Level:Really Easy
-
Total Repair Time:Less than 15 mins
-
Tools:Screw drivers
This main control board is a genuine OEM part that is designed for dishwashers. It is responsible for controlling the operation of the dishwasher. It monitors all the dishwasher cycles including wash, rinse, dry, and sanitization. It receives input from the control panel and sends commands to various components of the dishwasher, such as the motor, pump, heating element, and sensors, to control the different cycles and functions of the appliance. Signs of a faulty control board include an unresponsive control panel, error codes, interrupted wash cycles, or a burning smell, which indicates a short circuit.
Customer Repair Stories
CONFIGURED UI SERVICE CONTROL Part #: PS16618944
This did not help, so I ordered another control board and installed ... Read more it.
CONFIGURED SERVICE MACHINE CONTROL BOARD
Part #: PS16226072.
This did not help. This control board has a small orange fuse that looks like an old fashioned transistor. it was fine, as was the fuse on the previous control board.
There were two things about the Control boards that might help someone figure out what went wrong. When I took out the original control board, there was evidence of component overheating. When I installed the new control board there was a green light that was blinking.
I had hoped to complete this repair, but we have been without a dishwasher for over a month, so I bought a new one.
(I am a competent Instrumentation and Controls technician)
It could be that there is a bigger issue here; a major component failure.
If anyone has some suggestions to try, I would like to repair the machine and sell it as a used appliance.
-
Glen from WARDEN, WA
-
Difficulty Level:A Bit Difficult
-
Total Repair Time:More than 2 hours
-
Tools:Nutdriver, Pliers, Screw drivers
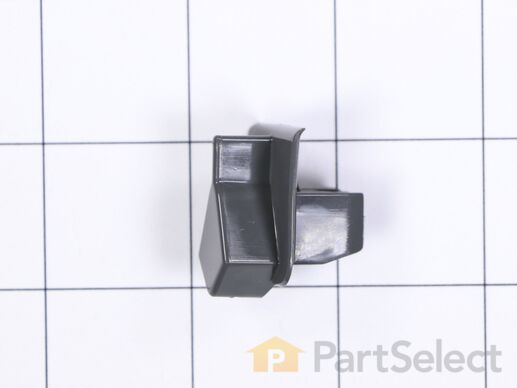
This dishwasher latch strike is a manufacturer-approved replacement part for your appliance. The latch strike is an important component in your dishwasher door assembly, and adds an extra layer of security in keeping the door closed. This part may become damaged if the door has been opened during a wash cycle. It can also wear out over time. It is fairly easy to replace, simply pop out the old door strike using a screwdriver for leverage, and insert the new one.
Replacing your General Electric Dishwasher Latch Striker

Customer Repair Stories
-
Lesa from BETHALTO, IL
-
Difficulty Level:Very Difficult
-
Total Repair Time:30 - 60 mins
-
Tools:Pliers
Introducing the GE Control Board Fuse 4.1 AMP, a critical component for your dishwasher maintenance. This 4.1 AMP fuse plays an integral role in safeguarding your dishwasher by promptly cutting off power when the dishwasher is at risk of shorting out or overheating. Before installing this essential part, it's vital to disconnect the dishwasher or turn off the house circuit breaker. It's also recommended to wear work gloves during the process for safety. This high-quality GE part is designed to ensure optimal functioning and longevity of your appliances, providing peace of mind with every wash.
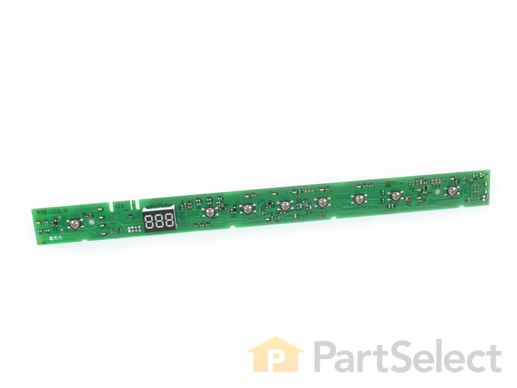
Elevate your dishwasher's performance with a GE-configured User Interface Board. This essential appliance component illuminates your dishwasher's settings and assists in the selection of cleaning cycles. Prior to installation, be sure to disconnect the power for safety purposes. To safeguard your hands from potential harm during the installation process, we recommend using work gloves. Trust in the reliability and durability that comes with every GE product. Enhance the functionality of your dishwasher with this GE User Interface Board.
Customer Repair Stories
Remove lower splash guard, raise the feet all the way, pull out dishwasher about 6-inches. Remove the two small screws from the bottom of the door that hold the outer door liner to the inner door liner.
Disconnect the pull-cord ... Read more from the spring assembly. Open the door about 1/3 and lift the door off. Be careful, there's not a ton of slack in the wire loom. Put it on towels on the floor to avoid scratching the door.
Separate the two door panels by sliding the outer liner upward and off.
Disconnect the steam vent by twisting off the cap on the inside and lifting up.
Using the pick tool, pull up on the plastic on the inside of the control panel assembly and pop it out from the little silver tabs on the outer door. Once all of them are popped (4 or 5), it will lift right off.
Disconnect the connector from the control board. Take out the two screws holding the control board in. Replace, and reverse procedure for reassembly.
-
Roman from AURORA, CO
-
Difficulty Level:A Bit Difficult
-
Total Repair Time:1- 2 hours
-
Tools:Nutdriver, Pliers, Socket set
-
Robert from NEW CARLISLE, OH
-
Difficulty Level:Easy
-
Total Repair Time:1- 2 hours
-
Tools:Nutdriver, Socket set
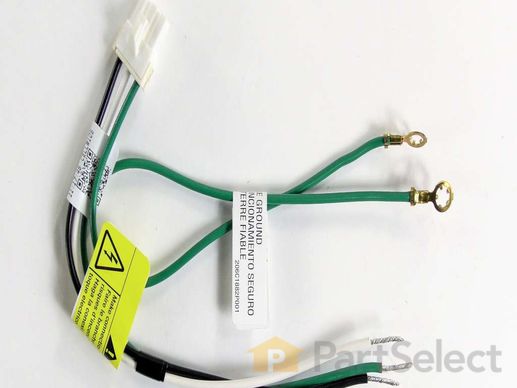
Introduce your GE dishwasher to an upgrade with this Jumper Wire Harness. An essential piece for dishwashers, this component acts as a crucial intermediary, transferring electrical signals between two points in a circuit. Remember, it's always advised to disconnect the power supply to your dishwasher or engage the circuit breaker before getting started with the installation process. As an added tip for your safety, make sure to don work gloves to safeguard your hands from any potential harm during implementation. Equip your kitchen's trusted companion with the Harness Assembly Jumper, a product designed with quality and efficiency that you'd expect from a reliable brand like GE.
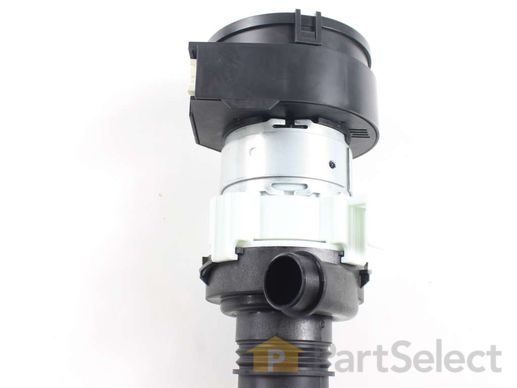
The Circulation Pump is an OEM part for some GE dishwashers. It is responsible for circulating water throughout the dishwasher. Be sure to use the model number of the appliance to confirm compatibility.
Customer Repair Stories
-
Eric from THORNTON, PA
-
Difficulty Level:Really Easy
-
Total Repair Time:15 - 30 mins
-
Tools:Pliers, Screw drivers, Socket set
-
Timothy from CASTLE ROCK, CO
-
Difficulty Level:Easy
-
Total Repair Time:30 - 60 mins
-
Tools:Pliers, Screw drivers, Socket set


