Back
Back
Keep typing for more specific results...
Models > GDF535PGR0WW > Symptoms > Not cleaning dishes properly

Parts That Fix General Electric Dishwasher GDF535PGR0WW Not cleaning dishes properly

Not cleaning dishes properly is a commonly reported symptom for the GDF535PGR0WW General Electric Dishwasher, and we have put together a full guide on how to fix this. This advice is based on feedback from people who own this exact appliance. We have listed the most common parts for your GDF535PGR0WW General Electric Dishwasher that will fix Not cleaning dishes properly. We have included repair instructions, and helpful step-by-step video tutorials. If you are experiencing this issue, not to worry, DIYers just like you have fixed this, and shared their experience to help you!
Fixes Symptom 56% of time

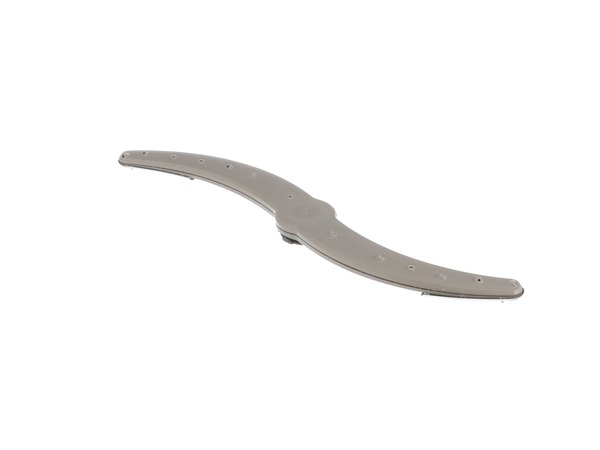
This lower spray arm assembly in your dishwasher distributes water and detergent during the washing cycle by spinning around and spraying water in different directions. You can usually find it attached to a support or hub at the bottom of the dishwasher. If this part is broken, you might notice some signs. You might hear a knocking or banging sound coming from the dishwasher. The spray arm may not rotate properly or might seem wobbly. It is important to replace a damaged arm assembly as your dishes will not get cleaned properly, and they will still have dirt on them even after a wash cycle. It can also cause the dishwasher to have a bad smell because of leftover food residue. To remove your existing arm assembly, you will need to release its locking mechanism before lifting it out of your appliance. Please be informed that this OEM-verified part that DOES NOT come with the heatshield, as per GE directly. This item is sold individually.

$ 25.95
  In Stock
PartSelect Number PS17137081
Manufacturer Part Number WD22X33499

Customer Repair Stories

Replaced Lower Spray Arm for GE Dishwasher
There was no repair -- it was a simple snap-in replacement of lower spray arm assembly. The shaft holding the lower spray arm in place is plastic so of course it broke when a utensil blocked the arm from spinning.

I appreciate the Parts Select company for enabling me to purchase a replacement part though that allows me to keep my old dishwasher working.
  • Wendy from CHESAPEAKE, VA
  • Difficulty Level:
    Very Easy
  • Total Repair Time:
    Less than 15 mins
8 of 10 people found this instruction helpful.
Was this instruction helpful to you?
Thank you for voting!
Spray arm had become unattached and burned by the heat element
It was a simple as: attach and done!
There is a ring on the part that tightens clockwise to the nipple that sprays out the water that it rests on. Twist clockwise and you are done!
It is a mystery how it was unattached to begin with but not a problem in the end, it was easy to fix!

Thanks for sending genuine GE parts!
  • Mark De from BRONX, NY
  • Difficulty Level:
    Very Easy
  • Total Repair Time:
    Less than 15 mins
11 of 13 people found this instruction helpful.
Was this instruction helpful to you?
Thank you for voting!
Fixes Symptom 23% of time

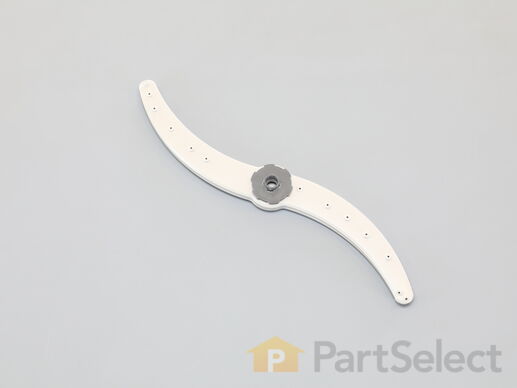
This OEM mid spray or center wash arm assembly distributes water and detergent in your dishwasher during the wash cycle. It has small nozzles that spray water onto your dishes and is located between the lower and upper rack. A broken assembly will result in weak water flow and ineffective dishwashing. It may also display signs of damage such as cracks, breaks, or missing nozzles. Additionally, a malfunctioning assembly can cause imbalanced water flow, potentially leading to damage to other dishwasher components such as filters or pumps. Prompt replacement is necessary to ensure proper dishwashing performance and prevent further damage. To install this to your appliance, you will need to snap its mounting bracket onto the rack before attaching the arms onto it. This replacement part is sold individually.

$ 33.95
  In Stock
PartSelect Number PS17137080
Manufacturer Part Number WD22X33498

Customer Repair Stories

Mid Spray Arm Assembly not spinning
The Mid Spray Arm Assembly was not spinning due to a dish that was in placed the dishwasher that was too high and hitting the arm. When it spun until it broke the center shaft. Replacement was easy. After removing power I pulled the upper tray out and removed the Conduit Mid Tiered Assembly by unsnapping it from the tray. I twisted off the broken spindle of the damaged arm assembly from the Conduit Mid Tiered Assembly and inserted the new arm and gently pushed it until it snapped into the Mid Tiered Assembly. Reinstalled the assembled parts by snapping into the tray making sure it was centered.
  • Robert from FLUSHING, MI
  • Difficulty Level:
    Really Easy
  • Total Repair Time:
    Less than 15 mins
  • Tools:
    Screw drivers
2 of 2 people found this instruction helpful.
Was this instruction helpful to you?
Thank you for voting!
Fixes Symptom 10% of time

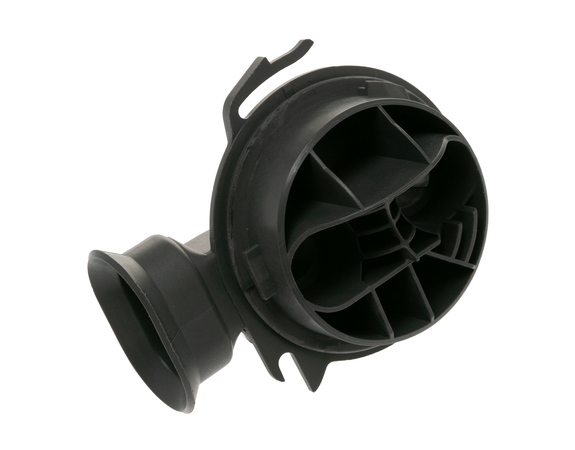
Discover the perfect solution for your dishwasher appliances with GE's Conduit Mid Assembly. Often referred to as the spray arm manifold, this essential piece securely holds the spray arm, linking it to the water feed tube. This precise design aids in delivering superior performance every time your dishwasher is put to use. For safe installation, always wear work gloves to provide protection for your hands. Choose the reliability and high-quality construction of GE's Conduit Mid Assembly for a seamless, stress-free appliance repair journey.

$ 36.95
  In Stock
PartSelect Number PS6883615
Manufacturer Part Number WD22X10094

Replacing your General Electric Dishwasher Dishwasher Conduit Mid Assembly

Replacing your Dishwasher Conduit Mid Assembly

Customer Repair Stories

Connector to sprayer broke
Connected sprayer aligned on bottom of top rack snapped in place. Very easy to install!
  • Melissa from BELLPORT, NY
  • Difficulty Level:
    Very Easy
  • Total Repair Time:
    Less than 15 mins
3 of 8 people found this instruction helpful.
Was this instruction helpful to you?
Thank you for voting!
The upper arm in the dishwasher broke.
Followed your instructions and was finished in 5 minutes.
  • Cris from BAYFIELD, CO
  • Difficulty Level:
    Really Easy
  • Total Repair Time:
    15 - 30 mins
1 person found this instruction helpful.
Was this instruction helpful to you?
Thank you for voting!
Fixes Symptom 4% of time

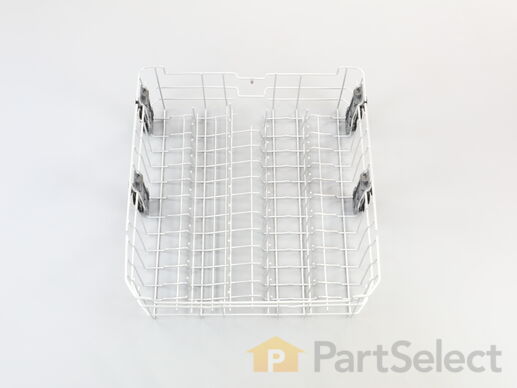
This dishrack is for dishwashers. The dishrack holds the dishes in place during the dishwashing cycle. Follow the instructions in the manual when installing this part.

$ 72.95
  On Order
PartSelect Number PS16618975
Manufacturer Part Number WD28X30219

Replacing your General Electric Dishwasher Upper Rack Assembly

Replacing your Upper Rack Assembly

Customer Repair Stories

Upper rack rusted out
Took out the old and swapped out the parts from the old one and put them on the new rack. Looks great and works great.
  • James from OMAHA, NE
  • Difficulty Level:
    Really Easy
  • Total Repair Time:
    30 - 60 mins
  • Tools:
    Screw drivers
2 of 2 people found this instruction helpful.
Was this instruction helpful to you?
Thank you for voting!
Old rack had rusted and broken tines
1. Take a picture of the old rack in the dishwasher! Just in case!
2. Remove rail channel end caps and place them on the tabletop on the correct side to make sure you put them back on the correct side.
3. Remove old rack.
4. Carefully snap off the water sprinkling unit. (carefully push down tabs so they don't break).
5. Using your picture as a reference (!) snap the water sprinkling unit on the new rack (it's easy).
6. Put the new rack back onto the rail channel and replace the end caps.

Done! Very easy installation ! Rack was not nearly as expensive as I anticipated and was delivered quickly. Note: You get the rack only. All ot the other parts are from the old unit.
  • Andrew from WINONA, MN
  • Difficulty Level:
    Really Easy
  • Total Repair Time:
    15 - 30 mins
2 of 2 people found this instruction helpful.
Was this instruction helpful to you?
Thank you for voting!
Fixes Symptom 4% of time

$ 19.95
  In Stock
PartSelect Number PS12743165
Manufacturer Part Number WD19X25466
Fixes Symptom 3% of time

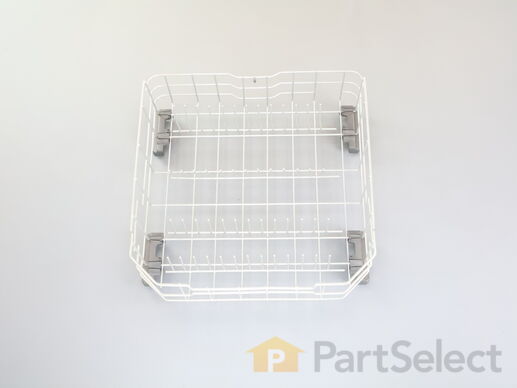
Note: This "Service Rack" fits numerous models. Per factory, on some models, it may be necessary to move the silverware basket to the inside of the rack along the right side.

$ 78.52
  In Stock
PartSelect Number PS17873657
Manufacturer Part Number WD28X34744

Customer Repair Stories

Lower dish rack rusted out
Took it out of the box and set rollers on track
rolled in place ALL DONE
  • CURT from SHELBY TWP, MI
  • Difficulty Level:
    Very Easy
  • Total Repair Time:
    Less than 15 mins
5 of 5 people found this instruction helpful.
Was this instruction helpful to you?
Thank you for voting!
The service rack vinyl coating had worn off on the rails on the bottom resulting in the metal being exposed and rusted.
Could not do the repair. The incorrect service rack was shipped. It was a different model than what was ordered. It was a different size and would not fit. Had to ship it back at my own expense. Service rack was $77.03 and that has been reimbursed. The return shipping cost to me was $43.75. That expense still has not been reimbursed. I do not want to risk ordering another service rack and risk having to go through the same type of service again.
  • Susan from OAKDALE, PA
  • Difficulty Level:
    Very Difficult
  • Total Repair Time:
    More than 2 hours
13 of 16 people found this instruction helpful.
Was this instruction helpful to you?
Thank you for voting!