Parts That Fix Frigidaire Refrigerator FGHS2631PF4A Fridge too warm
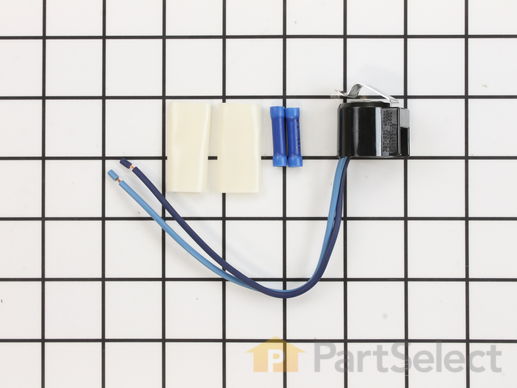
If you find that there is excessive frost in your freezer, or the freezer will not defrost, you may need to replace the defrost thermostat. The defrost thermostat kit comes with the clip, leads, and heat shrink. To access the defrost thermostat for this repair, you will need to remove your freezer shelves, as well as the back panel of your freezer. To complete this repair, you will need a 1/4-inch nut driver, a set of wire strippers and crimpers, and a heat gun or blow dryer. Before you begin this repair, be sure to disconnect the power source from the appliance.
Replacing your Frigidaire Refrigerator Defrost Thermostat Kit

Customer Repair Stories
-
donna from brandon, FL
-
Difficulty Level:Really Easy
-
Total Repair Time:15 - 30 mins
-
Tools:Screw drivers
-
Leo from Bentonville, AR
-
Difficulty Level:Easy
-
Total Repair Time:15 - 30 mins
-
Tools:Nutdriver, Pliers
This part helps the compressor kick on and off while maintaining a constant temperature to keep things frozen in your freezer. The run capacitor is attached to the compressor. This part is 120 volts and 15 mfd. The run capacitor helps the compressor kick on and off while maintaining a constant temperature to keep things frozen in your freezer. If your refrigerator is too warm, will not start, or your freezer section is too warm, you may need to replace this part. This is a genuine OEM part. Please remember to disconnect power to your refrigerator before starting your repair.
Customer Repair Stories
-
winifred from LOUISVILLE, KY
-
Difficulty Level:Easy
-
Total Repair Time:30 - 60 mins
-
Tools:Nutdriver, Pliers
Customer Repair Stories
-
john from Concho, AZ
-
Difficulty Level:A Bit Difficult
-
Total Repair Time:30 - 60 mins
Customer Repair Stories
-
alvin from staten island, NY
-
Difficulty Level:Really Easy
-
Total Repair Time:Less than 15 mins
-
Tools:Nutdriver, Screw drivers, Wrench (Adjustable)
P.S. Sorry about not having the model No.
The Part No was PS1991324 M ... Read more agnetic Gasket for Refr side of a Freezer/Refrigerator FRIGIDAIRE There are no screws to remove on this model. Just start at one corner and begin pulling old gasket out of the groove of the door.
-
cletus from Godfrey, IL
-
Difficulty Level:Really Easy
-
Total Repair Time:Less than 15 mins
Customer Repair Stories
-
Tim from SYLVANIA, OH
-
Difficulty Level:Really Easy
-
Total Repair Time:15 - 30 mins
-
Tools:Screw drivers
-
Cindy from AMARILLO, TX
-
Difficulty Level:Really Easy
-
Total Repair Time:Less than 15 mins
-
Tools:Screw drivers
This manufacturer-approved air filter system for refrigerators eliminates odors and any impurities. It does this by neutralizing and removing odor-causing molecules. For best results, it is important to change the filter every 6 months to ensure that food is kept fresh, and the humidity is controlled. This part measures about 7 inches wide and 5 inches deep. Follow installation instructions provided by the manufacturer when installing this part to ensure accurate results and further guidance. Remember to unplug the refrigerator from the power source before starting this project. The air filter may be located in different places depending on your appliance, but is usually on the inner right or left side. See your manual for exact location. Our customers rated this as a very easy repair that takes only a few minutes; just locate and remove the old air filter and insert the new one to complete the repair, which requires no tools.
Customer Repair Stories
-
Gregory from POTTSTOWN, PA
-
Difficulty Level:Really Easy
-
Total Repair Time:Less than 15 mins
-
melvin from BASKING RIDGE, NJ
-
Difficulty Level:Really Easy
-
Total Repair Time:Less than 15 mins
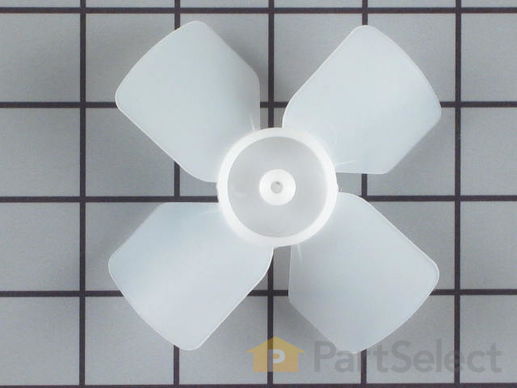
This evaporator fan blade is a genuine OEM part that is sourced directly from the manufacturer. The evaporator fan blade circulates air through the refrigerator to control the amount of cold air goes that goes to internal compartments of the unit. It may need to be replaced if the fridge is noisy or not cold enough. This part is made of plastic and is sold individually. It will be necessary to disconnect power to the refrigerator and empty the freezer compartment of the refrigerator. The tools needed to complete this repair are a 1/4 inch nut driver and a pair of needle nose pliers.
Replacing your Frigidaire Refrigerator Evaporator Fan Blade

Customer Repair Stories
2. Next I took out 2 screws from the bottom of the auger drive box and unplugged the wiring harness and removed the box. The wiring harness was a little tricky. The lock on the plug pushes in to unlock even though ... Read more it looks like it pulls out,.
3.next you must remove 2 screws from the left side bracket that holds the auger box and remove the bracket.
4.Now take out 8 screws that hold the back panel in place and remove the back panel.
5. now your looking at the evaporator fan blade and motor. The simple way to replace the fan blade is to unplug the motor and remove it from the freezer. It just sits in with nothing holding it. The fan requires a little pressure but should pull right off. Install new fan blade and put everything back in the same order it was removed.
-
gary from ARANSAS PASS, TX
-
Difficulty Level:Easy
-
Total Repair Time:30 - 60 mins
-
Tools:Nutdriver
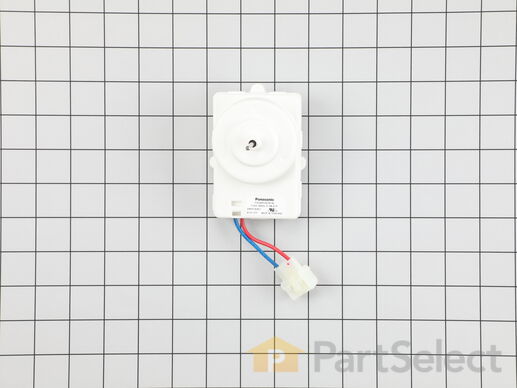
After unplugging the fridge, I removed the fan assembly in the freezer (there were about 4 nuts and a couple of plugs to ... Read more uncouple.
I could see right away the fan blades has broken off, but the motor looked good. The new new fan pushed easily onto the shift and fit perfectly in the housing.
I reinstalled the fan assembly, plugged in the fridge, and right away heard the new fan come on - very quietly. What was a roar became a whisper and the fridge was down to 38 degrees with a few hours.
-
Bruce from MARTINEZ, CA
-
Difficulty Level:Really Easy
-
Total Repair Time:Less than 15 mins
-
Tools:Nutdriver
Customer Repair Stories
-
Thomas from SPRINGDALE, AR
-
Difficulty Level:A Bit Difficult
-
Total Repair Time:1- 2 hours
-
Tools:Nutdriver, Pliers, Screw drivers
-
Robert from North Chesterfield, VA
-
Difficulty Level:A Bit Difficult
-
Total Repair Time:30 - 60 mins
-
Tools:Nutdriver, Screw drivers
This is a genuine condenser fan blade, which works with refrigerators, freezers and wines and beverage coolers.
Customer Repair Stories
I removed the broken fan from the condenser. This was very sipmle.
When i pluged the refridgerator back in to the outlet the fan tried to start up but soon be ... Read more gan to make aloud noise, due to there not being enough clerance.
-
Chris from Lockport, NY
-
Difficulty Level:Really Easy
-
Total Repair Time:Less than 15 mins
If your fan is still on the shaft, simply push it off ... Read more and extract it the same way. Then place the new one on the shaft.
In my case, since the part would take a couple days to get, and I had food both in the fridge and the freezer, I removed and unplugged the Condenser Fan Motor and the cowling frame and temporarily spliced a small fan I had into the line for the condenser motor. This kept the fridge working long enough to get the replacement part.
Side note. Direction of airflow is towards the Compressor, and draws air across the Condenser coils.
Hope this helps someone. :)
-
Jack from WALLING, TN
-
Difficulty Level:Really Easy
-
Total Repair Time:15 - 30 mins
-
Tools:Nutdriver, Socket set
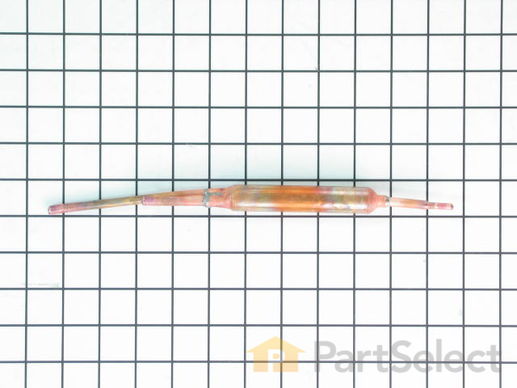
A filter-drier in a refrigerator has two essential functions. The first is to absorb system contaminants, such as water, which can create acids. The second is to provide physical filtration. This means trapping moisture, small metal chips, and dirt found in the refrigerant gas. If your refrigerator motor is constantly running, but the refrigerator is not getting cold, the issue could be due to a damaged or faulty filter-drier. Faulty filter-driers are sometimes the cause for abnormal freezer compartment temperatures and partially frosted evaporators. This filter-drier is approximately 11 inches long. Remember to disconnect the power from your refrigerator before beginning this repair.


