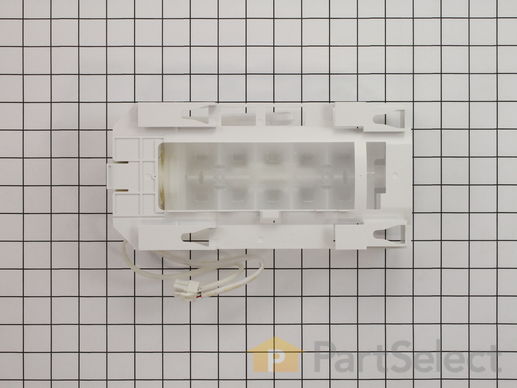
Parts That Fix Frigidaire Refrigerator FG4H2272UF Ice maker not making ice
This is a genuine Frigidaire part for your refrigerator. This is an ice maker, which connects to the water lines to provide fresh ice. The most common reason to replace this part is if your refrigerator is leaking, or it will not produce ice cubes. Be sure to disconnect the power to your refrigerator before beginning this repair.
Customer Repair Stories
Opened the freezer and emptied everything in it.
Remove the bin.
Two screws are on the left side. They go into the side wall.
Here’s where things get weird. The plastic “box” holds the “ice making assembly”. That box ... Read more is attached by FOUR slots. You will need to remove the wire rack below the frame. There’s a plastic spacer on the left side with a slot on it. You can pull it of with your fingers when you rotate it. Slide the rack to the left and pull down the rack from the RIGHT side holes. You have move the box toward you about a inch, then it drops down.
Now, there is a electrical connection from the box to the rear of the refrigerator wall. You need a small screwdriver to lift the tab on the TOP of the connector to release it. Once that is done, slide the box forward and put it in the sink.
While all this is happening, the freezer is thawing out.
Once you remove the box, you will get error codes on the digital display. This is a good thing.
There are two “square head’” screws that you have to remove to separate the TWO parts that make the box. Slide the outer trim towards you.
The icemaker assembly slides into four slots. You put the new wires in the same place as the one you removed.
Put everything back together the opposite of the removal.
Now for the secret.
All that food you removed? Put it back in until you can slide the box into place.
Then you plug the connector in. The box should be sitting on the food.
THIS IS THE SECRET.
The ice maker has two options. Cubed or Crushed.
There are two components that make them happen. On the left side there is a slot with a gray lever the moves up an down. There is an piece of aluminum on the right side the drives the screw in the box.
Rotate the screw drive to 45 degrees.
THIS IS THE SECRET.
On the left side of the box is a rod that is spring loaded and has a bent end.
It’s about “timing”.
Find a piece of “kite string”. I used the string from the yellow energy tag that came with the fridge.
The box is sitting on the frozen food. The wire in the back is connected.
Loop the string around the lever AND PULL UP.
Slide the whole thing into place using the slots.
When it’s in place, let go of the string.
Put the two screws back in.
FINAL.
You have to PRESS AND HOLD the IceMaker button to reset. You’ll get ice cubes in a couple of hours. Through the first 24 hrs away.
You’re welcom.
-
David from VISALIA, CA
-
Difficulty Level:A Bit Difficult
-
Total Repair Time:30 - 60 mins
-
Tools:Screw drivers
-
Richard from N CALDWELL, NJ
-
Difficulty Level:Really Easy
-
Total Repair Time:Less than 15 mins
-
Tools:Nutdriver, Screw drivers
This OEM refrigerator filter is for french door and side-by-side door types and is located in the back, top-right of your appliance. By absorbing heavy metals, pharmaceuticals, pesticides, chlorine, and much more, this filter provides delicious and healthy drinking water. This filter measures 2 inches deep, 9 inches high, 2 inches wide, and weighs 0.9 lbs. The installation is quick and easy with a push and twist feature. Don't forget to run water through the dispenser for about three minutes or 1.5 gallons to prepare the filter before use. For best performance replace this filter every six months.
Customer Repair Stories
HOWEVER, THE WATER FILTER INDICATOR STILL SAYS
'REPLACE'. THERE IS NO LEAKAGE, BUT IT APPEARS LIKE THE NEW CARTRIDGE IS NOT COMPLETELY INSERTED. I'VE TRIED REMOVING AND REPLACING THE NEW CARTRIDGE SEVERAL TIMES, BUT IT STILL SAYS 'REPLACE'.
INCIDENTALLY, THIS WAS THE SECOND ORDER OF THE CARTRIDGE AND LAS ... Read more T TIME I GOT TWO, AND THEY BOTH FIT FINE! WITH THIS ORDER I GOT JUST ONE.
-
Bo from SUN CITY WEST, AZ
-
Difficulty Level:A Bit Difficult
-
Total Repair Time:15 - 30 mins
-
Claude from MARYVILLE, TN
-
Difficulty Level:Easy
-
Total Repair Time:Less than 15 mins


