EasyApplianceParts is now PartSelect! We've merged our sites to provide a better shopping experience for you.   Full Details
Back
Back
Keep typing for more specific results...
Models > DDT595SMJ2ES > Symptoms > Will Not Start

Parts That Fix General Electric Dishwasher DDT595SMJ2ES Will Not Start

Will Not Start is a commonly reported symptom for the DDT595SMJ2ES General Electric Dishwasher, and we have put together a full guide on how to fix this. This advice is based on feedback from people who own this exact appliance. We have listed the most common parts for your DDT595SMJ2ES General Electric Dishwasher that will fix Will Not Start. We have included repair instructions, and helpful step-by-step video tutorials. If you are experiencing this issue, not to worry, DIYers just like you have fixed this, and shared their experience to help you!
Fixes Symptom 54% of time

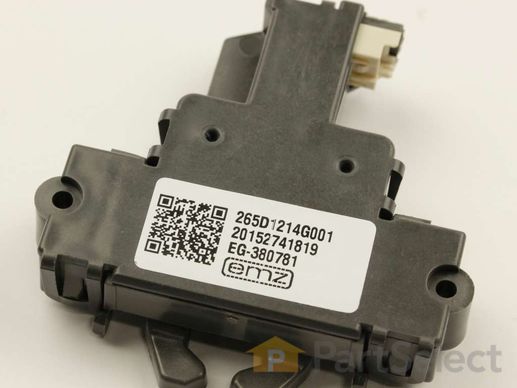
This is replacement door latch for your dishwasher. The door latch is attached to the tub frame, and connects to the door strike to keep your dishwasher door closed during operation. If you have a broken or faulty door latch, your dishwasher door may not stay closed, and this can prevent the dishwasher from running. This item is sold individually, and if your door strike is also damaged, you will need to replace that part separately. This is an OEM part sourced directly from the manufacturer.

$ 45.95
  In Stock
PartSelect Number PS6447681
Manufacturer Part Number WD21X10490

Replacing your General Electric Dishwasher Door Latch

Replacing your Door Latch

Customer Repair Stories

Wouldn't start, no lighted functions.
Shut off power at breaker, remove two screws anchoring DW to counter top . Slide DW out far enough to access door latch, disconnect electrical wiring plug, remove two Phillips head screws, install new door latch, repeat installation in reverse order.
  • Edward from BEAUFORT, SC
  • Difficulty Level:
    Really Easy
  • Total Repair Time:
    Less than 15 mins
  • Tools:
    Screw drivers
14 of 23 people found this instruction helpful.
Was this instruction helpful to you?
Thank you for voting!
Door latch not functioning
1. Turn off breaker supplying power to dishwasher in electrical panel
2. Open dishwasher door
3. Unscrew the screws that secure the dishwasher to the counter.
4. Tip dishwasher forward. Identify the non-functioning door latch. It looks exactly like the replacement. Unclip the wire harness from the door latch.
5. On the inside of the dishwasher, there are 2 screws directly under the door latch. Unscrew them and carefully set aside.
6. Remove old door latch.
7. Set new door latch in place. Holding securely, replace screws removed in step 5. Toward the end they get a little tougher to screw in.
8. Plug wire harness into new door latch.
9. Re-align dishwasher and re-secure to counter in previous position.
10. Test latch to make sure it closes properly.
11. Turn on breaker in electrical panel.
The dishwasher should now function properly.
  • James from ALBRIGHTSVLLE, PA
  • Difficulty Level:
    Really Easy
  • Total Repair Time:
    Less than 15 mins
  • Tools:
    Screw drivers
31 of 50 people found this instruction helpful.
Was this instruction helpful to you?
Thank you for voting!
Fixes Symptom 24% of time

This electronic control board is for dishwashers and manages the functions of the dishwasher such as washing, draining and drying.

$ 175.91
  In Stock
PartSelect Number PS17137050
Manufacturer Part Number WD21X24901C

Customer Repair Stories

No power/response at the control panel. Replaced power board first, did not solve the issue. Replaced the control board and works perfectly now.
Followed directions available on YouTube and the written instructions that came with the part. I made the repair more complicated than necessary as I did not notice that the jumpers come attached only to ONE pin out of the box. I took two tries to get the jumper settings right.
  • Jerry from SIMI VALLEY, CA
  • Difficulty Level:
    Easy
  • Total Repair Time:
    30 - 60 mins
  • Tools:
    Nutdriver, Screw drivers
12 of 13 people found this instruction helpful.
Was this instruction helpful to you?
Thank you for voting!
No lights at control panel and no start
Downloaded the GE manual from the internet. Followed the GE repair manual trouble shooting guide. The manual contains all of the disassembly and reassembly instructions. Main board had a more than one volt higher than listed voltage output. Manual does not list an acceptable voltage range so I ordered a new main board. New board had the same output and did not fix the problem. I ordered a new UI board. The new board is a genuine GE "programable" replacement board that covers multiple models.
I set the indicated jumper to the required position for my application and installed it. The problem was not corrected. I read that some people had problems with defective replacement boards so I contacted PartSelect to return the first two boards and reordered the UI board.
I once again set the jumper and installed the UI board and it worked immediately.
The whole repair was extremely easy. PartSelect is very good to work with. I had no problems with returns or refunds. I will definitely use them again if I have the need for any of their products. There were slightly cheaper suppliers, but PartSelect had the parts I needed in stock and they shipped my order lightning fast. They are more than worth the few extra pennies difference.
  • Robert from Perrysburg, OH
  • Difficulty Level:
    Really Easy
  • Total Repair Time:
    30 - 60 mins
19 of 21 people found this instruction helpful.
Was this instruction helpful to you?
Thank you for voting!
Fixes Symptom 10% of time

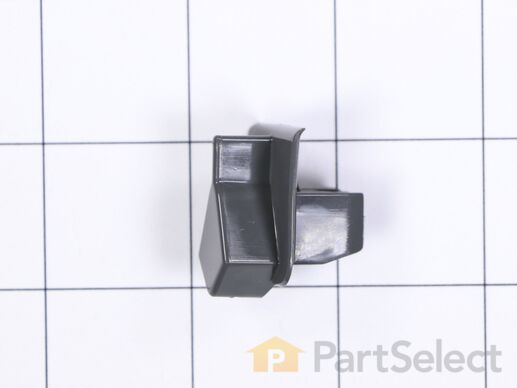
This dishwasher latch strike is a manufacturer-approved replacement part for your appliance. The latch strike is an important component in your dishwasher door assembly, and adds an extra layer of security in keeping the door closed. This part may become damaged if the door has been opened during a wash cycle. It can also wear out over time. It is fairly easy to replace, simply pop out the old door strike using a screwdriver for leverage, and insert the new one.

$ 13.95
  In Stock
PartSelect Number PS8690622
Manufacturer Part Number WD13X10071

Replacing your General Electric Dishwasher Latch Striker

Replacing your Latch Striker

Customer Repair Stories

Dishwasher would not know door was closed
Parts diagram shows Striker can be popped out with screwdriver. Not true. It has a screw bolting it internally. Impossible to get to unless you disassemble the entire door. We took a power drill and small drill bit and bore it out like a cavity in a tooth. Needle nose pliers to extract the screw. Pretend your a dentist. Fixed it in 5 minutes. Replacement fit tight. A+
  • Lesa from BETHALTO, IL
  • Difficulty Level:
    Very Difficult
  • Total Repair Time:
    30 - 60 mins
  • Tools:
    Pliers
1 person found this instruction helpful.
Was this instruction helpful to you?
Thank you for voting!
Fixes Symptom 9% of time

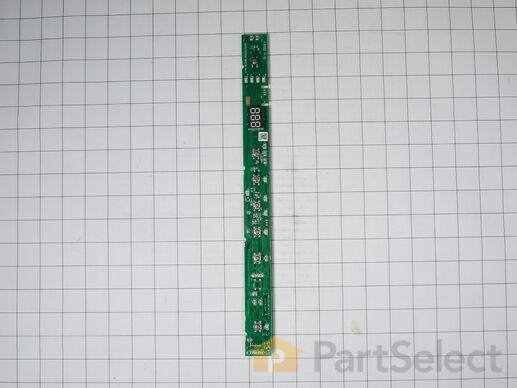
The user interface displays the dishwasher settings and lets you select the cycle.

$ 133.81
  In Stock
PartSelect Number PS16762508
Manufacturer Part Number WD21X31910

Customer Repair Stories

Dishwasher would not turn on.
Watched YouTube video on how to diagnose problems. Once part was identified ordered from Partselect.com and replaced the user interface circuit board. Dishwasher is now working.
  • Dennis from FORT SMITH, AR
  • Difficulty Level:
    Really Easy
  • Total Repair Time:
    1- 2 hours
  • Tools:
    Nutdriver, Screw drivers
4 of 5 people found this instruction helpful.
Was this instruction helpful to you?
Thank you for voting!
Most of the lights on the control panel had stopped working. There was no way to change the settings of the dishwasher.
When the part arrived, I was pretty sure it was the wrong part. The replacement part had an LED on it -- a box that stuck up about an inch above the circuit board. My dishwasher did not have an LED readout and I was pretty sure the LED would not fit in the space that was available. I was reluctant to take the dishwasher apart until I had the right part. The people at Part Select were helpful and together we looked at the schematic which did, indeed, seem to show a box sticking up from the circuit board. A YouTube video showed me how to take the door off its hinges, unscrew 4 screws and slide the inside of the door upwards. The circuit board went in fairly easily. There was space for the LED (even though it still doesn't show through the top) and now the lights work.
  • DONALD from GOSHEN, IN
  • Difficulty Level:
    Easy
  • Total Repair Time:
    30 - 60 mins
  • Tools:
    Nutdriver, Pliers, Screw drivers, Socket set
11 of 15 people found this instruction helpful.
Was this instruction helpful to you?
Thank you for voting!
Fixes Symptom 2% of time

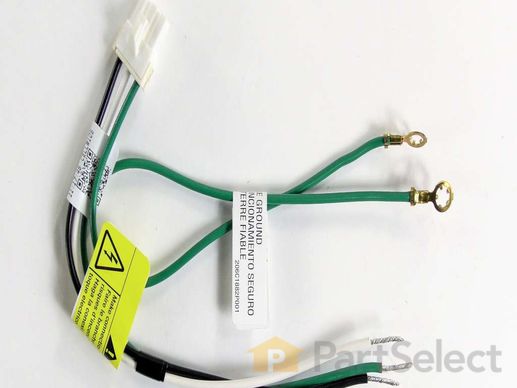
Introduce your GE dishwasher to an upgrade with this Jumper Wire Harness. An essential piece for dishwashers, this component acts as a crucial intermediary, transferring electrical signals between two points in a circuit. Remember, it's always advised to disconnect the power supply to your dishwasher or engage the circuit breaker before getting started with the installation process. As an added tip for your safety, make sure to don work gloves to safeguard your hands from any potential harm during implementation. Equip your kitchen's trusted companion with the Harness Assembly Jumper, a product designed with quality and efficiency that you'd expect from a reliable brand like GE.

$ 49.95
  In Stock
PartSelect Number PS12170953
Manufacturer Part Number WD21X23559
Fixes Symptom 2% of time

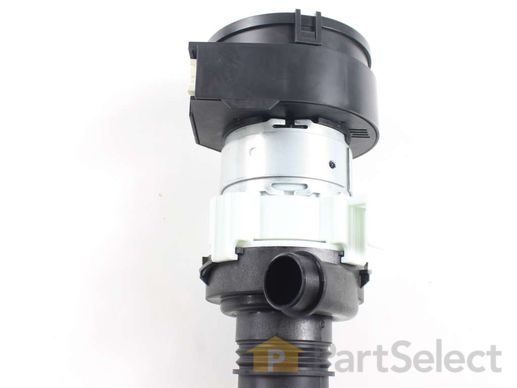
The Circulation Pump is an OEM part for some GE dishwashers. It is responsible for circulating water throughout the dishwasher. Be sure to use the model number of the appliance to confirm compatibility.

$ 131.95
  In Stock
PartSelect Number PS11772000
Manufacturer Part Number WD26X23258

Customer Repair Stories

Sprayer arms didn't operate and dishes were not cleaned
We bought this GE dishwasher new. After 9 months, we started noticing the dishes were not cleaning well. Eventually, the machine just filled up with water and drained. The washing arms didn't work. I replaced fill valve, but that didn't solve it. A GE Tech ran a diagnostic and informed us the pump motor was bad. It was off warranty and repairs would be $300. However, he noted it was easy to do on my own. Two pipe clamps. The part from PartsSelect was 40% less than ordering from GE and was a GE part. Replacement took half an hour and that includes getting it wrong once (one connection leaked due to a bad job attaching the pipe clamp). Works like a champ now.
  • Eric from THORNTON, PA
  • Difficulty Level:
    Really Easy
  • Total Repair Time:
    15 - 30 mins
  • Tools:
    Pliers, Screw drivers, Socket set
10 of 11 people found this instruction helpful.
Was this instruction helpful to you?
Thank you for voting!
Dishwasher ran but didn't wash
I got lucky and found the diagnostic test instructions tucked inside the washer under the kick plate. From there I ran the tests on each component until I narrowed it down to the pump. The pump cost me less than local dealers. The install went well. Watched the online videos to make sure I was doing it right. Was actually very easy and saved hundreds over a service call.
  • Timothy from CASTLE ROCK, CO
  • Difficulty Level:
    Easy
  • Total Repair Time:
    30 - 60 mins
  • Tools:
    Pliers, Screw drivers, Socket set
12 of 12 people found this instruction helpful.
Was this instruction helpful to you?
Thank you for voting!