


DBL333EBC General Electric Dryer - Overview
Sections of the DBL333EBC
[Viewing 1 of 1]
Keep searches simple, eg. "belt" or "pump".

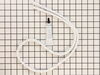
Dryer Belt
PartSelect #: PS2350043
Manufacturer #: WE12X10014
This belt has a length of 87 inches, width of 1/4”, flat, with 4 ridges.
$27.95
In Stock

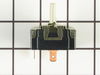
Dryer Rotary Start Switch
PartSelect #: PS268305
Manufacturer #: WE4X881
This part is used to start the dryer once you have selected a setting on the timer.
$56.38
In Stock

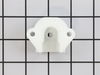
Knob and Clip
PartSelect #: PS268450
Manufacturer #: WH01X10060
This knob accepts a D-shaped shaft.
$28.95
In Stock

Lower Front Felt Seal w/Adhesive
PartSelect #: PS832645
Manufacturer #: 5303937183
The lower front felt seal with adhesive, also known as a drum felt seal, is used in dyers and allows the drum to easily glide on the front panel. For this repair project, you will need the following t...
$28.95
In Stock


Rear Bearing
PartSelect #: PS267858
Manufacturer #: WE3X70
Bearing Only. This part helps your appliance run as quietly as possible.
No Longer Available

Rear Bearing Kit
PartSelect #: PS267556
Manufacturer #: WE25X10001
This kit comes with the rear bearing, shaft support, lubricant and other items required for the installation.
$118.29
In Stock

Drum Glide
PartSelect #: PS755802
Manufacturer #: WE03X10007
Sold individually. There are some dryers that require 2 per dryer. They attach to the outer-most sides of the bearing.
$65.29
In Stock

Rear Bearing Shaft Support
PartSelect #: PS265828
Manufacturer #: WE13X10011
Introducing the GE Dryer Drum Bearing! This genuine replacement part is the ultimate solution for enhancing your dryer's performance. It is ideal for supporting the drum as it spins, offering stabilit...
$97.96
In Stock

DRYER BEARING BRACKET
PartSelect #: PS12710145
Manufacturer #: WE13X28680
This bracket is used on the drum bearing.
$45.95
In Stock

Upper Felt Seal with Adhesive
PartSelect #: PS652857
Manufacturer #: WE09X10013
Experience smooth operation with this genuine Dryer Felt Seal from GE. This product is designed to allow your dryer drum to glide effortlessly on the front panel, promising a quieter, more efficient p...
No Longer Available

High Limit Safety Thermostat
PartSelect #: PS268202
Manufacturer #: WE4X757
This hi-limit thermostat acts as a safety mechanism that keeps the dryer from overheating. With this thermostat, a dryer's heating element will cut out if the internal temperature reaches 260 degrees...
$64.30
In Stock
Questions And Answers for DBL333EBC
We're sorry, but our Q&A experts are temporarily unavailable.
Please check back later if you still haven't found the answer you need.
Common Symptoms of the DBL333EBC
[Viewing 5 of 5]Noisy
Fixed by
these parts
these parts

Show All
Marks left on clothes
Fixed by
these parts
these parts
Show All
Won’t Start
Fixed by
these parts
these parts
Show All
Drum Not Spinning
Fixed by
these parts
these parts
Show All
Will Not Start
Fixed by
these parts
these parts

Show All


Keep searches simple. Use keywords, e.g. "leaking", "pump", "broken" or "fit".
dryer belt broke
first I took the dryer apart 1st thing i did was unplug the power supply (safety first) then I removed the top of the unit then removed the front cleaned all the lint from the inside of the cabinet I found the proper belt size on part select.com the next day I had my dryer belt delivered (which cost 1/3 the price of the local repair shop
... Read more
price)
then I placed the belt over the dryer drum and made sure it was in the general location it should be I then replaced the front cover and the top. then I removed the rear cover which was held on by six 5/16 sheet metal screws which gave me access to the drive pulley and belt tensioner the belt goes on by going under the tensioner then around the drive pulley
Then i rotated the drum by hand to make sure everything had clearance I then buttend everything up plugged it and started it up it workd fine and I figure Ill get another 8 years out of it
Thank you partselect.com
Read less
Parts Used:
-
Matt from La Belle, MO
-
Difficulty Level:A Bit Difficult
-
Total Repair Time:15 - 30 mins
-
Tools:Nutdriver, Screw drivers, Socket set
162 of 192 people
found this instruction helpful.
Was this instruction helpful to you?
Thank you for voting!
Broken Knob Post
First I unplugged the dryer, then I removed the access panel on the back of the control panel. I removed the wires from the back of the switch...Here is where I messed up. I removed the switch prior to ordering the part, the bad part is the way I removed the part. When you get the new part in you will be able to see how it will be mounted
... Read more
to the control panel. I had no idea, so I did what was necessary to remove it. Needless to say, I bent the hell out of the hole that the switch mounts in. In turn, the installation of the new switch did not go as easily as I would have liked. After straightening out some metal and drowning the thing in epoxy, the new switch is installed. I hooked the wires back up on the back of the switch, plug in the dryer, and dry some clothes. Standing victorious over the dryer with beer in hand, not only did I accomplish the mission but I learned my lesson... destructive removal = BAD!
Read less
Parts Used:
-
Jaren from Lemoore, CA
-
Difficulty Level:A Bit Difficult
-
Total Repair Time:15 - 30 mins
-
Tools:Pliers, Screw drivers
123 of 143 people
found this instruction helpful.
Was this instruction helpful to you?
Thank you for voting!
No Heat!
Unplug power. Take the top off. Take front off, unplug the two wire connections. Undo belt from back access. Pull up on drum and remove. Unscrew 4 screws that hold on the element housing, remove. Reverse steps to put back together.
Parts Used:

-
Kristian from Jackson, WY
-
Difficulty Level:Easy
-
Total Repair Time:15 - 30 mins
-
Tools:Screw drivers
75 of 107 people
found this instruction helpful.
Was this instruction helpful to you?
Thank you for voting!